The Spanish version is the authoritative reference. View in Spanish
Configuration
Before you start issuing invoices, configure your invoicing tool to adapt it to your needs as an issuer.
- Click Finish configuration from the home panel.
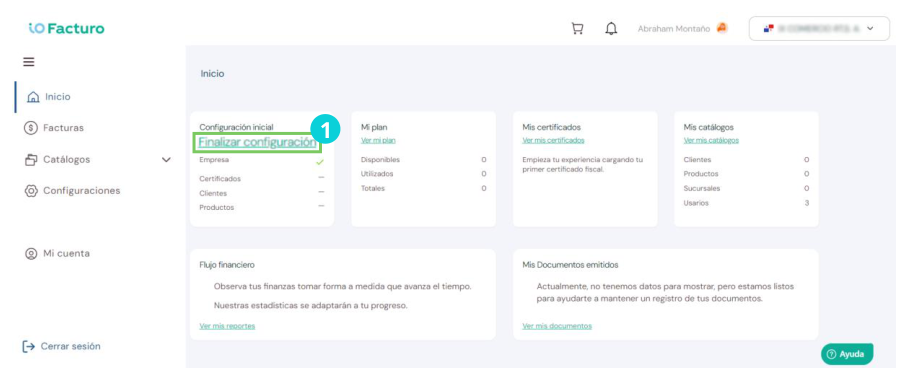
All the configurations shown below can be modified later from the editing options available in each section.
Company
Within the Company tab you will find the information of the company from which you will issue tax documents.
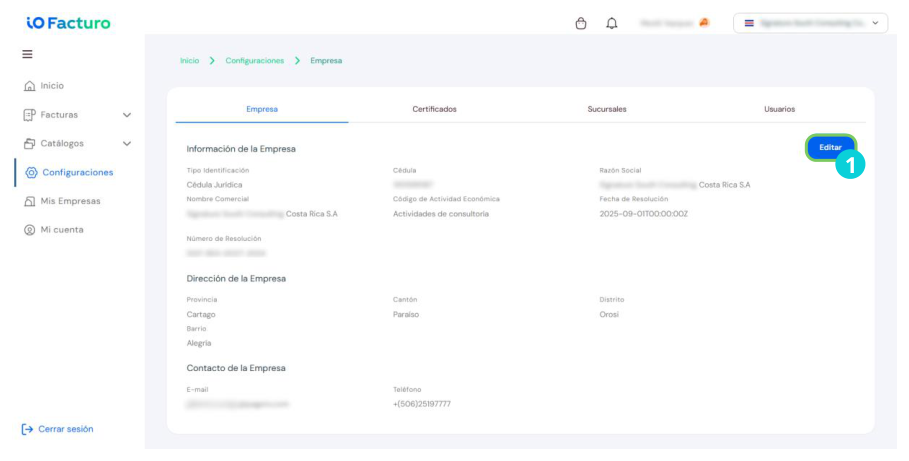
- To modify your company's data, click Edit
A form will be shown with the general data of your registration. To complete the configuration of your ioFacturo account, you must complete the data as shown below:
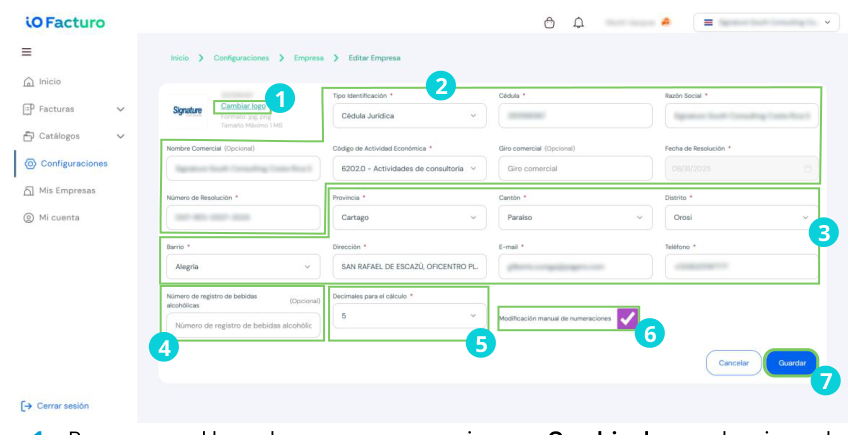
- To upload your company logo, click Change logo, select the file that contains your company logo from the file explorer.
- Enter your tax data.
- Select your company's location and contact data.
- If you have one, enter the alcoholic beverages registration number.
- Enter the number of decimals for the calculation in the documents issued.
- To allow editing of numbering in issued documents, the checkbox must be shown checked.
- To update this information, click Save.
Certificates
Upload the certificates needed to start issuing invoices from ioFacturo.
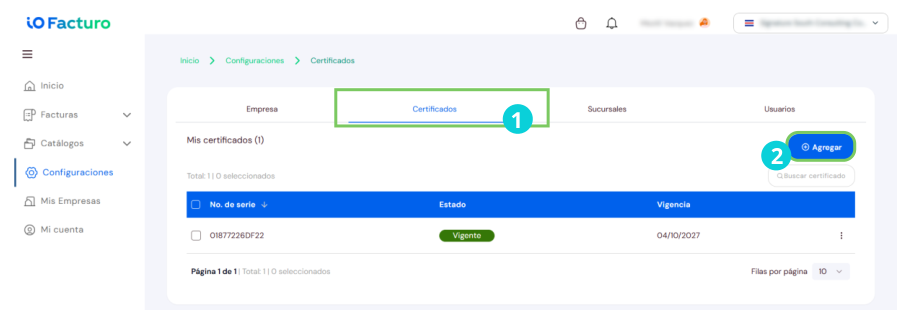
- Click the Certificates tab.
- Click the Add button.
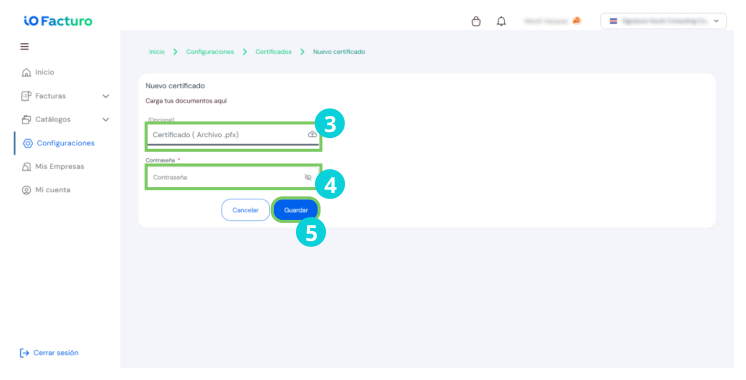
- To upload your company's certificate, click the Certificate field.
In your file explorer, select your certificate file, which will be in .pfx format
- Enter your certificate password.
- When finished, click Save.
Branches
Register, view and modify your company's branches to locate the documents issued at each one.
The branches table shows the following data:
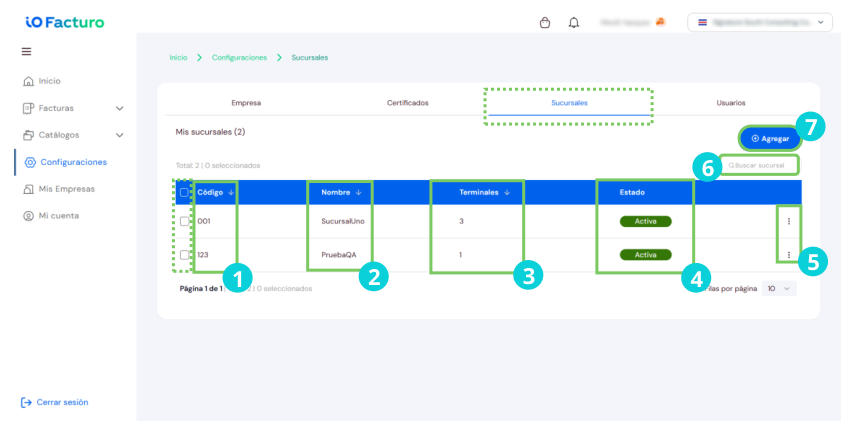
- Branch identification code.
- Branch name.
- Number of billing points per branch
- Status of the branch record:
- a. Active
- b. Inactive
- When clicking the button, the following options will be shown:
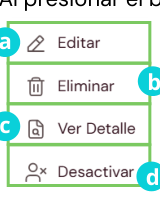 | a. You can modify the branch record from the Edit option. b. There is also the option to remove the branch record from the Delete button. c. When clicking View Detail, all the branch information is shown. d. To suspend issuing from any of the branches, click Deactivate. To activate it again, use the same option. |
- To make it easier to locate a branch record, you can use the search bar.
- To register a new branch, click Add.
Register a new branch
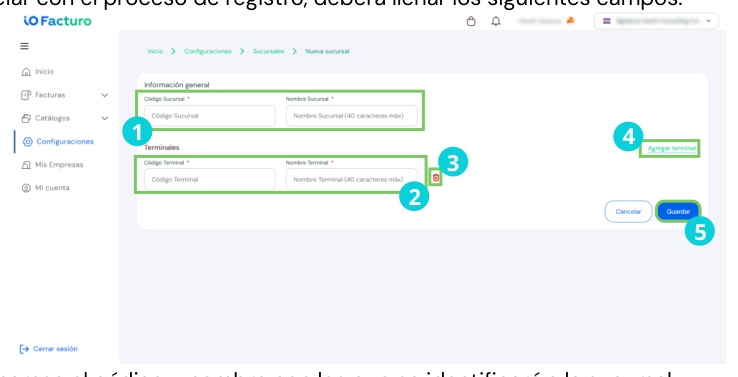
- Enter the code and name that will identify the branch.
- Enter the data of the first billing point or terminal that will be located within the branch.
- Click the delete icon to erase the terminal data.
- To add a new terminal in this same branch, select Add point and enter the data of the new billing point.
- When finished, click Save.
Users
To register users, an Administrator profile is required.
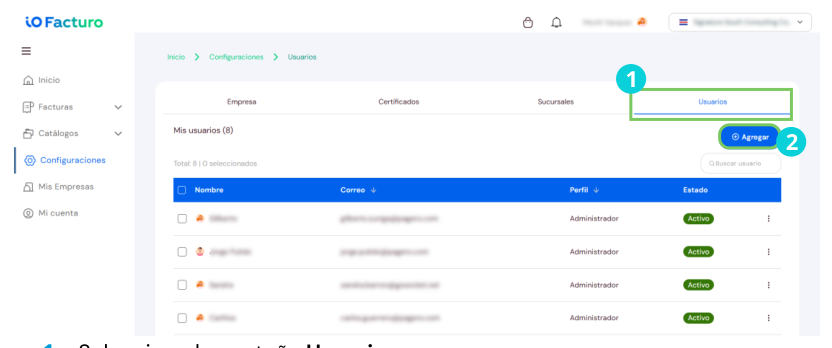
- Select the Users tab.
- Click Add.
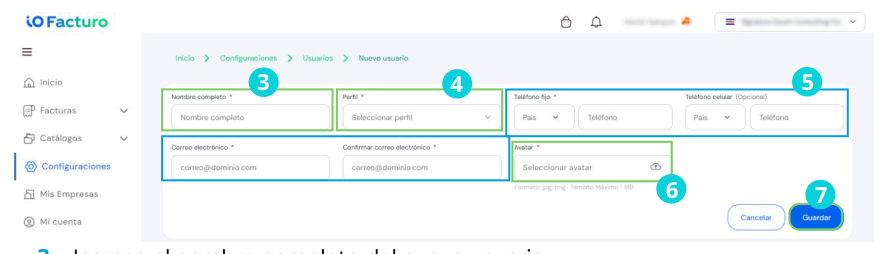
- Enter the full name of the new user.
- Select the type of profile that will be assigned. This can be:
- a. Administrator: has permissions to modify settings, issue documents and register new users, customers, products and taxes.
- b. Operator: user with permission to issue invoices and view customer and product catalogs.
- c. Viewer: can only enter the system to view and query documents.
- Enter the contact data of the new user.
- Select the avatar of the new user.
- When finished, click Save.
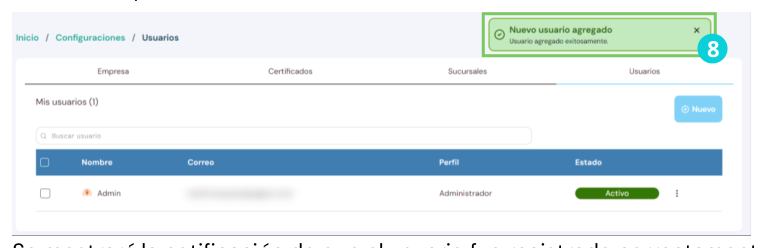
- A notification will be shown indicating that the user was registered successfully.
Once registration is complete, all users loaded into the system so far will be shown with the following information:
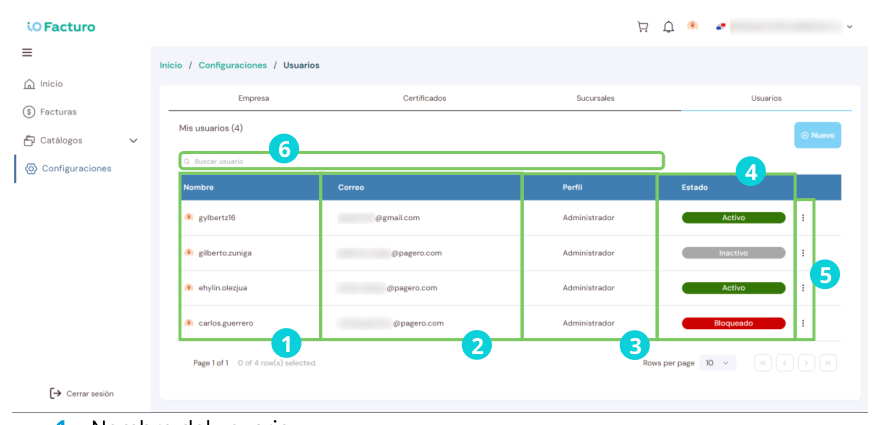
- User name.
- User registration email.
- Type of profile of the user.
- Status of the user, which can be:

- Within the three dots, you will find a menu to carry out actions such as:
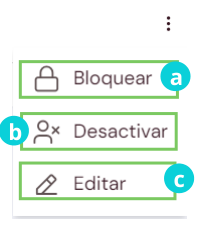
- To quickly locate a user, you can use the search bar