The Spanish version is the authoritative reference. View in Spanish
Configuration
Before issuing invoices you need to configure your invoicing tool to adapt it to your company's needs as an issuer.
The initial configurations can be modified at any time from the Configurations module.
Home panel
Within the home screen of the global invoicing tool, you will find the following elements:
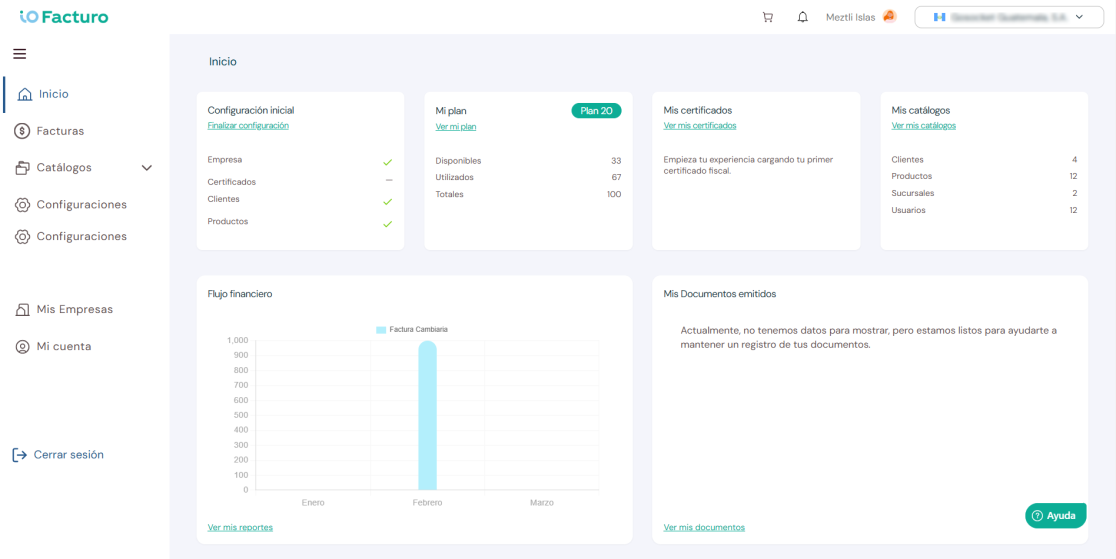
- Main menu. One of the ways to move around the portal.
- Initial configuration. It will be shown until you finish the configuration.
- My plan. Check the active plan type. Press View my plan for details.
- My certificates. Shows the registered certificates. Press View my certificates.
- My catalogs. Summary of catalogs and number of records.
- Financial flow. Report of documents issued in the last quarter.
- My issued documents. Number and type of documents from the last quarter.
- Store. Access it to upload payment receipts for your plan.
- Notifications. Number of notifications with a summary.
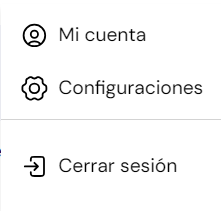
- Account. Menu from which you can:
- Company identifier. Company whose session is active. If you have more than one associated company, you can switch from this tab.
- Help. Access to frequent topics and questions from other users.
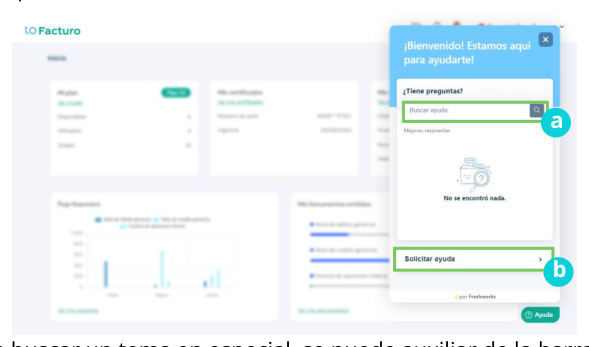
- a. Use the search bar to find a topic.
- b. If your query doesn't match any topic, go to Request Help.
- Sign out.
Initial configuration
Before starting to issue invoices, configure your invoicing tool:
- Press Finish configuration.
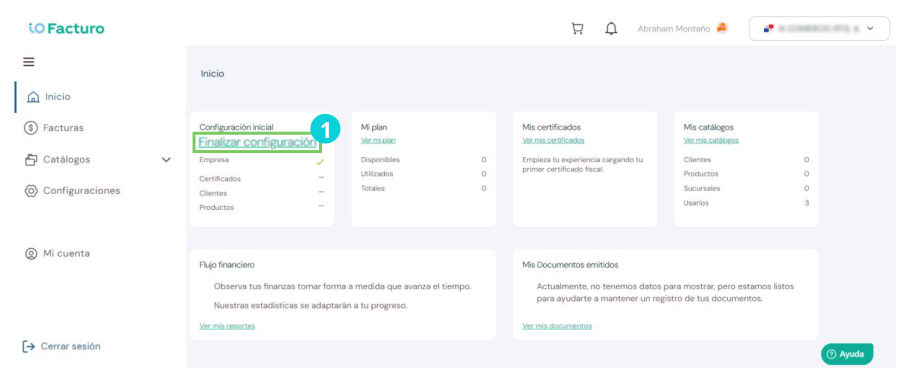
The configurations we will review below can be changed later in the Configurations module.
General information
A form with the general details of your registration will be displayed:
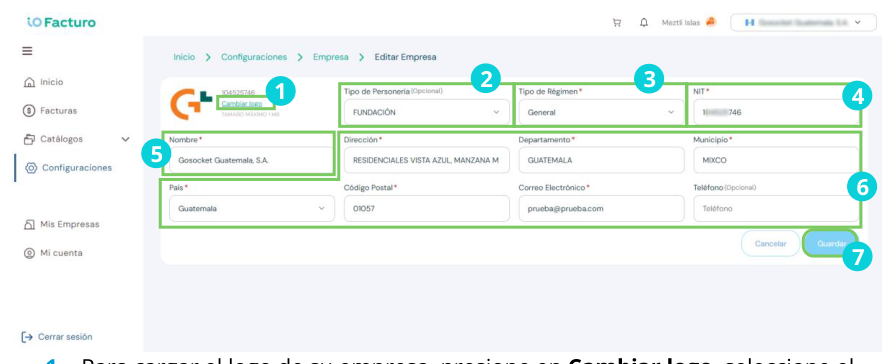
- To upload your company logo, press Change logo and select a
.jpgor.pngfile (maximum 1 MB). - Select the legal entity type to which the registration belongs.
- Choose the type of regime to which the company belongs.
- Verify the Tax Identification Number (NIT) that was saved in the initial registration.
- Enter the name or legal name of the registration.
- Verify the country to which the registration's RUC belongs.
- Select your company's location and contact details.
- To update this information, press Save.
Certificates
Within the Certificates tab you can upload the certificates needed to issue invoices.
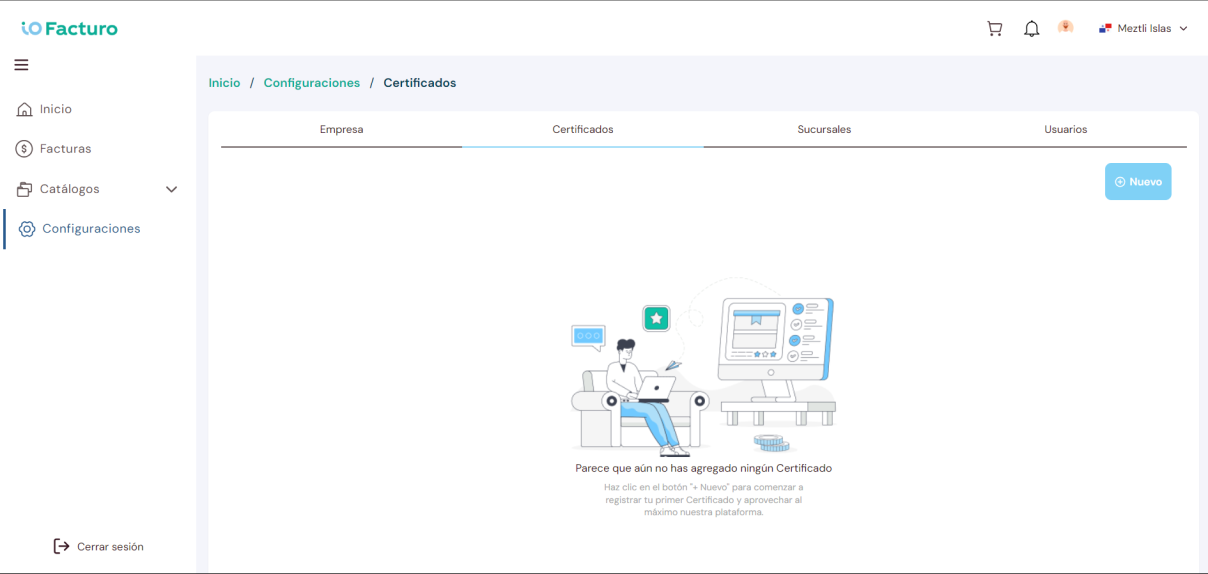
- Press the Certificates tab.
- Press the New button.
If you already have a certificate uploaded in Inbox (a Gosocket solution), you can use it directly to issue tax documents.
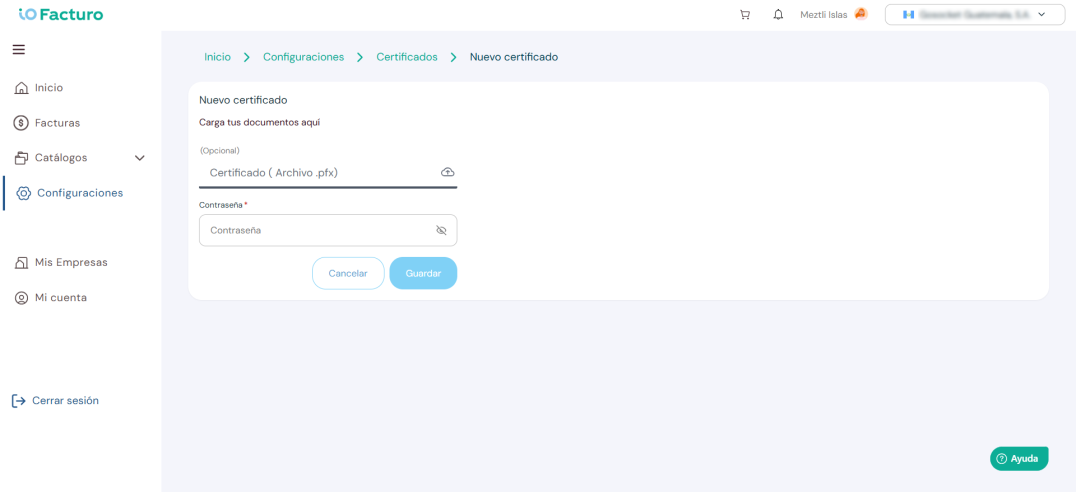
- Press the Certificate field and select your certificate file.
Within your file explorer, select your certificate file, which will be in .pfx format.
- Enter your certificate's password.
- Press Save.
Branches
From the Branches tab you can register, look up and modify your company's branches.
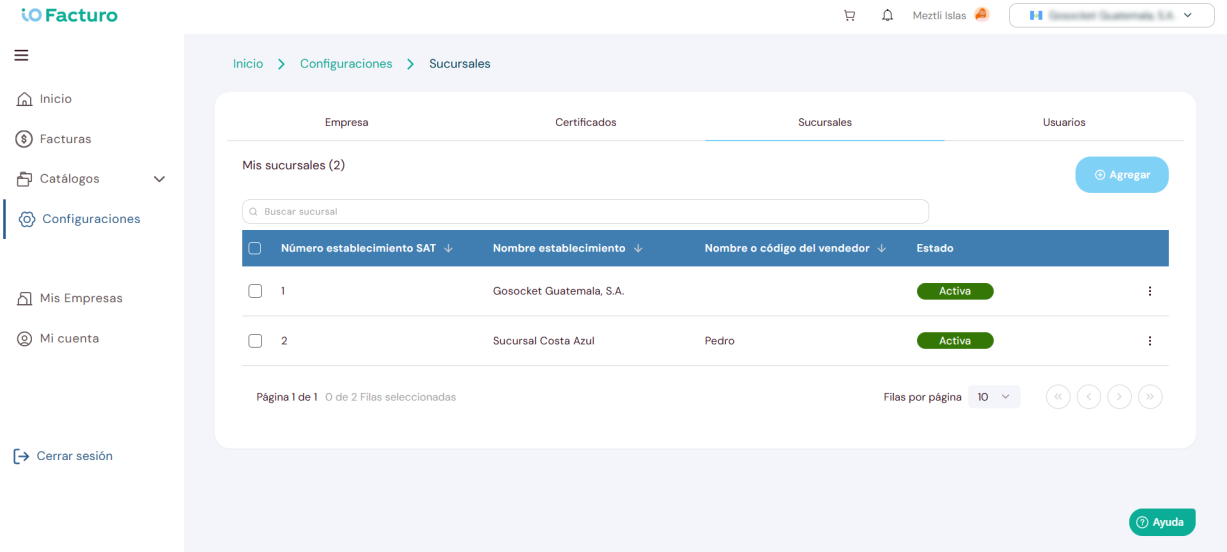
- Establishment number.
- Name used to identify the branch.
- Name or code of the salesperson who will issue the tax document.
- Status of the branch record:
- a. Active
- b. Inactive
- When you press the three-dot button, the following options will be displayed:
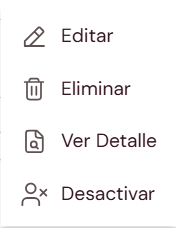
- To make it easier to locate a branch record, you can use the search bar.
- To register a new branch, press Add.
Add branch
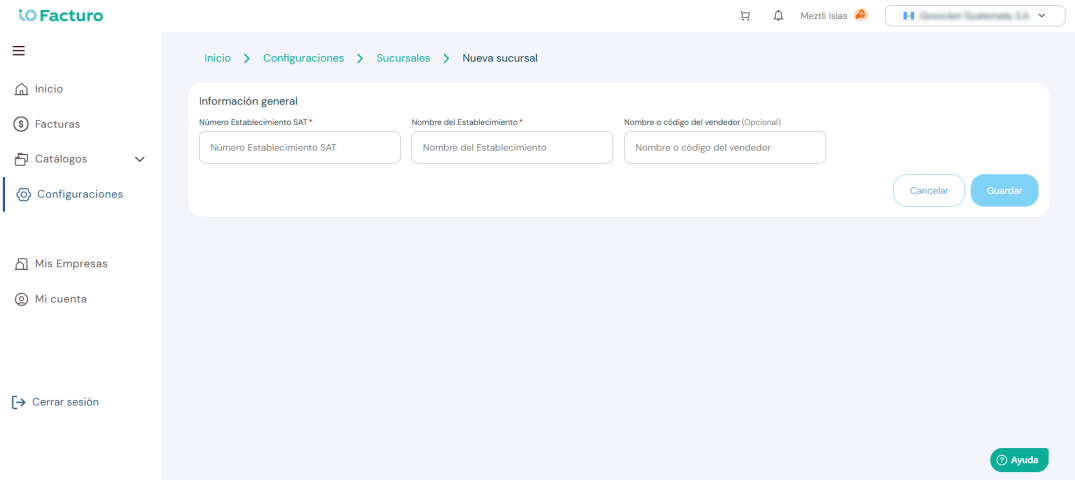
- Enter the branch's SAT establishment number.
- Enter the branch name.
- Enter the name or code that will identify the salesperson who will issue documents to customers.
- When finished, press Save.
Users
To manage users you need an Administrator profile and access to the Configurations module.
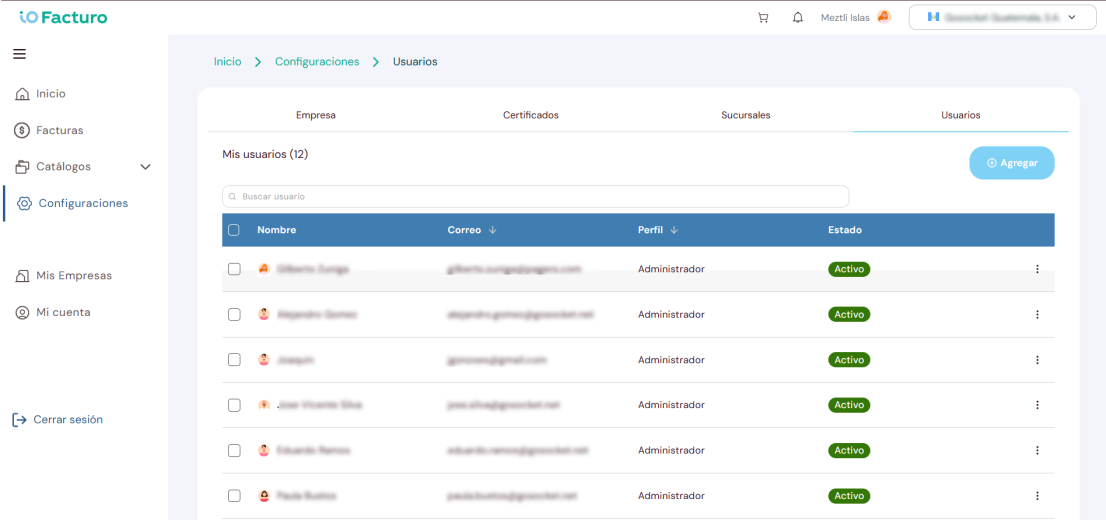
- Select the Users tab.
- Press the Add button.
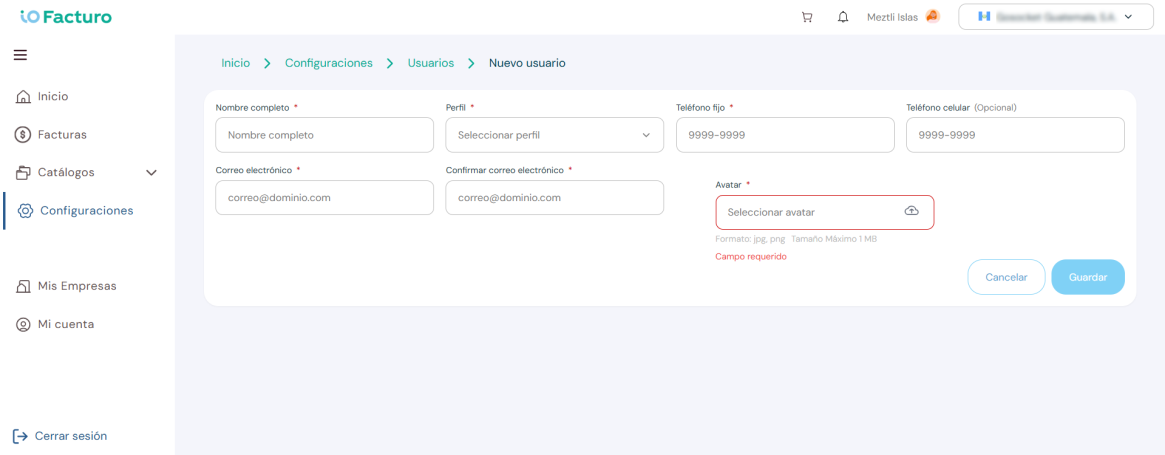
- Enter the full name of the new user.
- Select the profile type:
- Administrator: full configuration, issuance and management permissions.
- Operator: permission to issue invoices and look up catalogs.
- Read-only: can only view and look up documents.
- Enter the contact details of the new user.
- Select the avatar of the new user.
- Press Save.
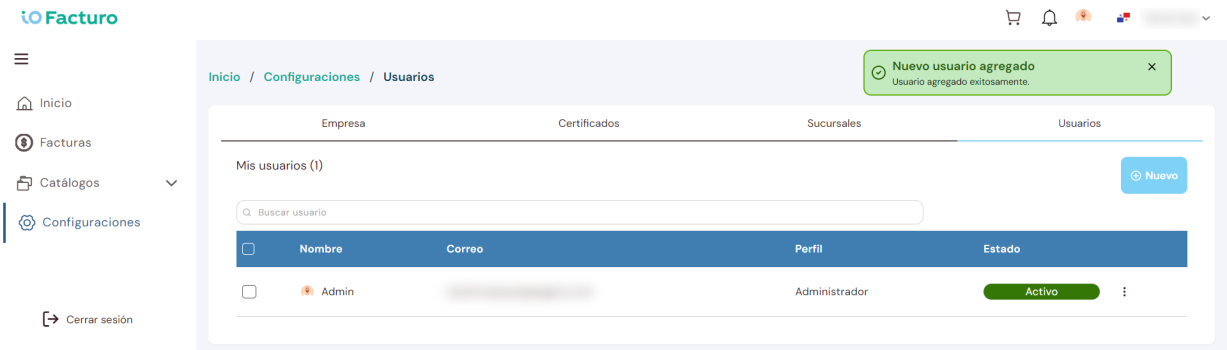
- A notification will be shown indicating that the user was registered successfully.
Once registration is complete, all the loaded users will be displayed:
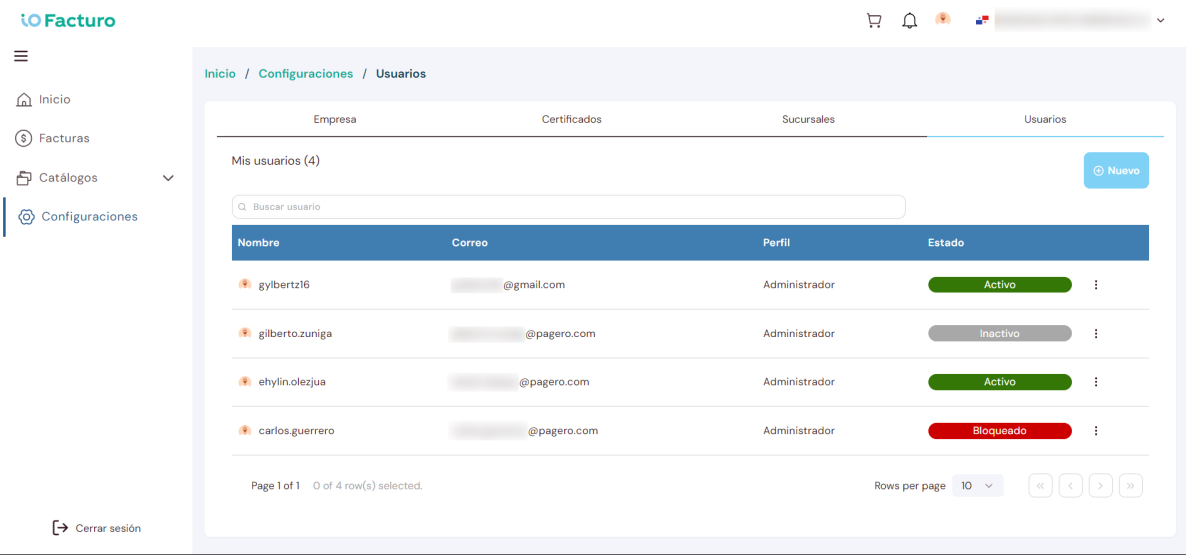
- User name.
- User's registration email.
- User's profile type.
- User status, which can be:

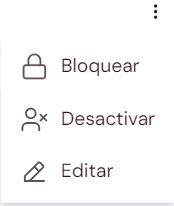
- Within the three dots, you will find a menu to perform actions such as:
- To quickly locate a user, use the search bar.