The Spanish version is the authoritative reference. View in Spanish
Documents
From the Documentos (Documents) module you can manage all issued and received documents.
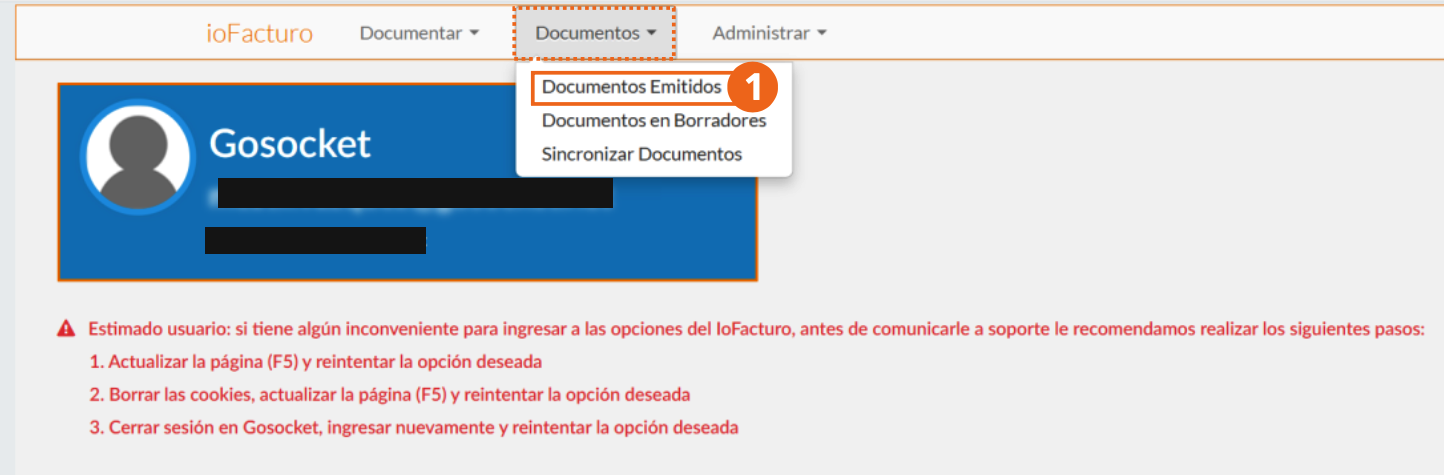
Navigating Issued Documents
Select Documentos Emitidos (Issued Documents). The screen offers the following search filters:
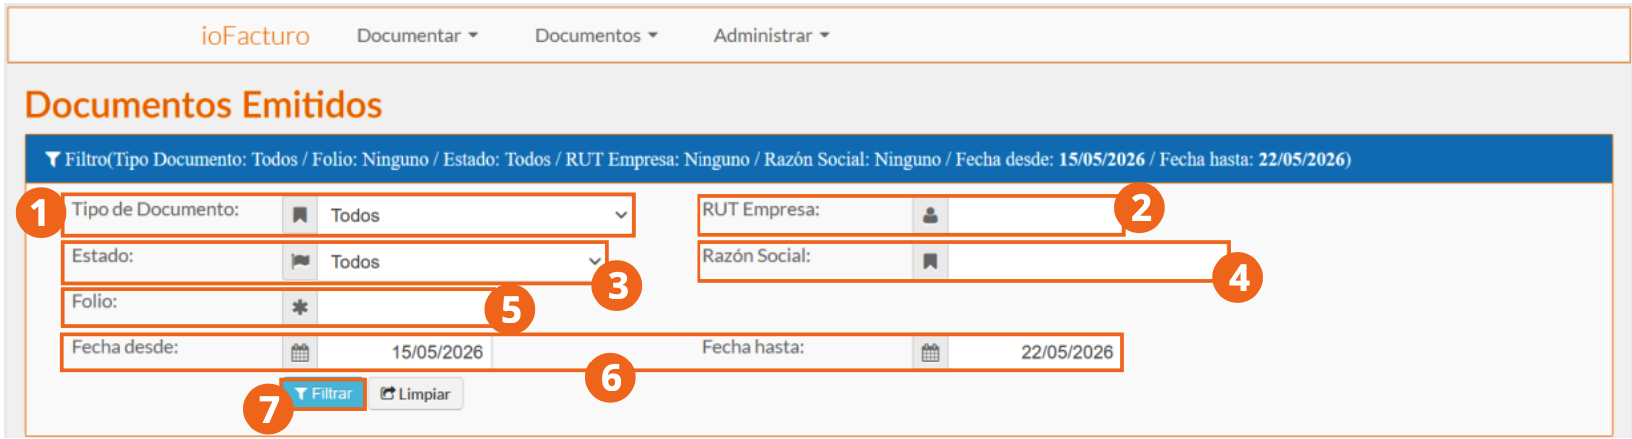
- Select the document type to locate.
- Enter the tax ID of the company receiving the document.
- Capture the legal business name that identifies the company receiving the document.
- Select the status the document is in.
- Enter the folio number assigned to the document to locate.
- Choose the period in which the document was issued, using the calendars shown when you click the indicated fields.
Since these are optional fields, you can use one or several of the filters described. You can also select none and simply click Filtrar (Filter), so the system shows all documents issued within the preconfigured period indicated in the fields from point 6.
The results list shows, for each document:
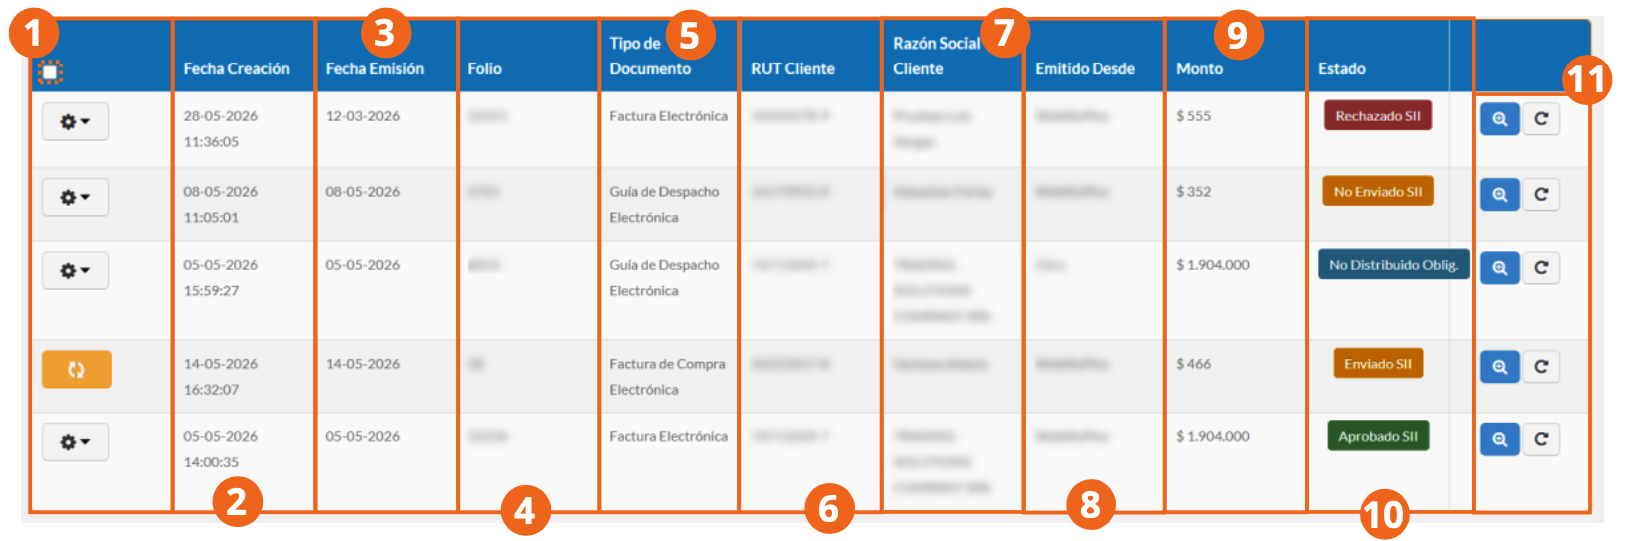
- Date the document was created.
- Date the document was issued.
- Folio assigned to the document.
- Electronic document type.
- Tax ID of the document's receiver.
- Legal business name that identifies the document's receiver.
- Server from which the document was issued.
- Monetary value of the document.
- Status of the document before the Tax Authority (SII).
- To display a preview of the document, click the magnifying glass icon.
- To update the document's status, click the circular arrow icon.
Draft Documents
To enter this module, select Documentos en Borradores (Draft Documents) from the Documentos module.
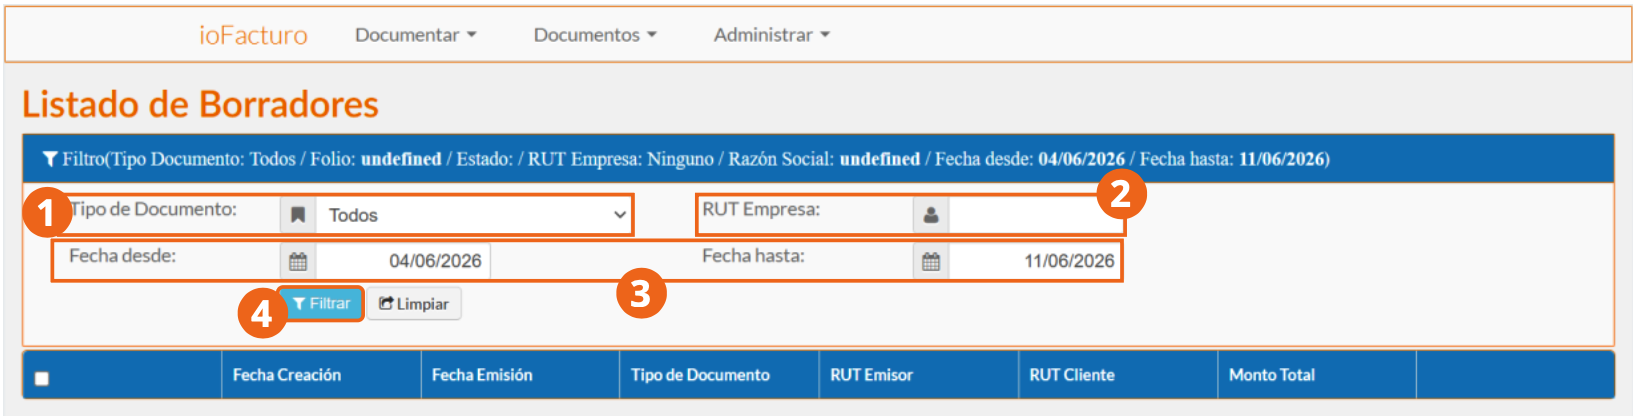
- Select the document type the draft corresponds to.
- Enter the tax identification number of the document's receiver.
- Using the calendar shown in the marked fields, choose the period in which the document was created.
- When finished, click Filtrar.
Synchronize Documents
From this module you can synchronize issued documents with those stored in the Gosocket database. To enter, click Sincronizar documentos (Synchronize Documents) from the Documentos module shown in the ioFacturo menu.
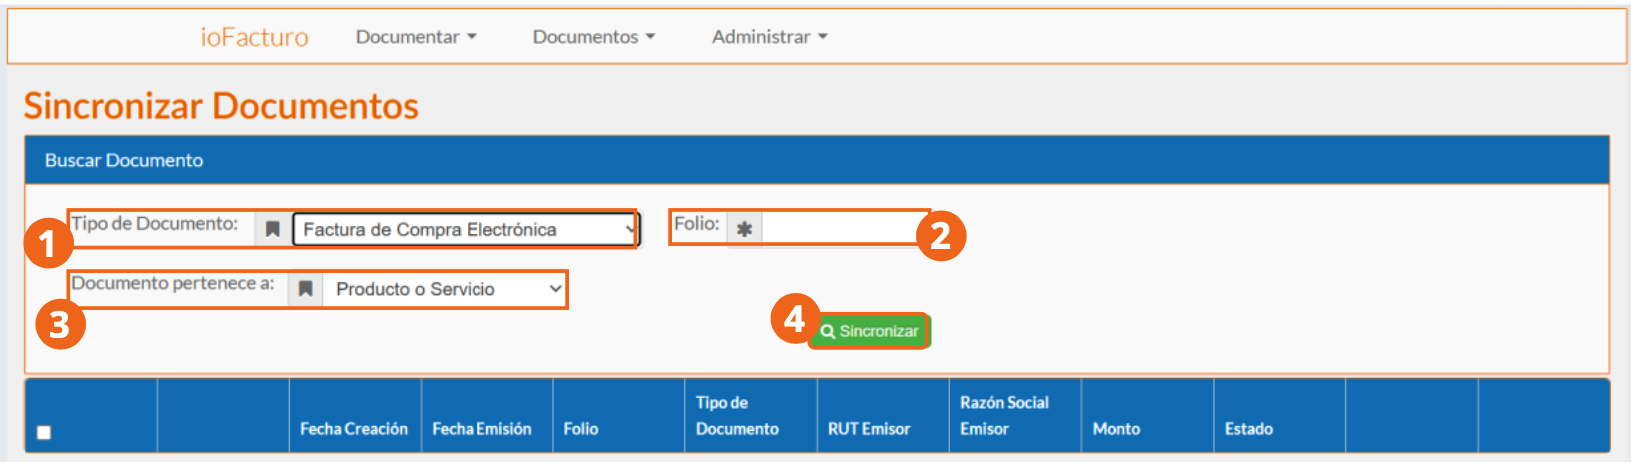
- Select the document type to synchronize.
- Enter the folio assigned to the document.
- Choose which type of product or service the document to be synchronized belongs to.
- When finished, click Sincronizar (Synchronize).