The Spanish version is the authoritative reference. View in Spanish
Folios
The Folios submodule of the Administrar (Manage) module lets you administer and order the folios assigned by the SII for each document type you want to issue. Folio ranges are uploaded through the CAF (Folio Authorization Code) file provided by the SII.
View the folios
- Within ioFacturo, go to the Administrar module and select Folios.
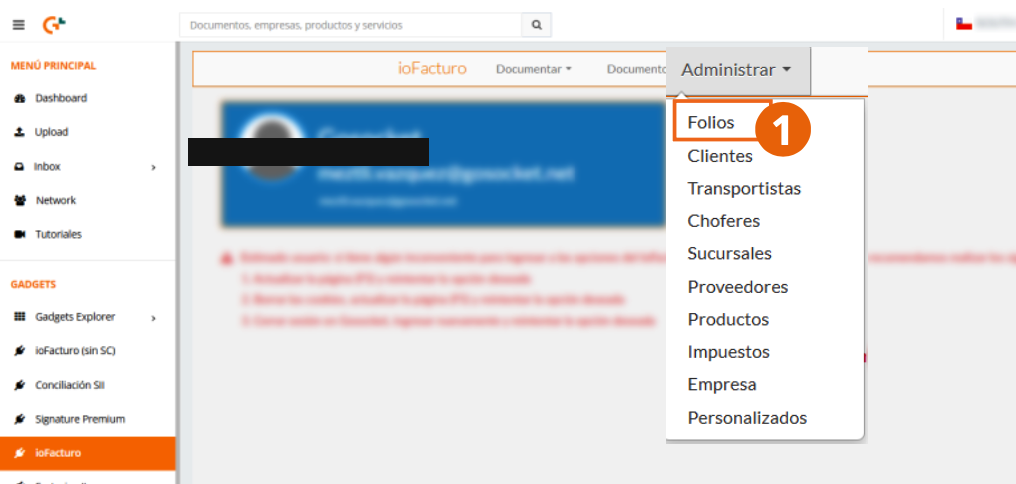
- The list of folio ranges uploaded to the system is displayed.
Upload a CAF
- Click Cargar Caf (Upload CAF).
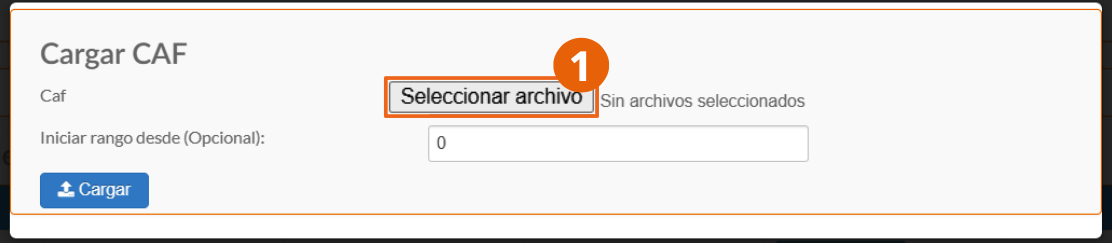
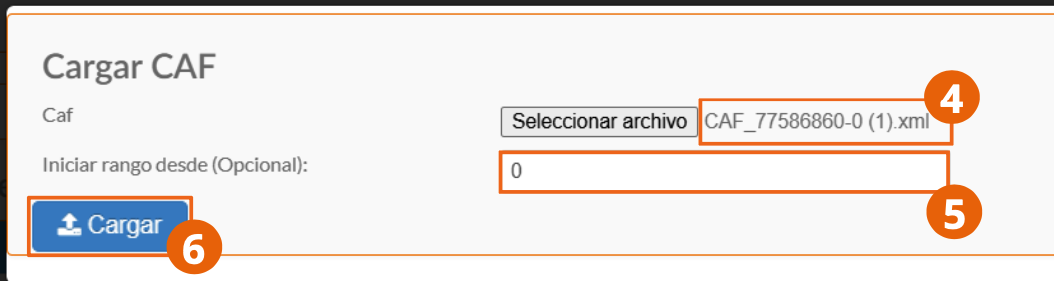
- Select the file containing the Folio Authorization Code you want to upload.
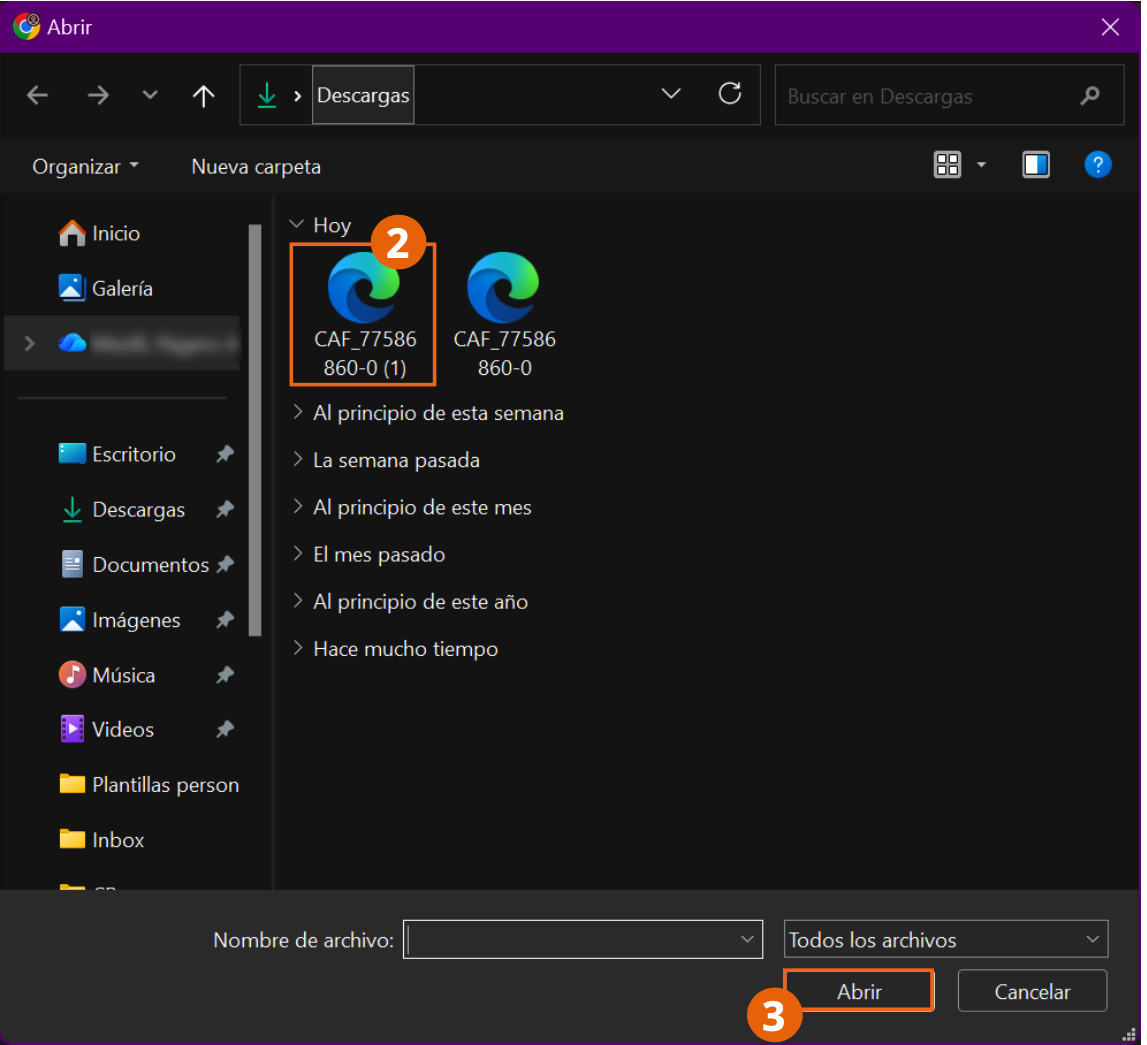
- Verify the name of the file being uploaded.
- Enter the number from which the range should start being used.
- Click Cargar (Upload) to save the range in the system.
Layout of the folio list
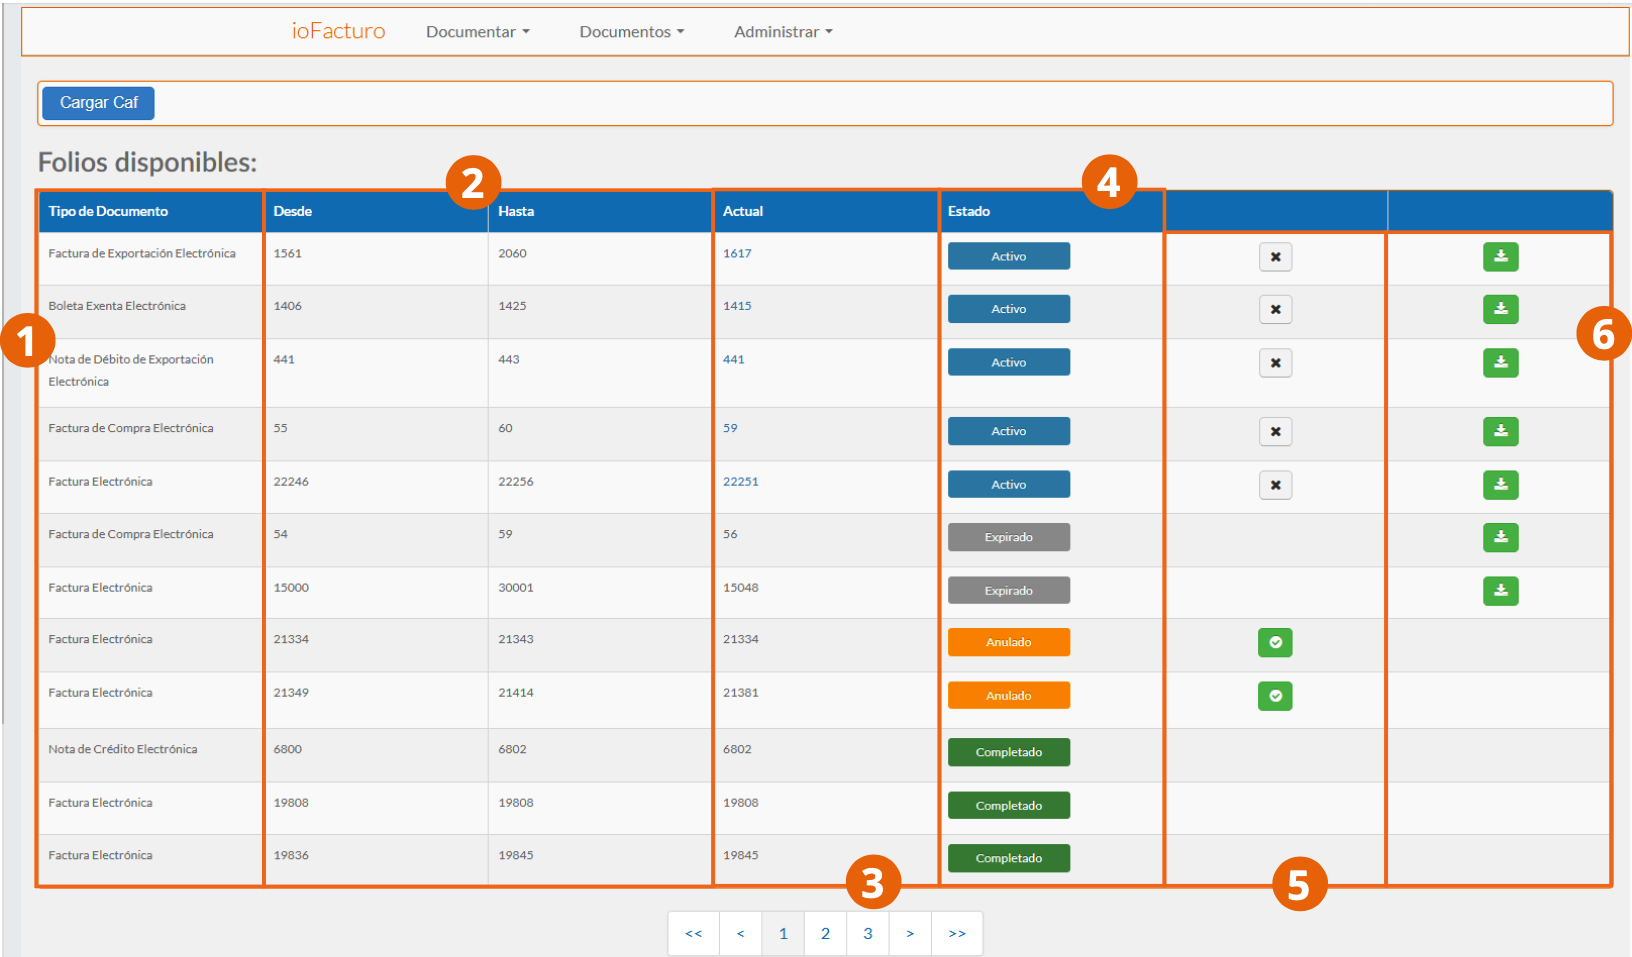
Each record in the list shows the following information:
- Document type the folio range applies to.
- Numbering range covered by the record's folios.
- Next number: the number about to be assigned to the next document to be issued.
- Folio range status: whether the range is active for use, has expired, was voided, or has already been fully used (completed).
Activate or deactivate a range and download its XML
- Click the gray button with an ✕ on the record to deactivate the folio range, or the green button with a ✓ to activate it.
- To download the range's XML, click the record's green download button.
Manual folio assignment
If you want to manually assign the folio when issuing a document, the folio must have been uploaded beforehand from this submodule. See Document Issuance.