The Spanish version is the authoritative reference. View in Spanish
Electronic Self-Invoice
The Electronic Self-Invoice is the document issued by the buyer (purchaser) instead of the seller, when the seller is not required to issue an invoice to the DNIT — for example, when buying from a non-taxpayer individual. This page describes the issuance of the self-invoice, section by section of the form.
Open the Issuance Form
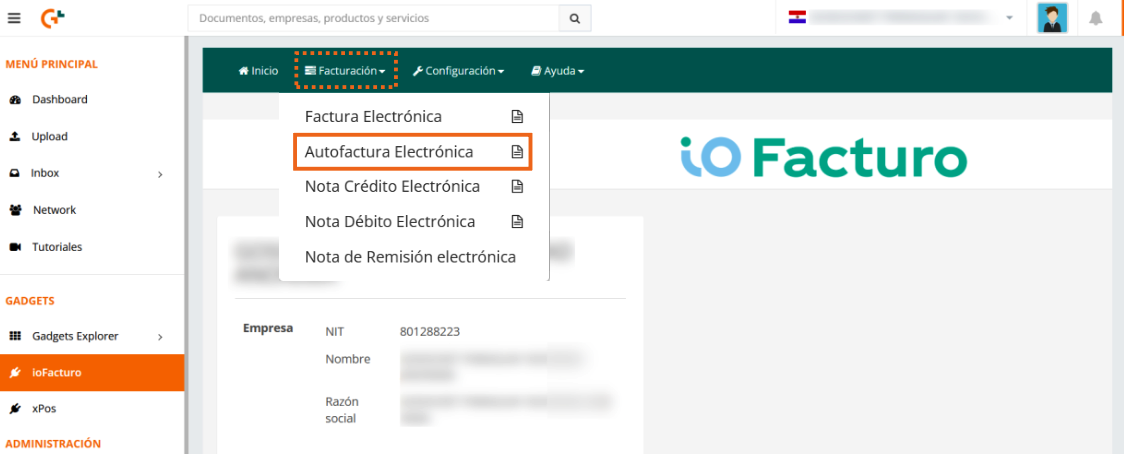
To start issuing an electronic self-invoice, click Invoicing in the ioFacturo menu and select Electronic Self-Invoice.
Document Data
Enter the data for the document to be issued:

- Issuance Date: the document's issuance date is displayed. You can also modify it as needed.
- Transaction Type: select the type of transaction to which the document corresponds.
- Tax Type: choose the applicable tax.
- Payment Condition: select whether payment will be made in cash or on credit.
- Maturity Date: the system will inform you of the document's maturity date.
- Numbering: you will see the numbering assigned to the document; if you have a previous number, click on the field and enter it.
- Advance Condition: optional field; you can choose the data by clicking in the space, or leave it as shown.
- Payment Type: select the type of payment with which the document will be settled.
Issuer and Receiver Data
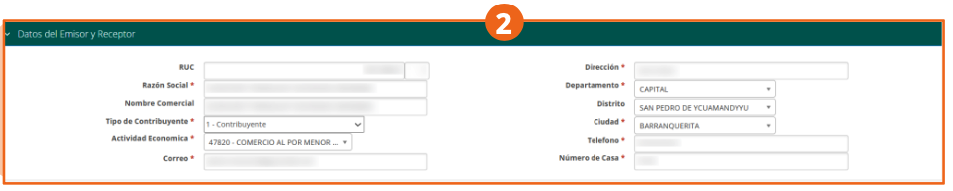
The tax data of your company as the document's issuer and buyer in this transaction is displayed: the RUC, legal name, trade name, type of taxpayer, economic activity, and email, as well as location and contact data (address, department, district, city, phone, and house number).
Self-Invoice Specific Data
This section captures the data of the seller (the person or business not required to issue an invoice):
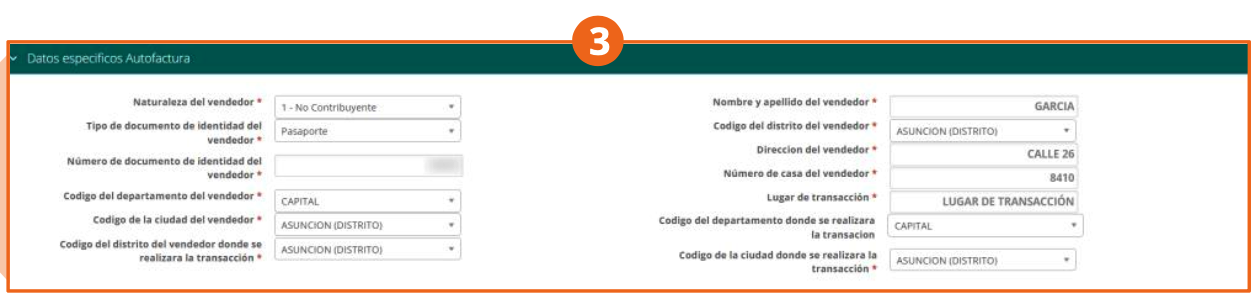
- Seller's nature: indicate whether they are a taxpayer or non-taxpayer.
- Seller's first and last name.
- Seller's identity document type and their identity document number.
- Department code, city code, and seller's district code.
- Seller's address and seller's house number.
- Place of transaction: describe where the transaction took place.
- Department code and city code where the transaction will take place.
Product Details
- Click on the search icon in the detail line to choose the product to invoice.
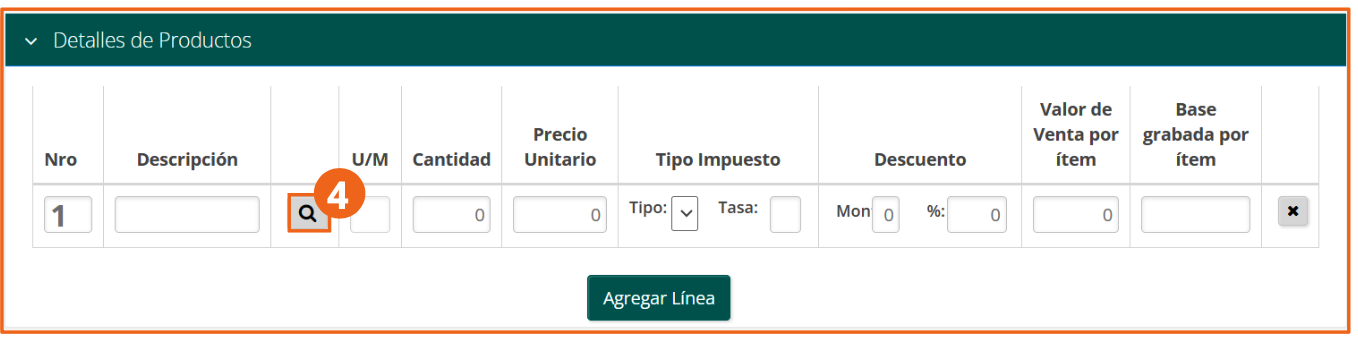
- The product or service data will be displayed in the Product Details section:
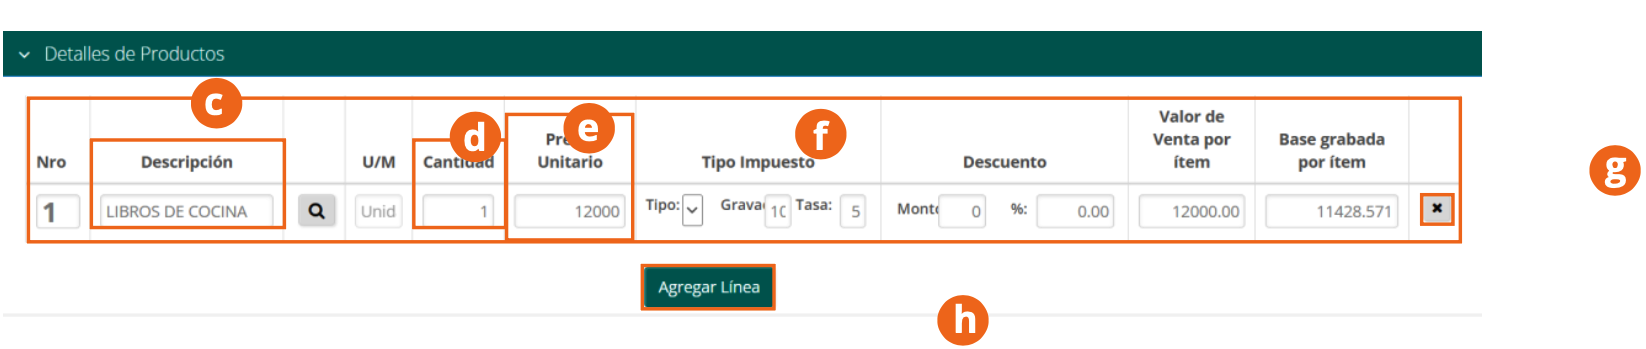
- Verify the product's description loaded in the form.
- Enter the quantity of products to be invoiced.
- Verify or adjust the unit price.
- Select the tax type that applies to the item (taxable, exempt) and its rate.
- The sale value per item and the taxable base per item calculated by the system will be displayed.
- To remove the item, click the ✕ button on the line.
- To invoice more than one product, click Add Line.
Reference Data
When the transaction is backed by a pre-printed document or a certificate, complete the Reference Data section:
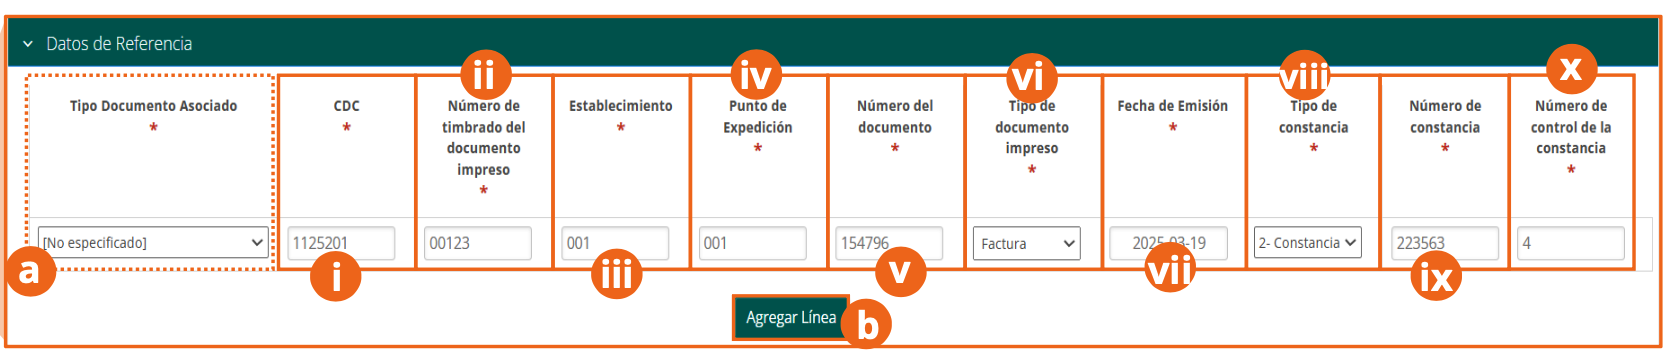
- Associated Document Type, CDC, Establishment, Issuance Point, Document Number, Printed Document Type, and Issuance Date of the voucher that backs the transaction.
- Certificate type, certificate number, and certificate control number, when the seller's nature requires it.
- Click Add Line if you need to reference more than one document.
Custom Fields
You can add custom fields that you need through the Custom section. If you see any field that is not necessary, you can delete it with the ✕ button on the line.
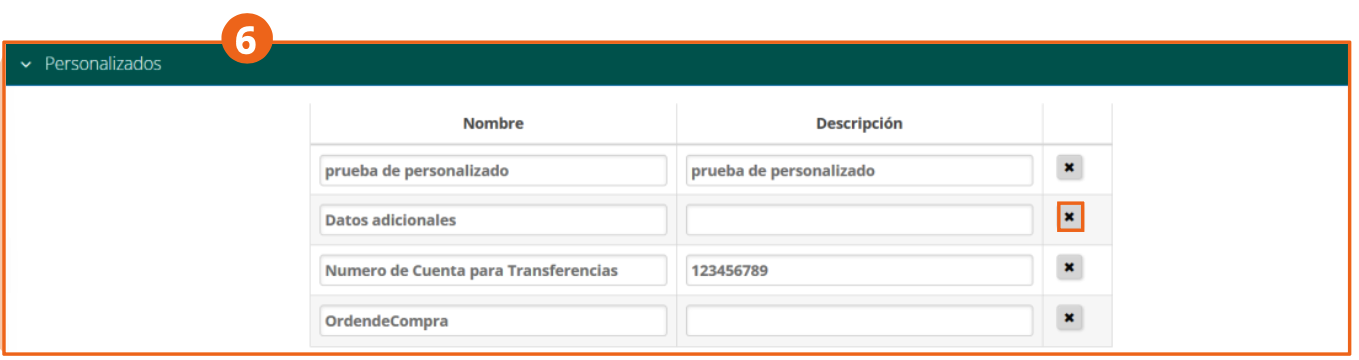
Custom fields are defined from the Configuration module, in the Custom submodule.
Totals Data
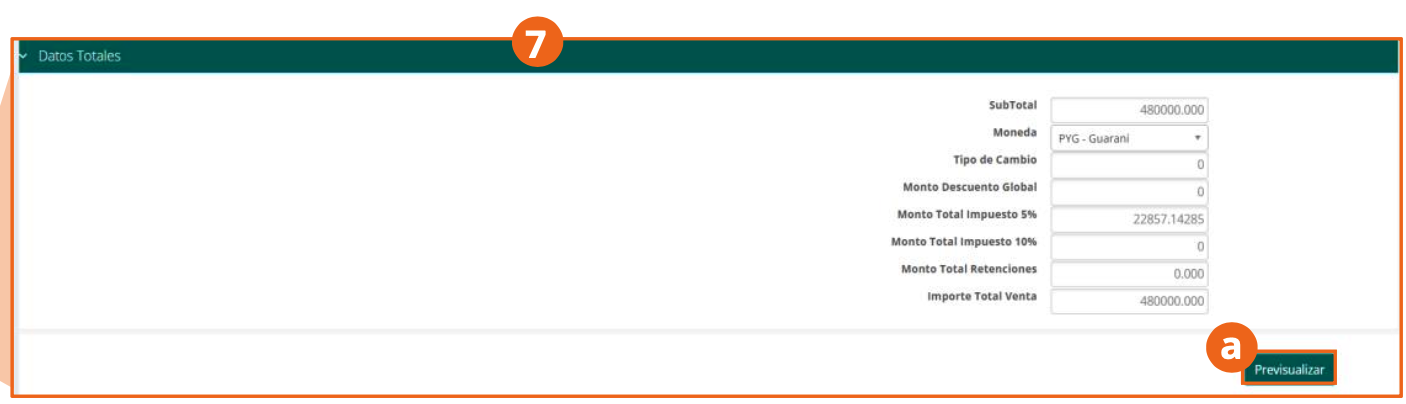
Within the Totals Data section, the calculation of the sum of amounts to be paid is shown: subtotal, currency, tax amounts, and the total sale amount. When finished, click Preview.
Preview and Submission
Within the preview you will find the document's information and the elements that will be shown on it once generated (the KuDE graphic representation, with the CDC to verify the voucher's validity).
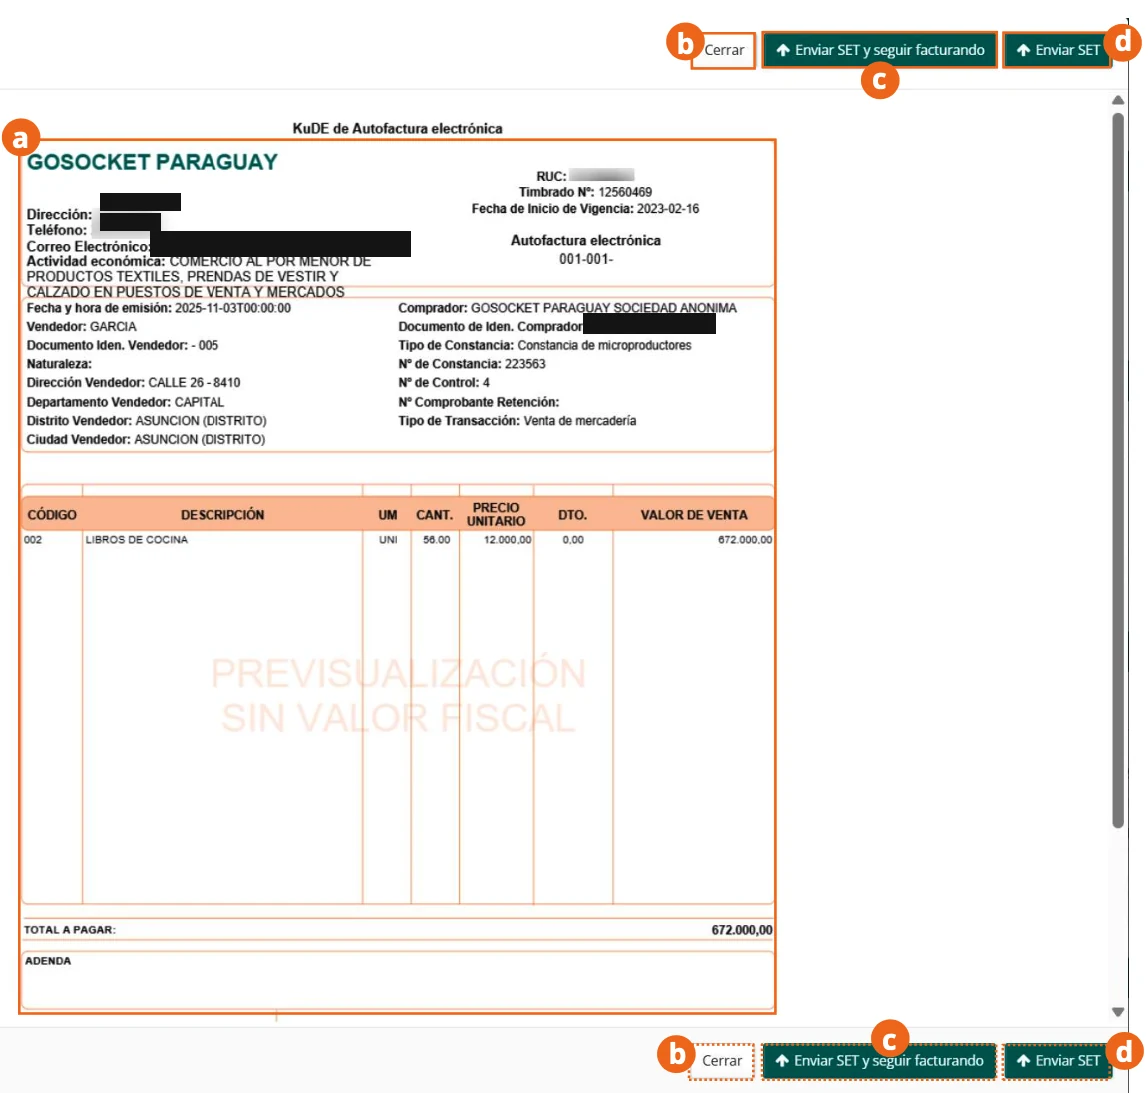
- To keep editing the document's information, click Close.
- To continue the issuance process and keep issuing self-invoices, click Send to SET and keep invoicing.
- To send the document and finish, click Send to SET.
Once submitted, the system will confirm that the document has been successfully transmitted to the tax authority.
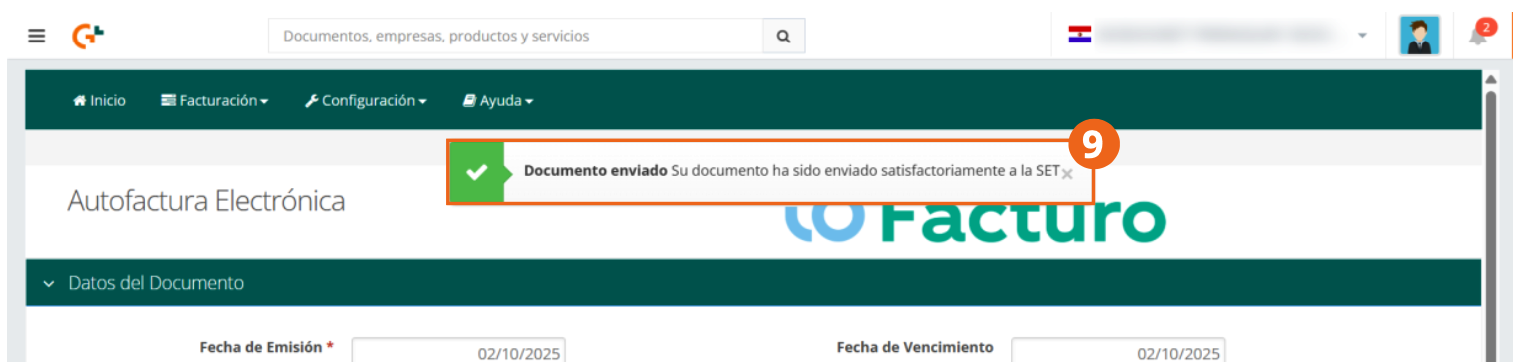
The interface buttons keep the acronym SET (Undersecretariat of State for Taxation), the former name of the current DNIT. Submission is done through the SIFEN system (e-Kuatia), where the voucher's validity can also be checked with its CDC number.