The Spanish version is the authoritative reference. View in Spanish
Configuration
Before issuing your electronic documents, you need to prepare the system from the Configuration module: register your customers, load the numbering ranges (tax stamp) provided by the DNIT, set up the product catalog and, if needed, define custom fields.
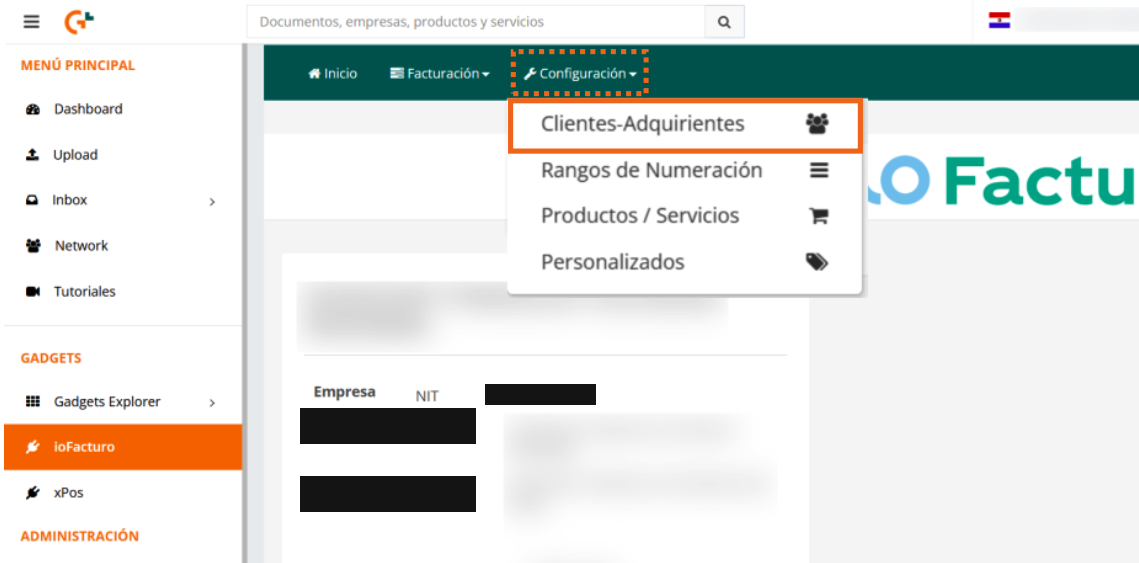
Customers-Buyers
Register a customer
- From the main menu, go to Configuration and select Customers-Buyers.
- Click the Add button.
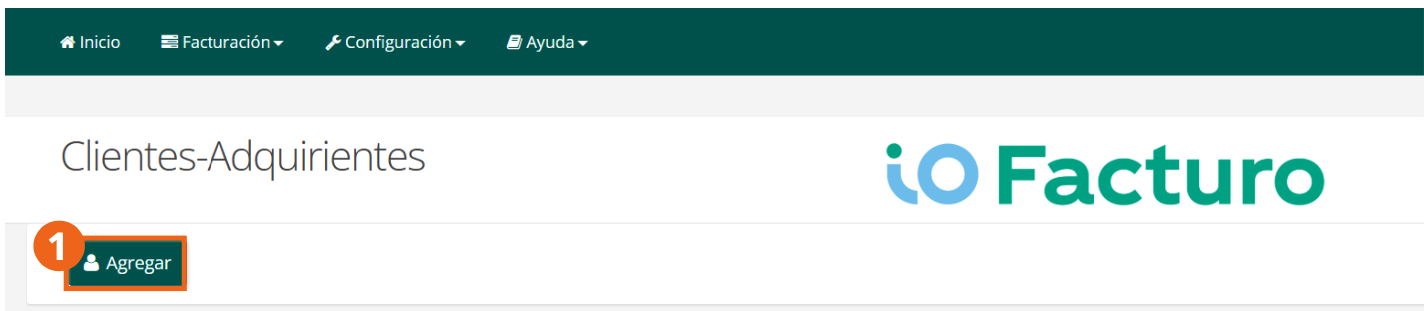
The registration form for the new customer opens:
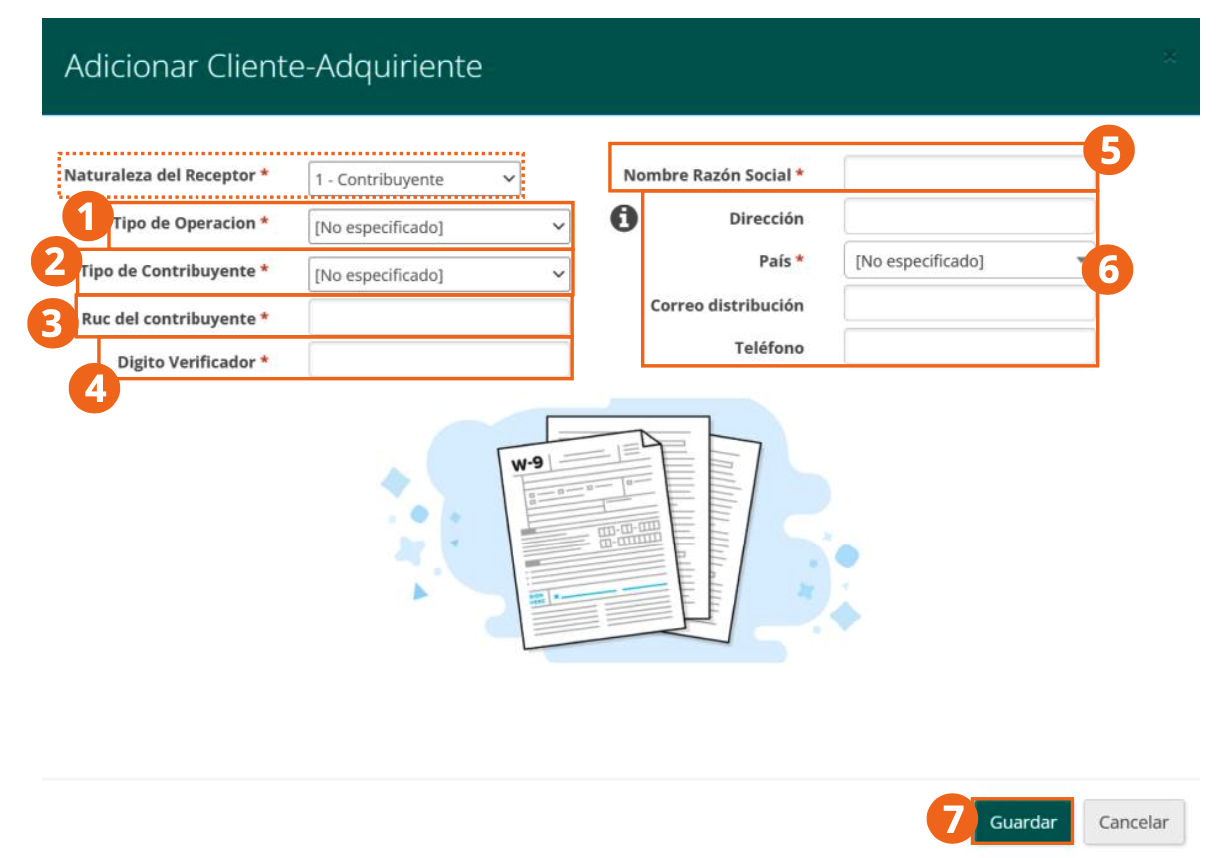
- Operation Type: select the usual type of operation with this customer.
- Taxpayer Type: applies when the Receiver's Nature is Taxpayer.
- Taxpayer's RUC and its check digit.
- Legal Name of the customer.
- Address, Country, Distribution email, and Phone.
- When finished, click Save.
When the Receiver's Nature is Non-Taxpayer, the form replaces the RUC and check digit with the customer's Identity document type and Identity document number.
Search customers
The search section of the Customers-Buyers screen lets you locate a record by receiver nature, identity document number, or legal name. Use all or only some of the filters and click Search.
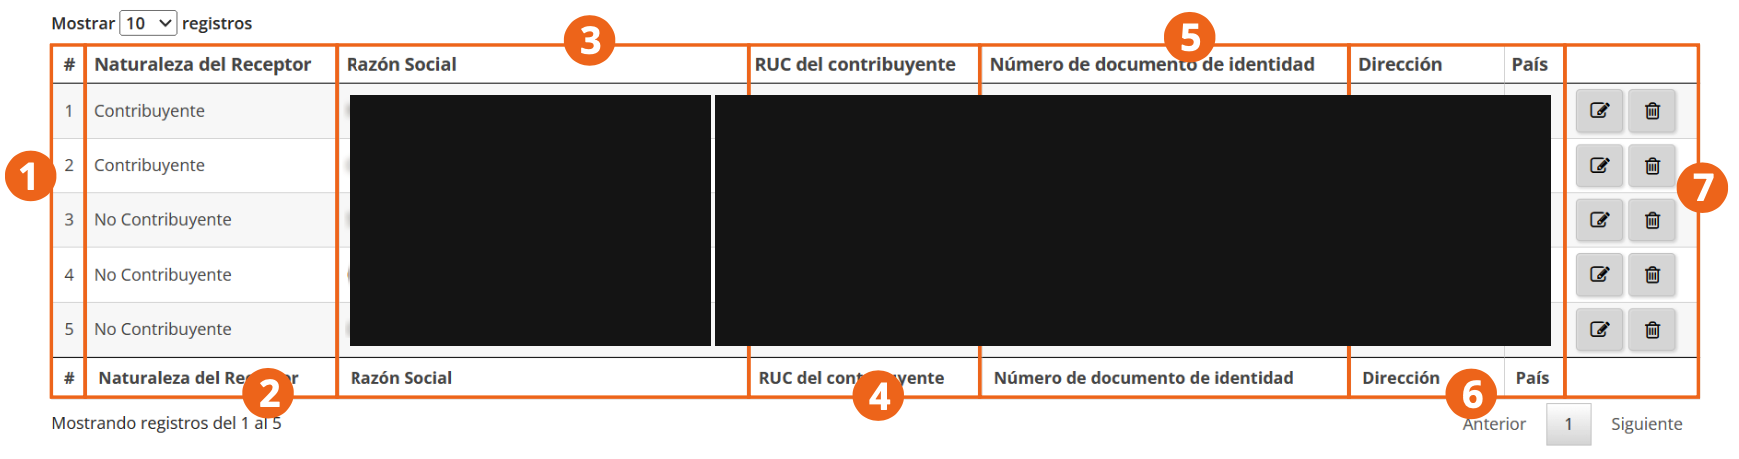
Customer list layout
The list shows each record's information in the following order: receiver's nature, legal name, taxpayer's RUC, identity document number, address, and country, plus the buttons to edit or delete the record.
Numbering Ranges
Before you can issue documents, you need to load the numbering ranges (tax stamp) the DNIT authorized for your company.
- From the main menu, go to Configuration and select Numbering Ranges.
- Click the Add button.
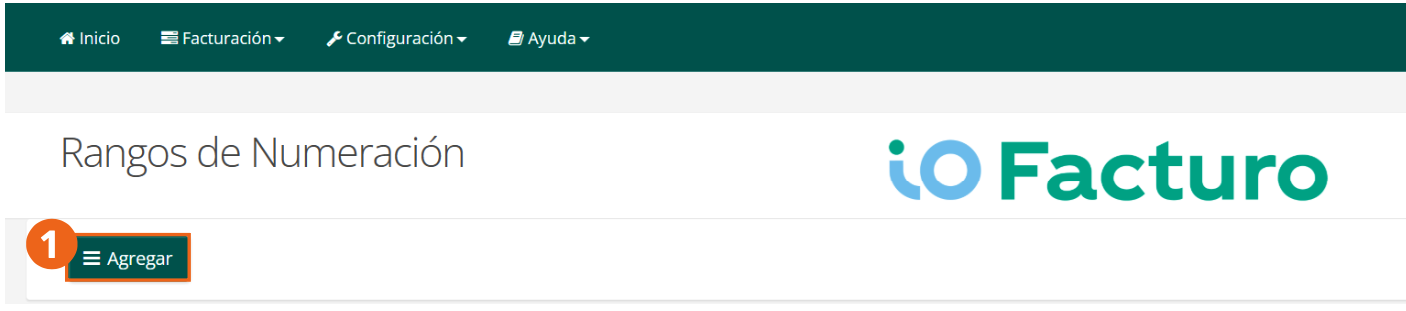
The range registration form opens:
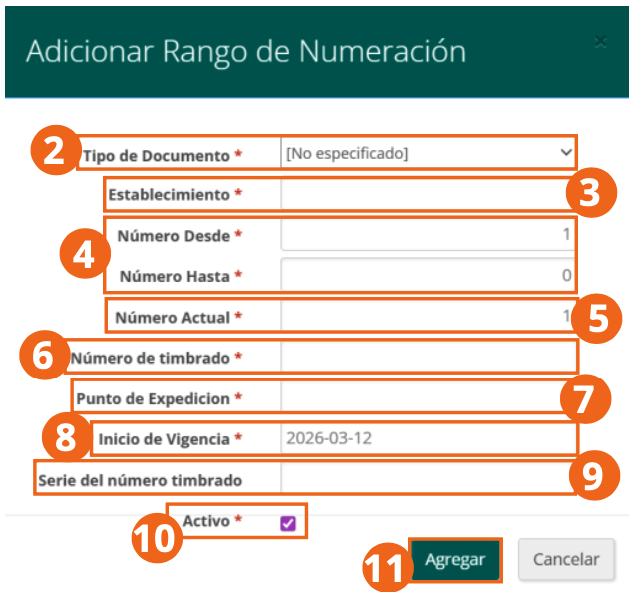
- Document Type: select which of this manual's five document types the range corresponds to (Invoice, Self-Invoice, Credit Note, Debit Note, or Remittance Note).
- Authorized Establishment and Issuance Point.
- From Number, To Number, and Current Number of the range.
- Tax stamp number and, if applicable, Tax stamp number series.
- Start of validity of the tax stamp.
- Active: check this box so the range is available for issuance.
- When finished, click Add.
Numbering range list layout
The list shows, for each loaded range, whether it is Active, the Document Type, the Series and tax stamp number, the Establishment, the Issuance Point, the From Number, the To Number, and the Current Number (the count of vouchers used). Click the ✕ button to deactivate a range.
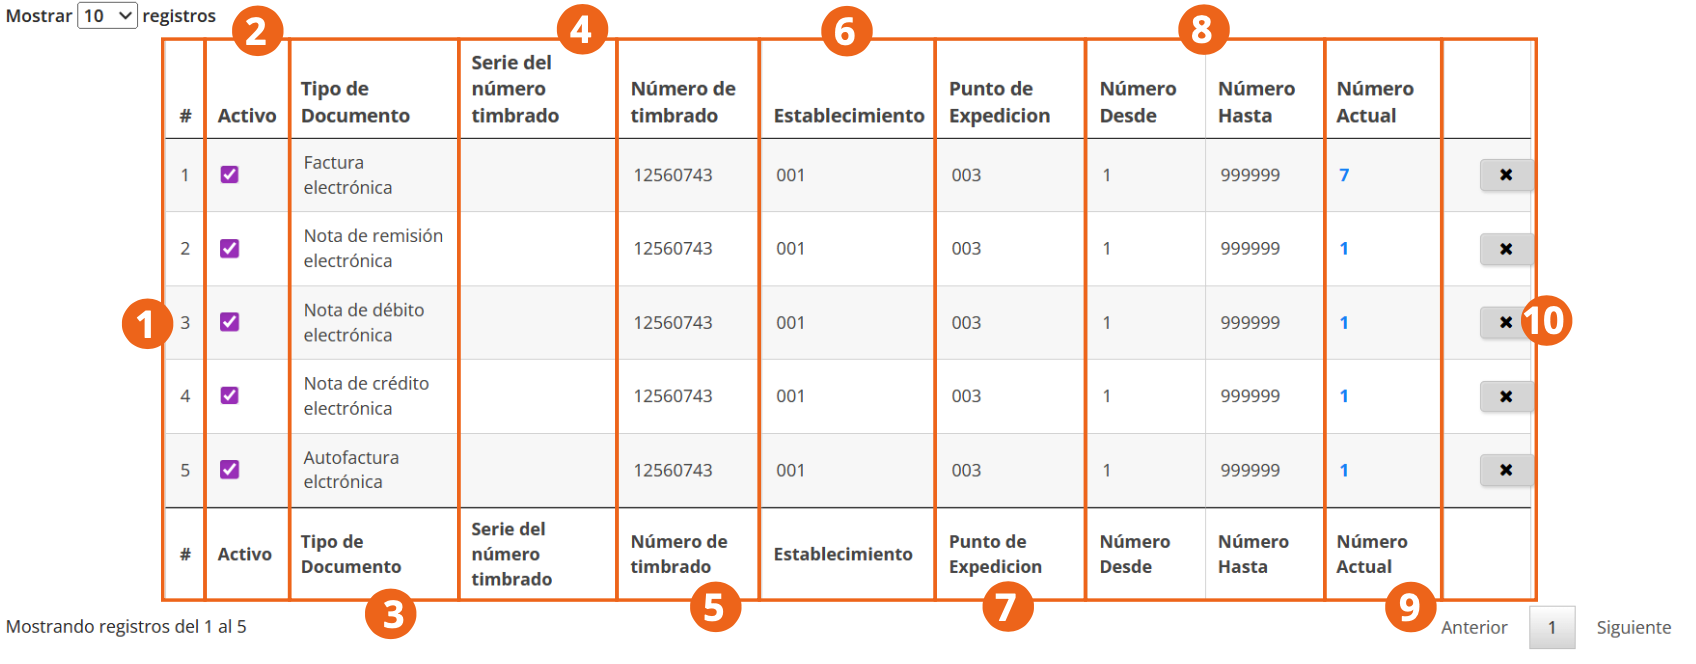
A single tax stamp number can authorize independent ranges for each document type (Electronic Invoice, Remittance Note, Debit Note, Credit Note, and Self-Invoice), each with its own From Number / To Number sequence.
Products
Register a product
- From the main menu, go to Configuration and select Products / Services.
- Click the Add button.
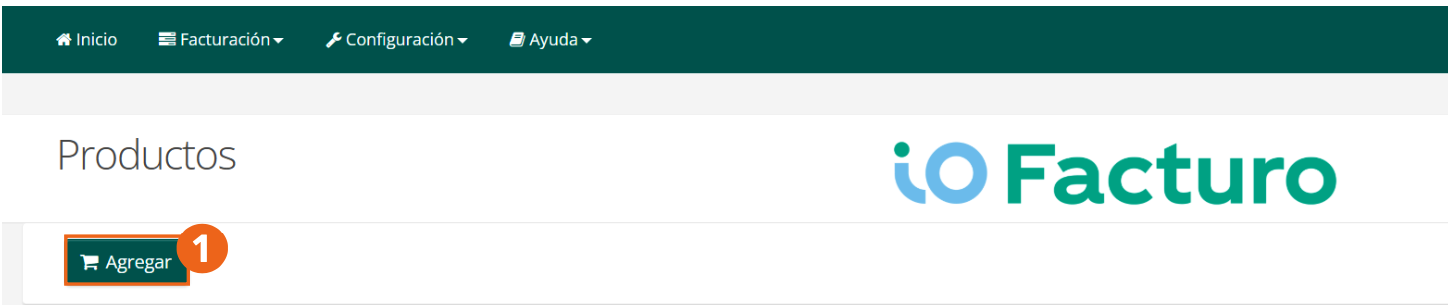
The product registration form opens:
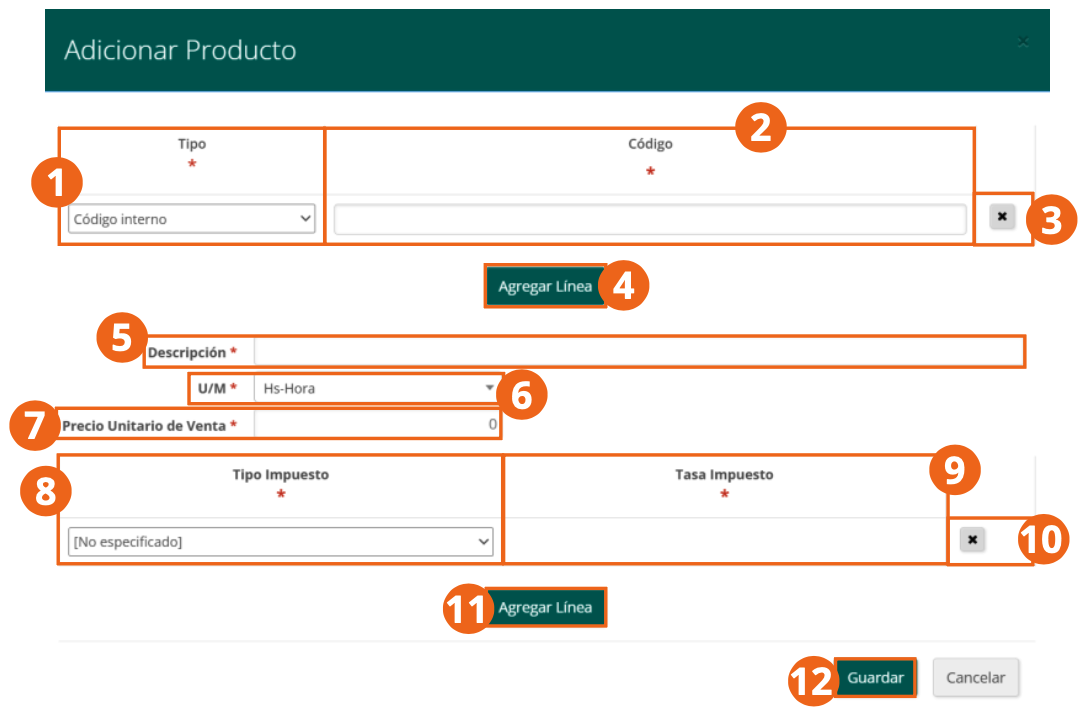
- Select the Type of code you will use to identify the product (for example, internal code) and enter its Code. Click Add Line if the product needs more than one code.
- Enter the product's Description.
- Select the U/M (unit of measure) it is sold by.
- Enter the Unit Sale Price.
- Select the applicable Tax Type and verify the Tax Rate. Click Add Line if the product requires more than one tax rule.
- When finished, click Save.
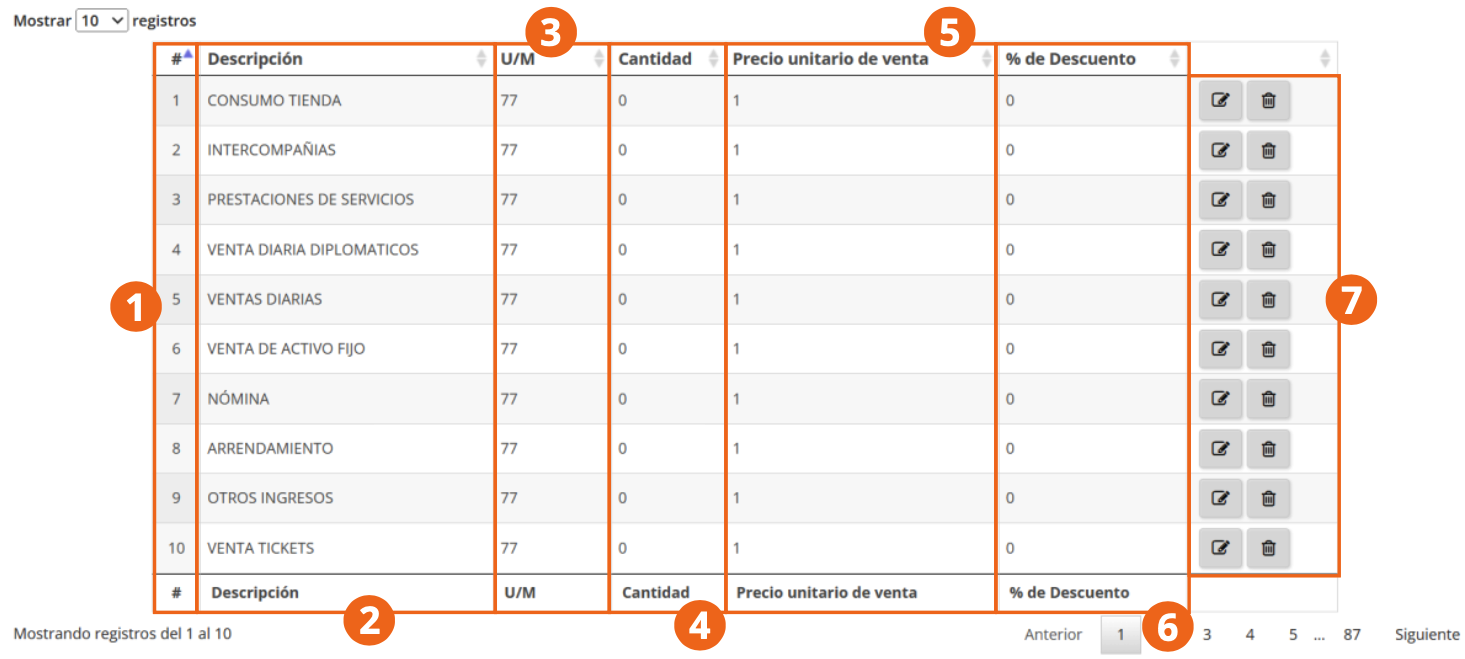
Product list layout
The list shows, for each product, its description, unit of measure (U/M), quantity, default unit sale price, and default discount %, plus the edit and delete buttons.
Custom Fields
Register a custom field
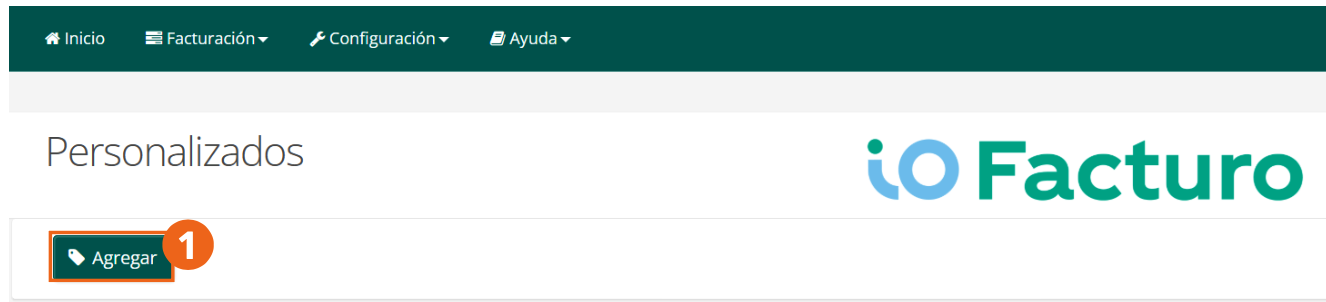
- From the main menu, go to Configuration and select Custom.
- Click the Add button.
The custom field registration form opens:
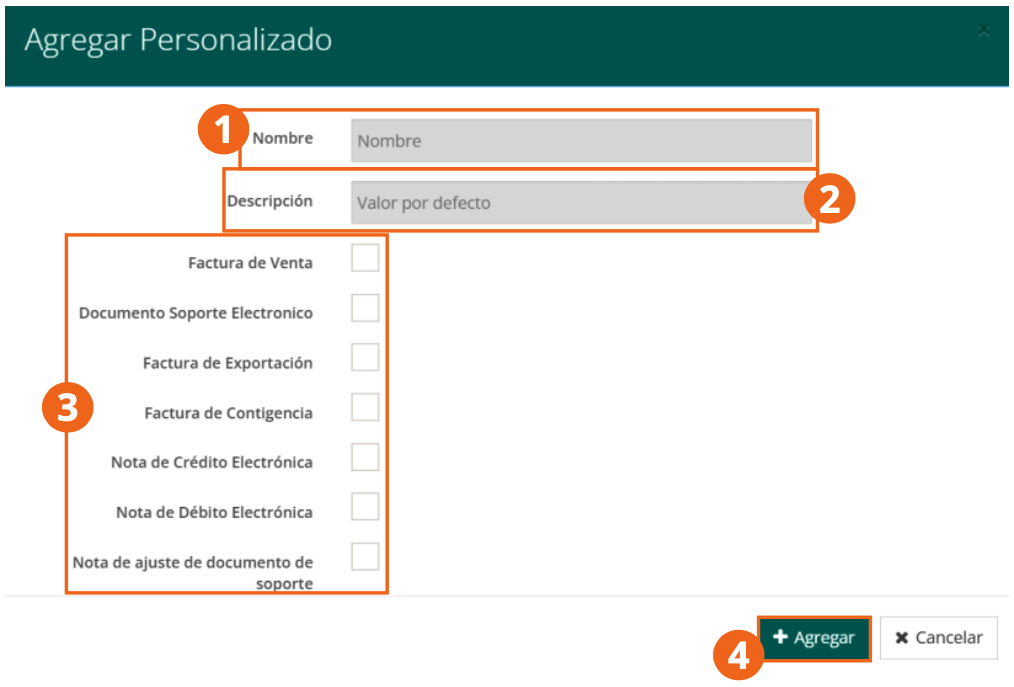
- Enter the field's identifying Name.
- Write the Description, which serves as the default value.
- Check the boxes for the document types where the custom field will be included.
- When finished, click Add.
The list of document-type checkboxes comes from Gosocket's shared platform catalog, common to ioFacturo Legacy variants across different countries. Do not assume it includes — or is limited to — Paraguay's five current document types (Electronic Invoice, Self-Invoice, Credit Note, Debit Note, and Remittance Note); verify on screen which ones apply before saving the field.
Custom field list layout
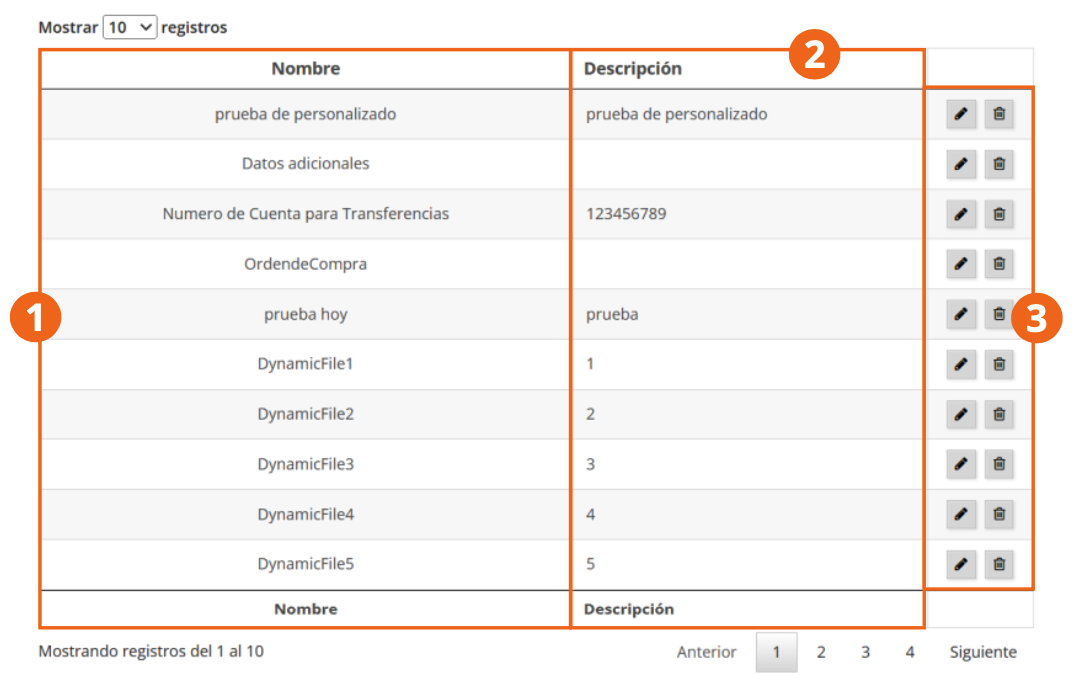
The list shows the Name and Description of each registered custom field, along with the edit and delete buttons.
Custom fields registered here appear in the Custom section of each document type's issuance form. See, for example, Custom Fields in Electronic Invoice.