The Spanish version is the authoritative reference. View in Spanish
Configuration
From the Configuration module, the fundamental parameters for proper tax document issuance are administered:
- The records of folios that will be assigned to issued documents, whose proper administration ensures consecutive and orderly control of each generated voucher.
- The tax certificates of the issuing company, essential for validating the authenticity and legality of documents; you can verify their validity to prevent operational interruptions.
- The lists of customers and products or services, which expedite document preparation and reduce possible information entry errors.
- The custom fields that can be included in documents, to incorporate additional data such as internal references, purchase order numbers, or cost centers.
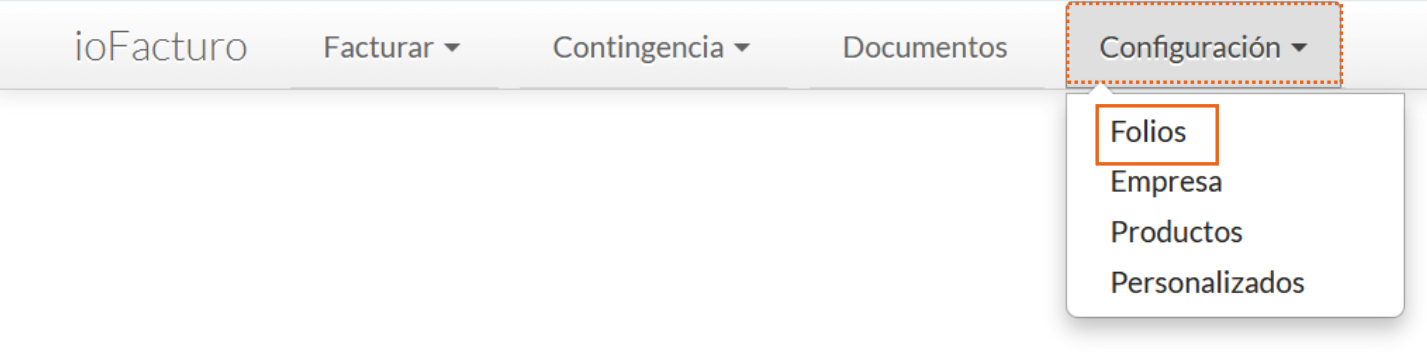
Folios
To start loading the folios that will be used in document issuance, click on Folios from the Configuration module. The folio administration screen will be displayed, from which you can perform the following actions:
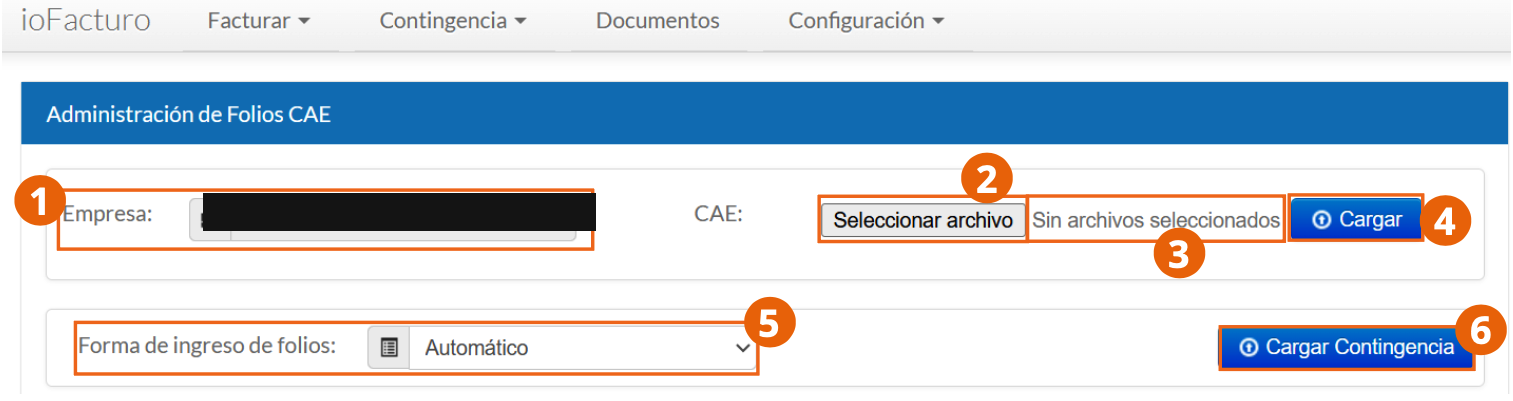
- The name of the company from which you access ioFacturo Inbox will be displayed.
- Click Select File. This action opens the file explorer, from which you must choose the CAE file (emission authorization certificate) that contains the folios to assign to issued documents.
- Verify the name of the previously selected file.
- Click Load to save the folios in the system.
- In Folio entry method, select whether the assignment of folios to documents will be loaded automatically in the issuance form or whether a manual selection will be made for each document.
- If these folios are for documents issued during a contingency, click Load Contingency instead of the button in step 4.
Active Folios
At the bottom of the screen we find the table of folio records loaded to date that are active for assignment, with the following elements:
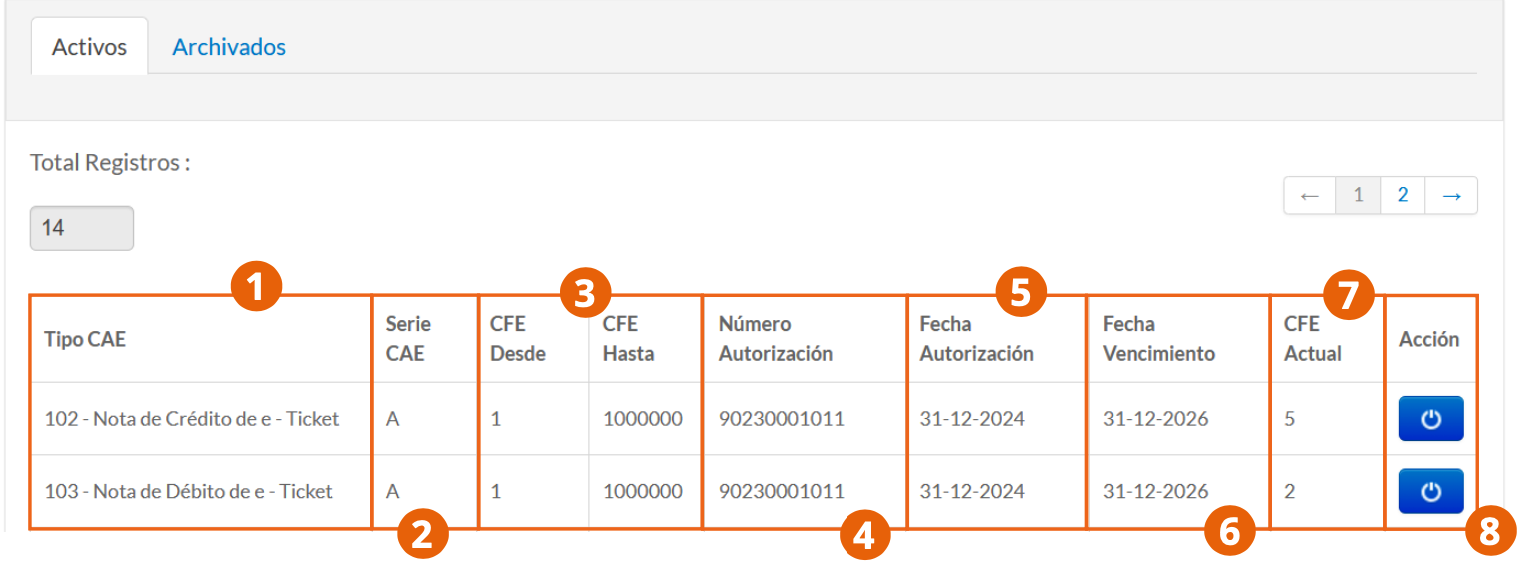
- CAE Type: type of document to which the folio range will be assigned.
- CAE Series: series to which the folio range belongs.
- CFE From / CFE To: range of folio numbers covered by the record.
- Authorization Number: DGI authorization number for the folio range.
- Authorization Date: date on which the DGI authorized the folios.
- Expiration Date: date on which the folio range expires.
- Current CFE: count of folios used to date.
- Action: button to deactivate the folio range.
Archived Folios
The Archived tab displays the information of folios that are deactivated.
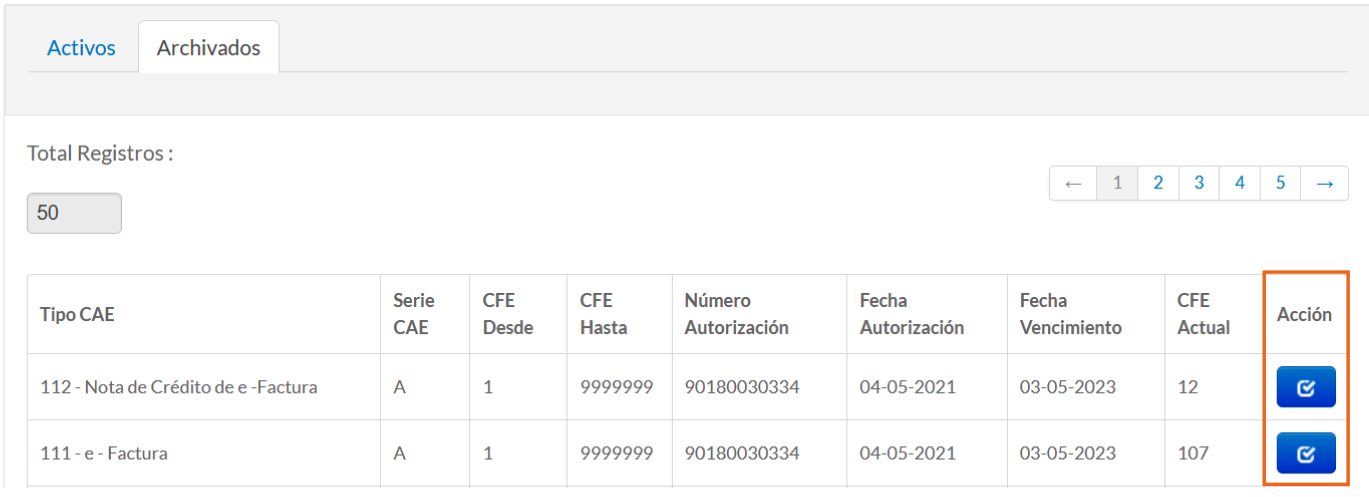
This list contains the same fields as the active tab, with the difference that in the Action column you can reactivate the folio ranges you need, so they continue to be assigned to issued documents.
Company
From this submodule, you can update your company records according to the certificates previously loaded on the Gosocket portal. To start this management, click on Company from the Configuration module.
When you access this screen, you will find the following elements:

- Company tax data (RUT and legal name).
- Validity of the license with the DGI.
- Update buttons for Company, Certificate, and License.
Products
From this submodule, you can register the products that will be included in issued documents. To access it, click Products from the Configuration module.
The product administration screen will be displayed, where we find the product record with the following elements:
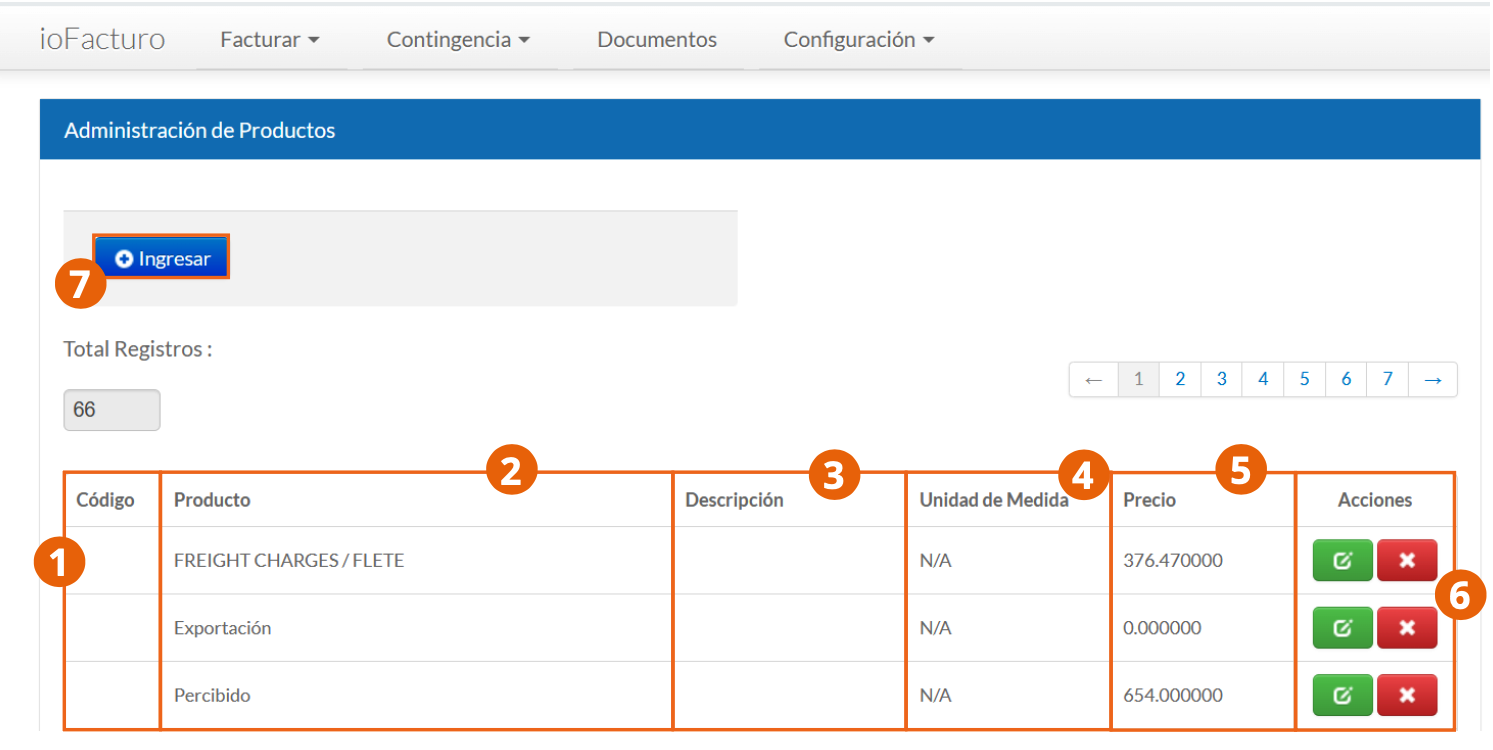
- Code of the product.
- Product: name with which it is identified.
- Description of the product.
- Unit of Measure by which the product is sold.
- Price of the product.
- Actions: click the green button to edit the product record, or click the red button to delete it.
- To start registering a product, click Enter.
Register a Product
The product registration form will be displayed:
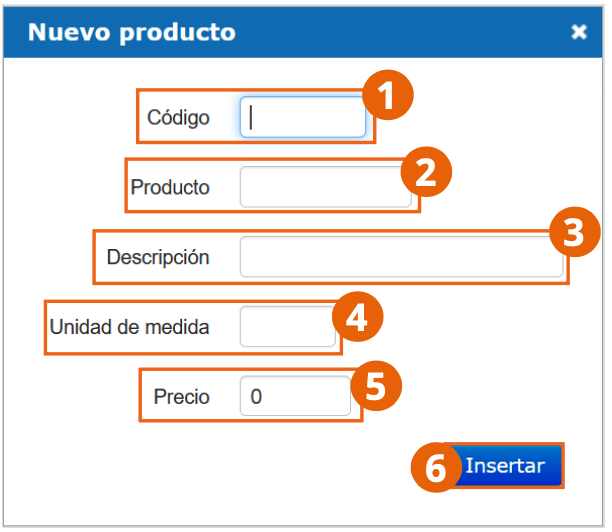
- Enter the code with which the product will be identified when a document is issued.
- Write the product's name.
- Capture the product's description.
- Enter the unit of measure by which the product is sold.
- Write the price assigned to the product before taxes.
- When finished, click Insert.
The product will then appear within the product record and as part of the product catalog to choose from when issuing a document (see Details).
Custom
From this submodule, you can register the custom fields that will be included in issued documents. To access it, click Custom from the Configuration module.
The custom field administration screen has the following layout:
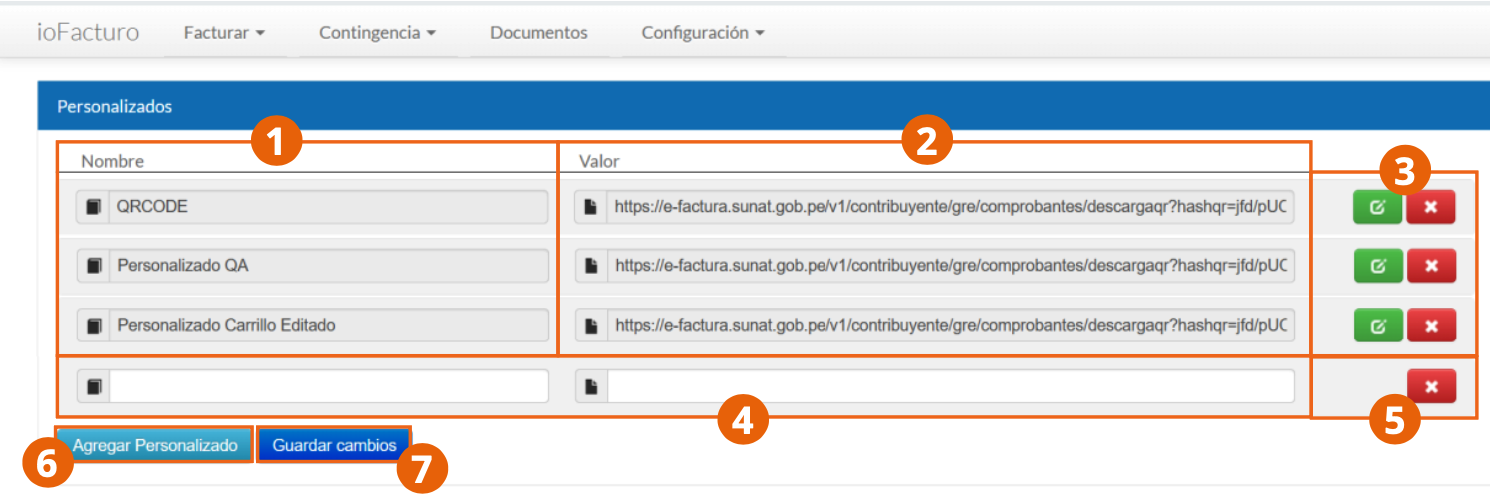
- At the top of the screen, the custom field records are displayed, where the first column contains the name of each field.
- In the Value column, you can check the value this custom field will give the issued document.
- To edit the record, click the green button. To clear the field's value, click the red button.
- At the bottom of the list, you can start registering a new custom field, beginning with the name and then entering the field's value.
- To clear the fields of the new record, click the red button in that row.
- To save the new record, click Add Custom. To save the edited records, click Save Changes.
The custom fields registered here appear in the Custom section of the issuance form. See Document Issuance.