The Spanish version is the authoritative reference. View in Spanish
Document Issuance — Invoice Module
Through the Invoice module, the process of generating your Electronic Fiscal Vouchers (CFE) begins in a simple and organized way. Before proceeding with the final issuance, you can review the information entered in detail and make the necessary changes, making sure all the data is correct and meets the established requirements.
The document issuance forms are divided into the following sections:
- Document Information: series, folio, validity, etc.
- Issuer: tax identifications, business activity, contact data, and location of the issuer.
- Receiver: identifications, contact, and location of the receiver.
- Details of the transaction.
- References: reference documents for the document being issued.
- Payment Information: data about the document's payment.
- Custom: custom fields to include in the document.
- Totals of the amounts that will be charged in the document.
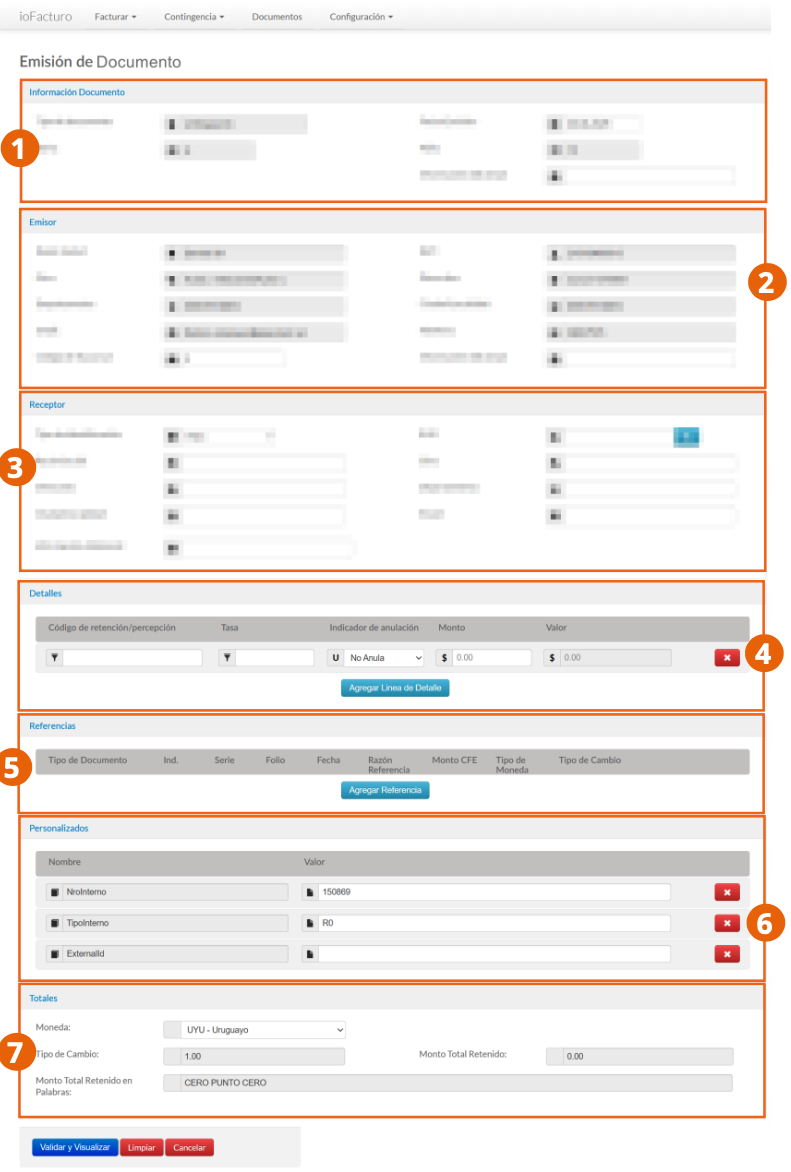
Document Information
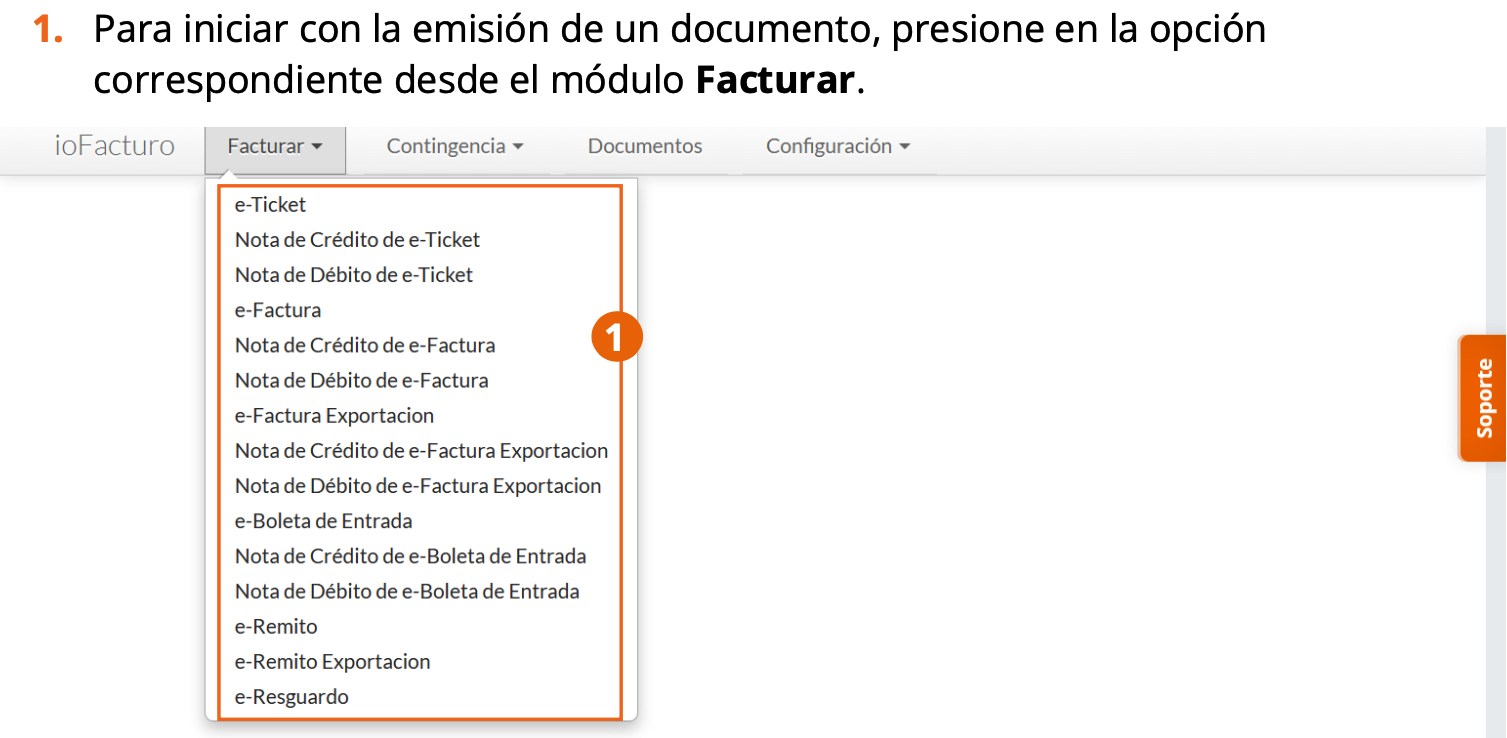
To start issuing a document, click on the option corresponding to the document type from the Invoice module.
The Document Information section of the issuance forms is the only one that varies according to the document type. Let's see how they differ.
e-Ticket and e-Invoice
For the e-Ticket and e-Invoice document types, as well as their debit and credit notes, the section contains the following fields:
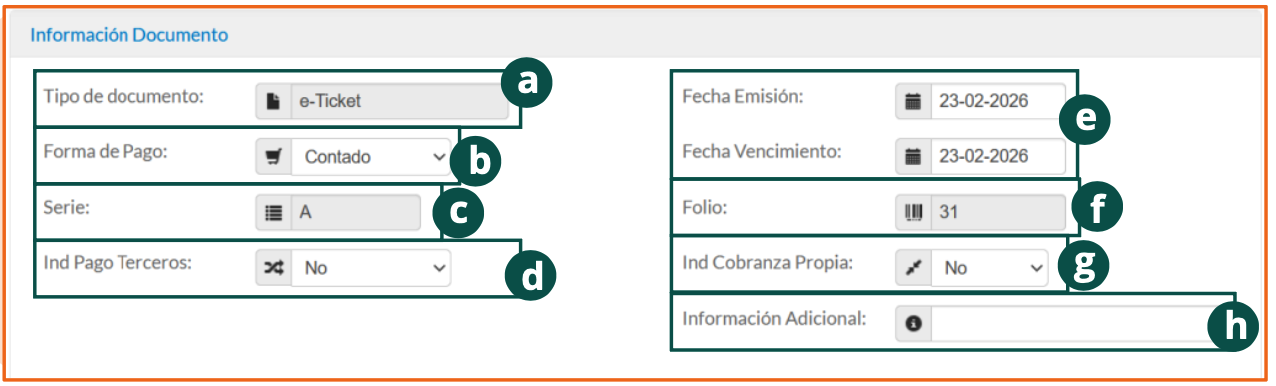
- Document Type: informational field.
- Payment Method: select how the document will be settled; it can be cash or credit.
- Series: the series corresponding to the folio of the document to be issued will be displayed.
- Third-Party Payment Ind: choose whether the document will have a third-party payment indication.
- Issuance Date and Expiration Date: using the calendar that appears when you click on each field, select the document's validity period.
- Folio: informational field with the folio assigned to the document to be issued.
- Own Collection Ind: select whether the document will have an own collection indication.
- Additional Information: if you need the document to contain additional information about the transaction, write it in this field.
Export e-Invoice
For the Export e-Invoice document type, as well as its debit and credit notes, the section contains the following fields:
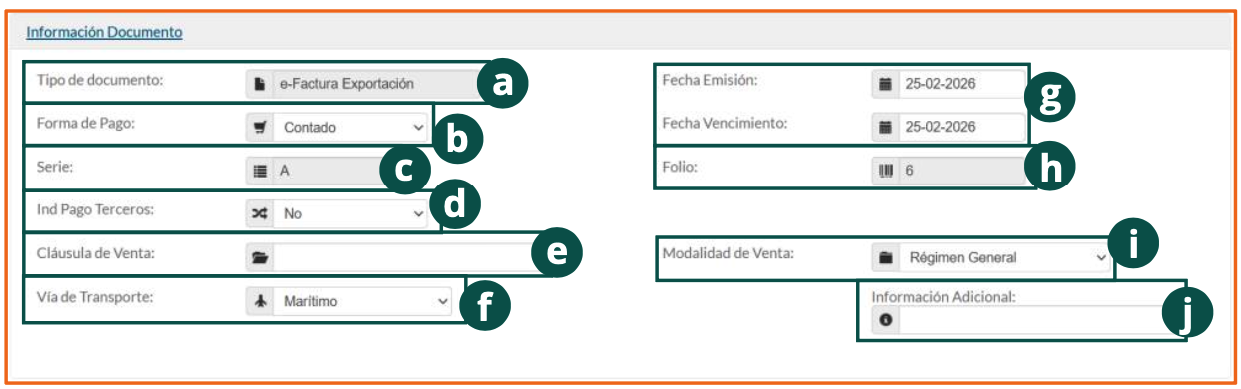
- Document Type: informational field.
- Payment Method: select how the document will be settled; it can be cash or credit.
- Series: the series corresponding to the folio of the document to be issued will be displayed.
- Third-Party Payment Ind: choose whether the document will have a third-party payment indication.
- Sales Clause: enter the sales clause the document corresponds to.
- Transport Route: select the route by which the merchandise will be transported.
- Issuance Date and Expiration Date: using the calendar that appears when you click on each field, select the document's validity period.
- Folio: informational field with the folio assigned to the document to be issued.
- Sales Mode: select the sales mode regime for the transaction.
- Additional Information: if you need the document to contain additional information about the transaction, write it in this field.
e-Entry Voucher
For the e-Entry Voucher document type, as well as its debit and credit notes, the section contains the following fields:
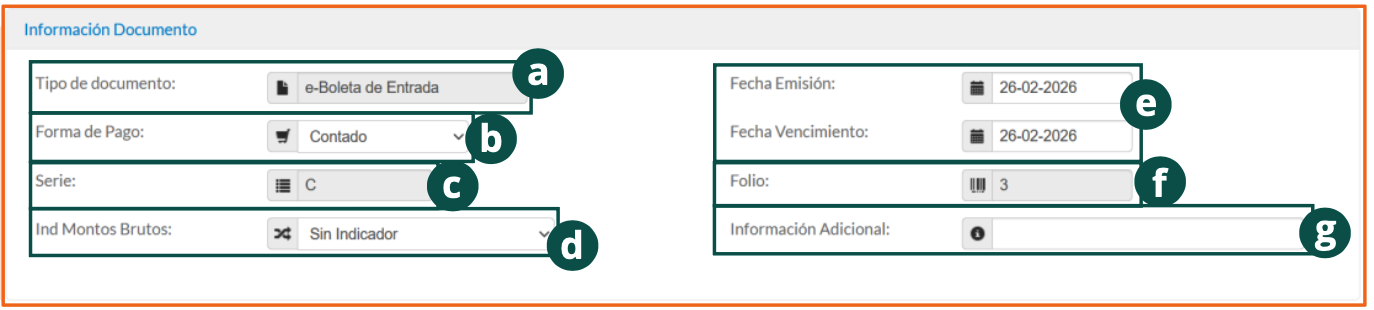
- Document Type: informational field.
- Payment Method: select how the document will be settled; it can be cash or credit.
- Series: the series corresponding to the folio of the document to be issued will be displayed.
- Gross Amounts Ind: choose whether the document will have a gross amounts indication.
- Issuance Date and Expiration Date: using the calendar that appears when you click on each field, select the document's validity period.
- Folio: informational field with the folio assigned to the document to be issued.
- Additional Information: if you need the document to contain additional information about the transaction, write it in this field.
e-Remittance and e-Receipt
For the e-Remittance and e-Receipt document types, the section contains the following fields:

- Document Type: informational field.
- Series: the series corresponding to the folio of the document to be issued will be displayed.
- Issuance Date: using the calendar that appears when you click on the field, select the document's issuance date.
- Folio: informational field with the folio assigned to the document to be issued.
- Additional Information: if you need the document to contain additional information about the transaction, write it in this field.
Export e-Remittance
For the Export e-Remittance document type, the section contains the following fields:
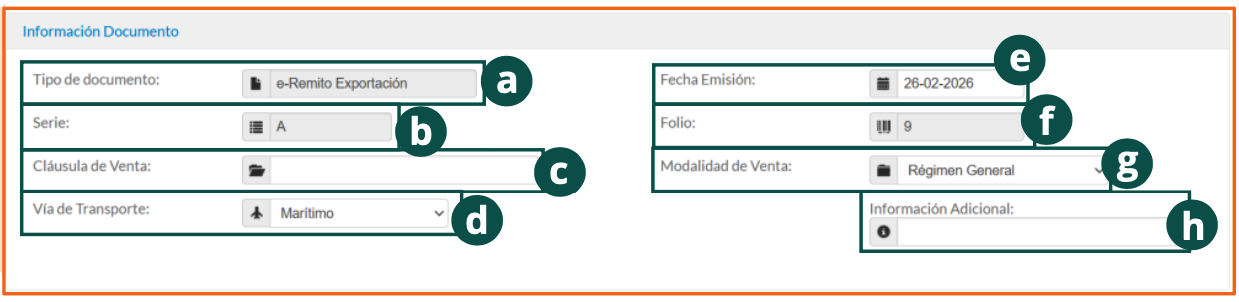
- Document Type: informational field.
- Series: the series corresponding to the folio of the document to be issued will be displayed.
- Sales Clause: enter the sales clause the document corresponds to.
- Transport Route: select the route by which the merchandise will be transported.
- Issuance Date: using the calendar that appears when you click on it, select the document's issuance date.
- Folio: informational field with the folio assigned to the document to be issued.
- Sales Mode: select the sales mode regime for the transaction.
- Additional Information: if you need the document to contain additional information about the transaction, write it in this field.
Sections in Common
All the forms for the different document types require the same information starting from the Issuer section. Let's explore these sections.
Issuer
The Issuer section shows your company's data as the party issuing the document: legal name, RUT, business activity, address, department, city, email, and phone.
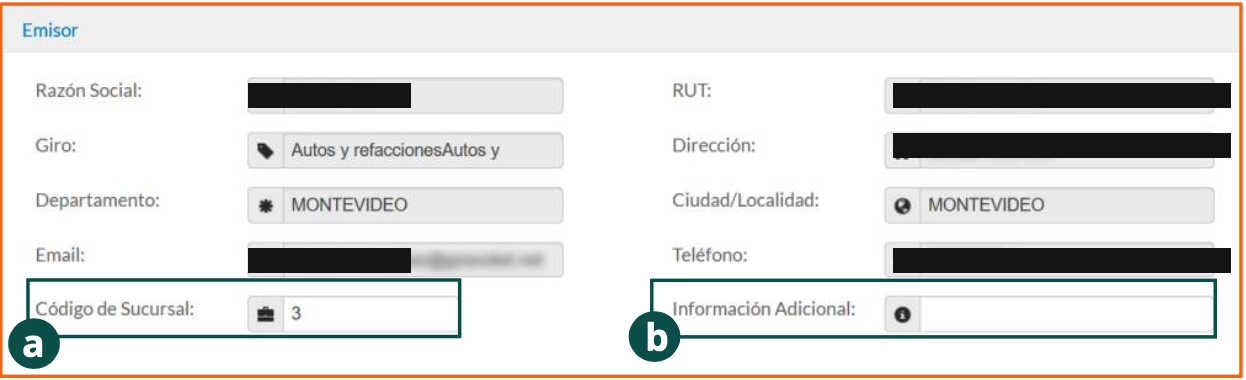
- You can edit the Branch Code from which the document is issued.
- If you need the document to contain additional information about the issuer, enter it in the Additional Information field.
Receiver
This section captures the data of the document's receiver.
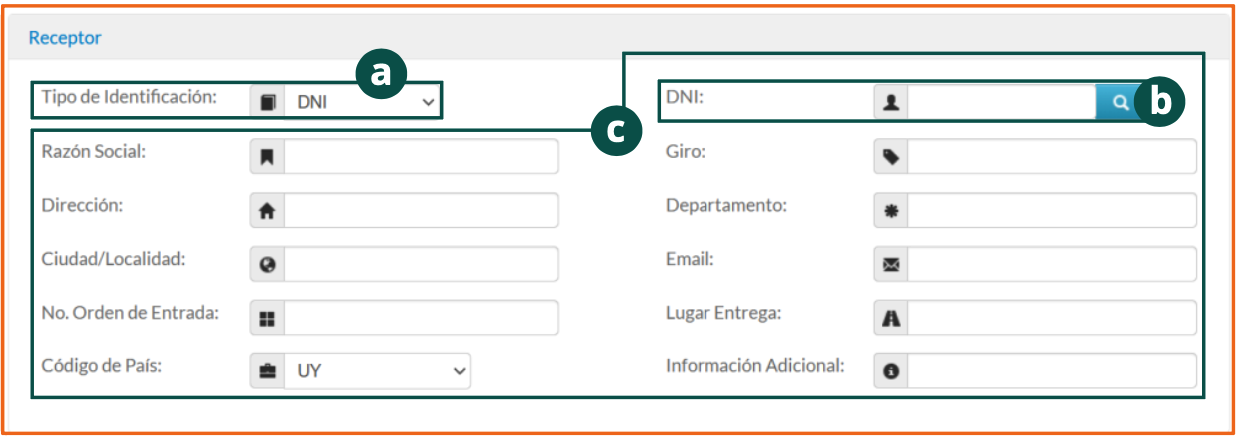
- Select the receiver's Identification Type, which can be:
- RUC
- CI
- Passport
- DNI
- NIFE
- Other identification type
- Once selected, the identification field is enabled with its search button. Click the button to locate the document's receiver in the customer list.
For customers, you can register tax data, contact information, and business terms, which speeds up document preparation and reduces possible information entry errors.
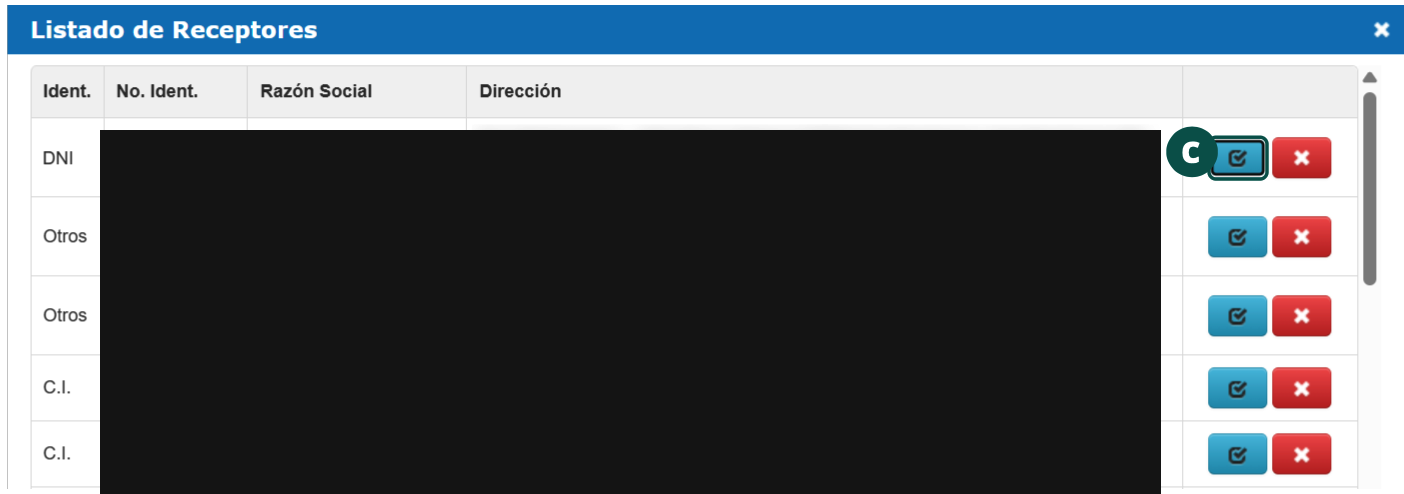
- Click the selection button on the customer record that will be the receiver of the document to be issued.
The record's information is then displayed in the rest of the fields in this section.
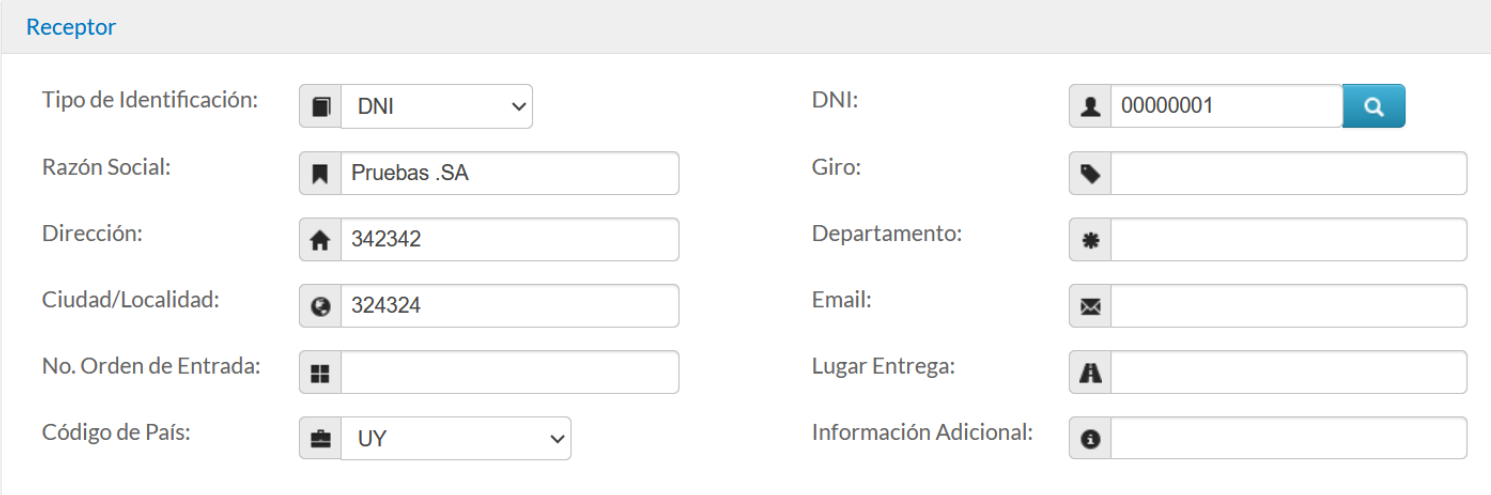
Details
The Details section is used to enter the products or services that will be charged in the document.
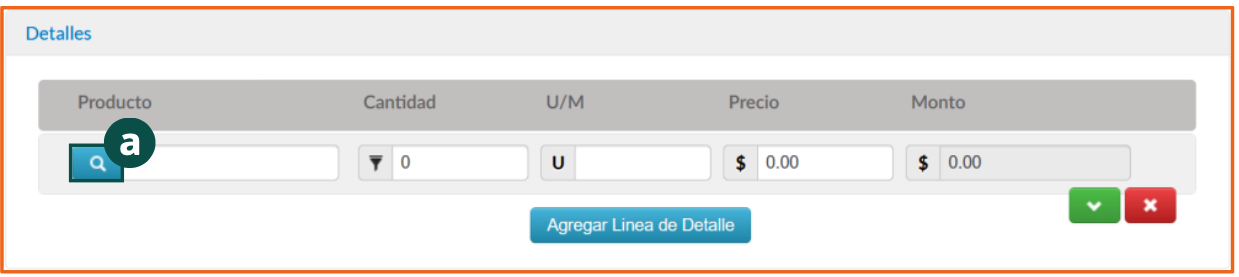
- Click the search button to locate the product or service to charge within the catalog of previously registered products.
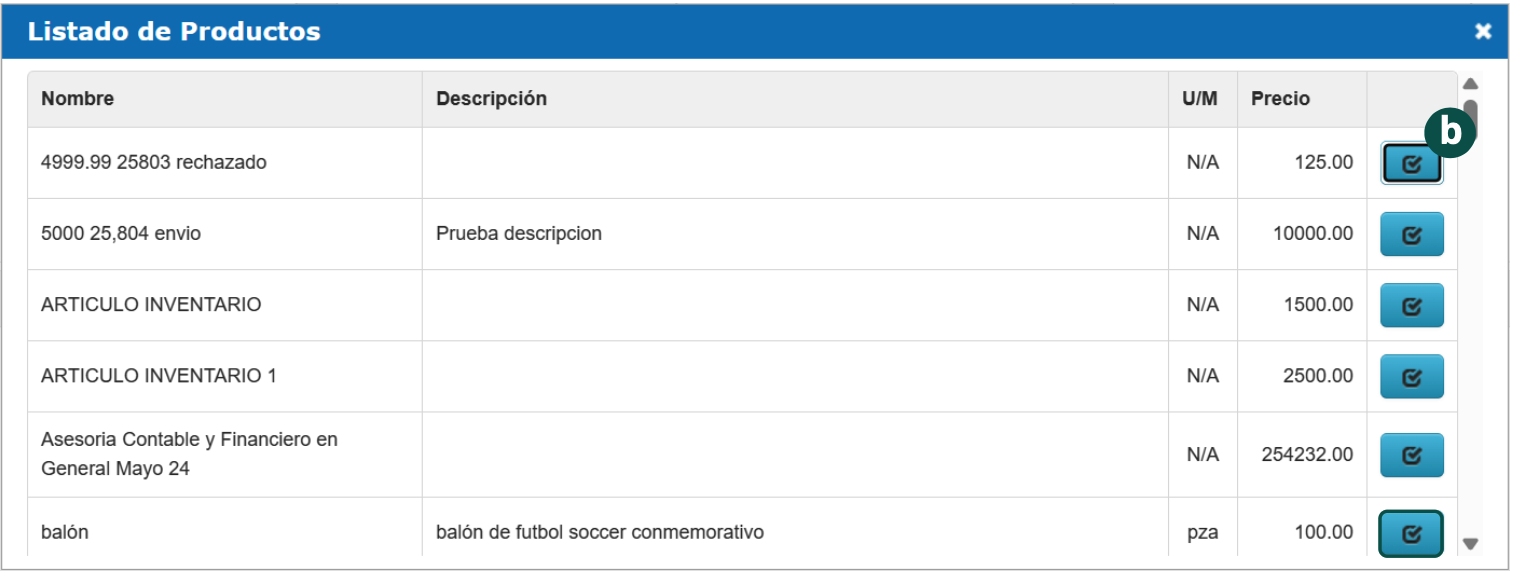
- Click the selection button of the product to charge. The product's information will then be displayed within the form: quantity, unit of measure, price, and amount.
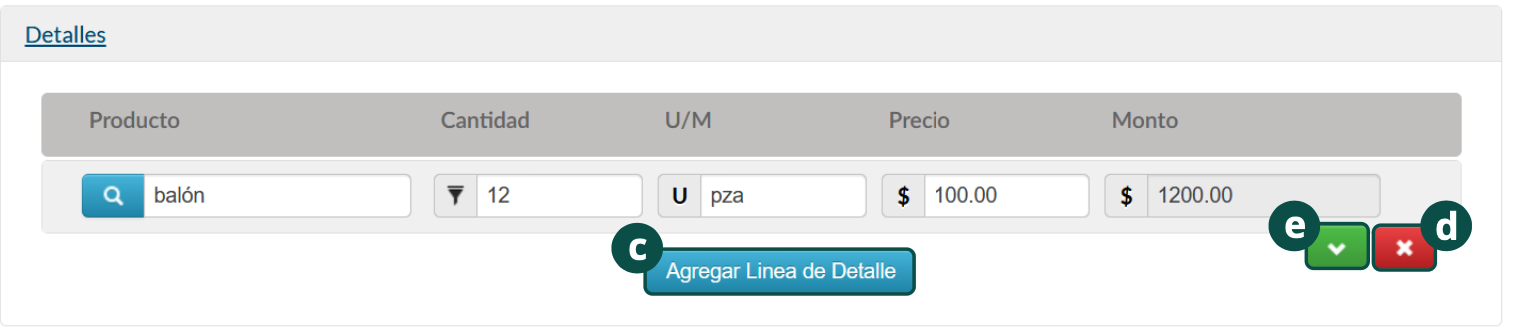
- To add a new product to the form, click Add Detail Line and repeat the process.
- To remove a product from the form, click the red button with an ✕.
- Clicking the expand button shows the applicable tax details, discounts, surcharges, and withholdings applied to the product.
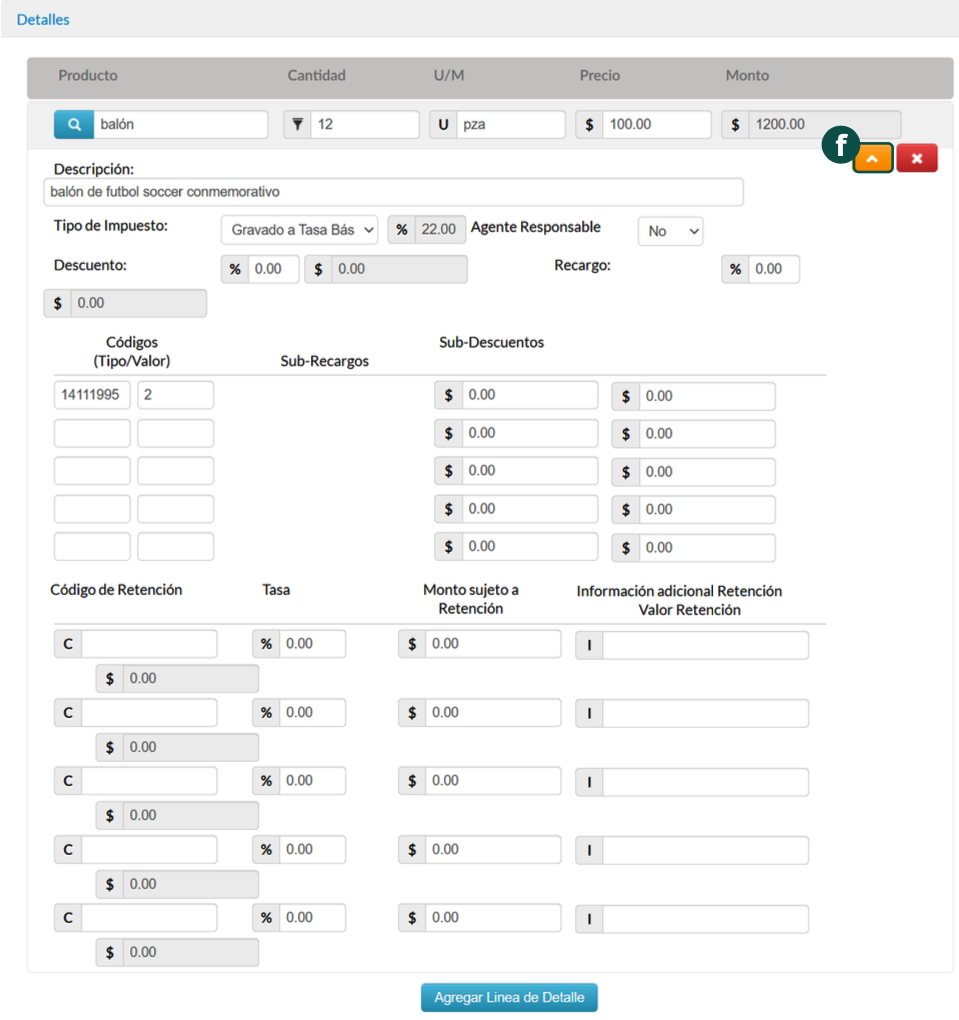
- To collapse the product detail, click the expand button again.
References
In the References section, you can add reference documents that must be associated with the document you are issuing.

- To add a reference, click Add Reference.
- Enter and select the required fields: document type, indicator, series, folio, date, reference reason, CFE amount, currency type, and exchange rate.

- To remove the reference from the record, click the red button with an ✕.
- To add another reference document, click Add Reference.
Payment Information
You can add information about the document's payment from this section of the form.
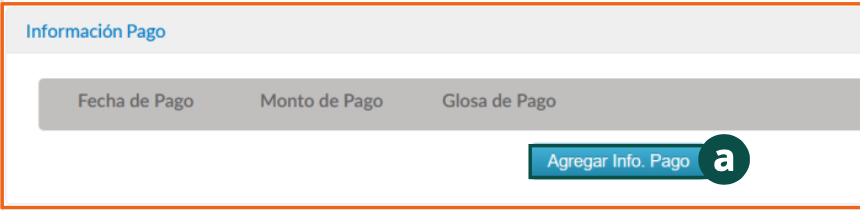
- Click Add Payment Info.
- Enter and select the information requested in each field (payment date, payment amount, and payment note).

- To remove this information, click the red button with an ✕.
- If you need to add more payment information, click Add Payment Info.
Custom
To add custom fields to the document, click Custom. The custom fields will be displayed according to the records previously created from the Configuration module (see Custom).
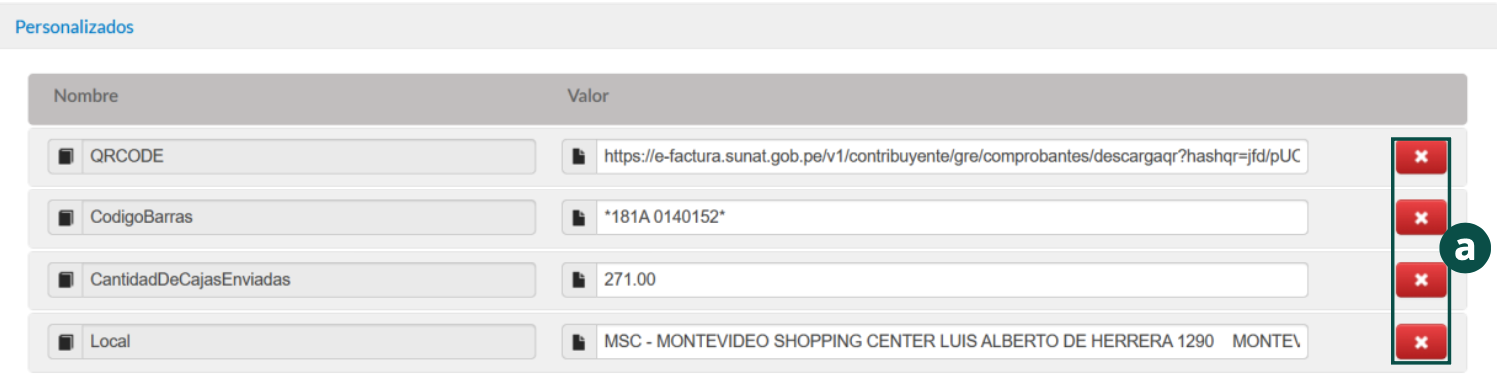
- The name and value of each registered custom field are displayed.
- To discard fields that will not be included in the document, click the red button with an ✕.
Totals
The Totals section shows the sum of the products or services to be charged in the document, including discounts, exempt amounts, VAT base and total, currency, and exchange rate.
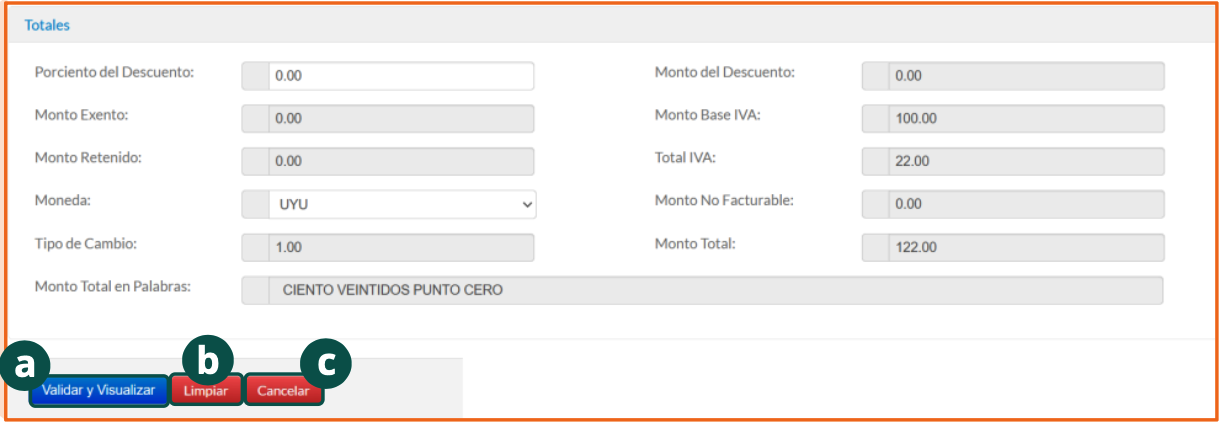
- To review the document, click Validate and Preview.
- If you need to clear the content of the issuance form, click Clear.
- You can also cancel the document's issuance by clicking the Cancel button.
The folio assigned to the document comes from the ranges authorized by the DGI, which must have been previously loaded via the CAE file. See Configuration — Folios.
Issued documents can be queried, synchronized with Inbox, and downloaded from the Documents module. See Documents.