The Spanish version is the authoritative reference. View in Spanish
Use case: Document with Rejected Smart Supply status
This page is part of Inbox and Smart Supply. Other use cases: Accepted · Pending.
1. Requirements a document must meet for Smart Supply validations to apply
Before looking at the practical examples, let's review the four fundamental requirements a document must meet before Smart Supply validations are applied:
a. The initial reception process takes place when documents enter the Gosocket Inbox through the Exchange Mailbox, the API or the Manual Upload channel (Upload), becoming available in the Received tray.
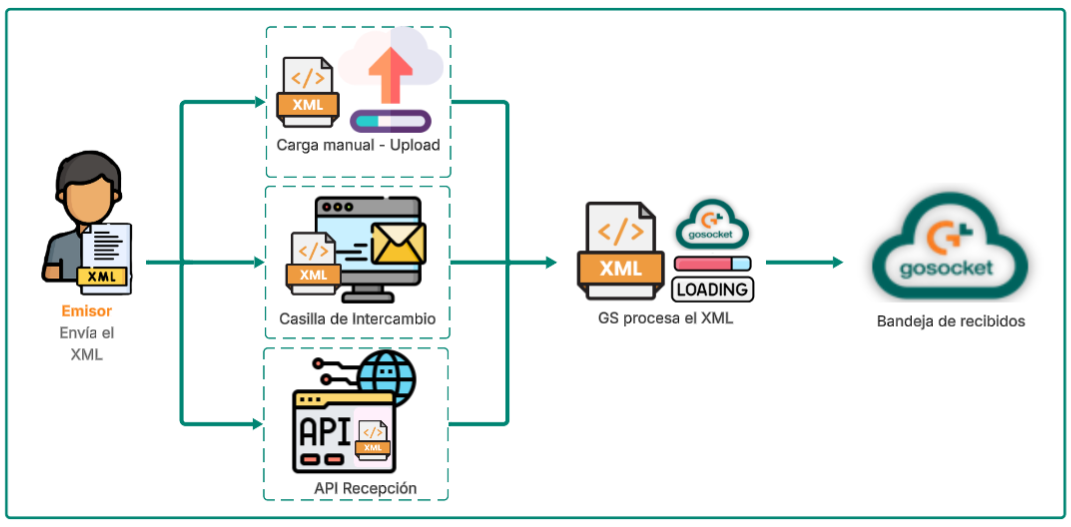
For more details on the reception process in Gosocket, see Manual document upload.
b. The document must successfully pass the mandatory tax validations of Schema, Signature, and validation with the Tax Authority.
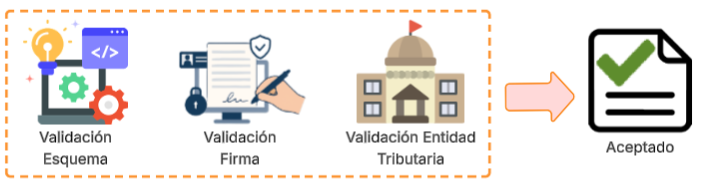
c. Only after meeting the two previous requirements will the document be displayed in the Inbox grid with the verification icon, as shown in the image:

d. In addition, both the invoice and the Purchase Order must be available in the Gosocket Inbox tray.
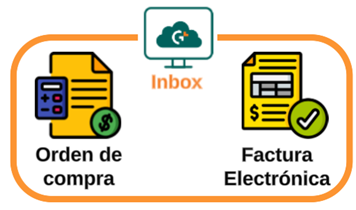
Note: if the document does not pass these reception validations, the rejection icon will be displayed in the Inbox grid

and it will not be assigned any Smart Supply traffic light color; that is, no validation will be applied to it, as shown below:

For detailed information on the different statuses of a document in Smart Supply, see Document statuses in Smart Supply.
2. Use case description: when a document ends up in Rejected Smart Supply status
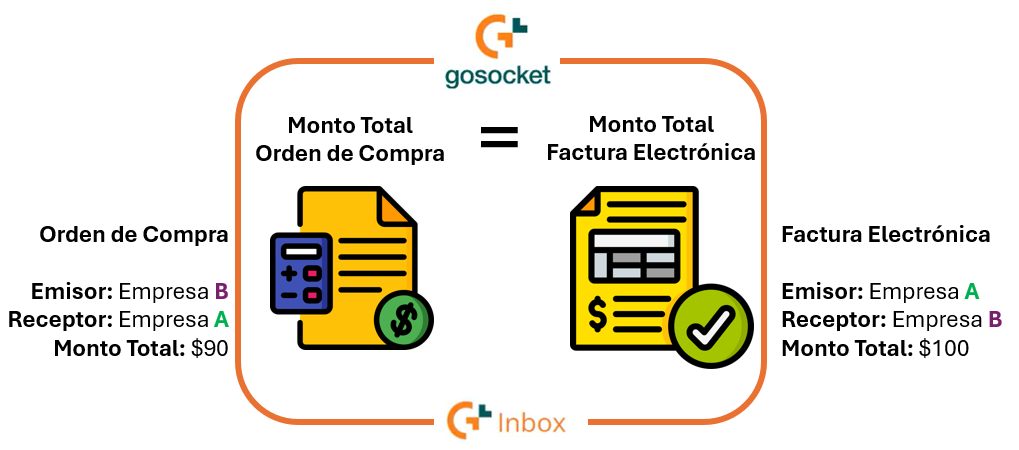
Next, we will explore how Smart Supply automates a fundamental business requirement: "Validate that the invoice total amount matches the purchase order total amount".
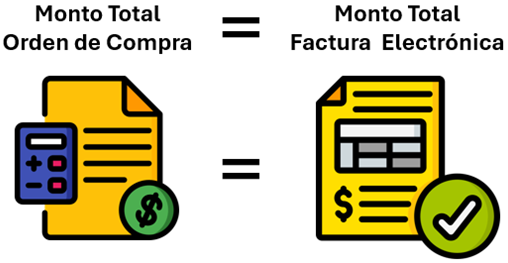
Where:
- Company B issues a purchase order to Company A for a total amount of $90.
- Company A issues an electronic invoice to Company B for a total amount of $100.
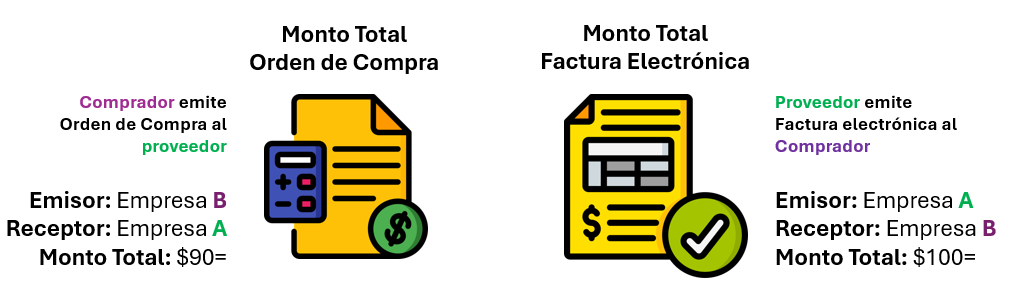
Once the electronic invoice and the purchase order have been sent, both the supplier and the buyer can view both documents on the Gosocket platform.
We will break down the Smart Supply configuration to understand how the business rules define the document flow in Inbox, which, after passing the validations, can take two paths: the successful or the unsuccessful path.
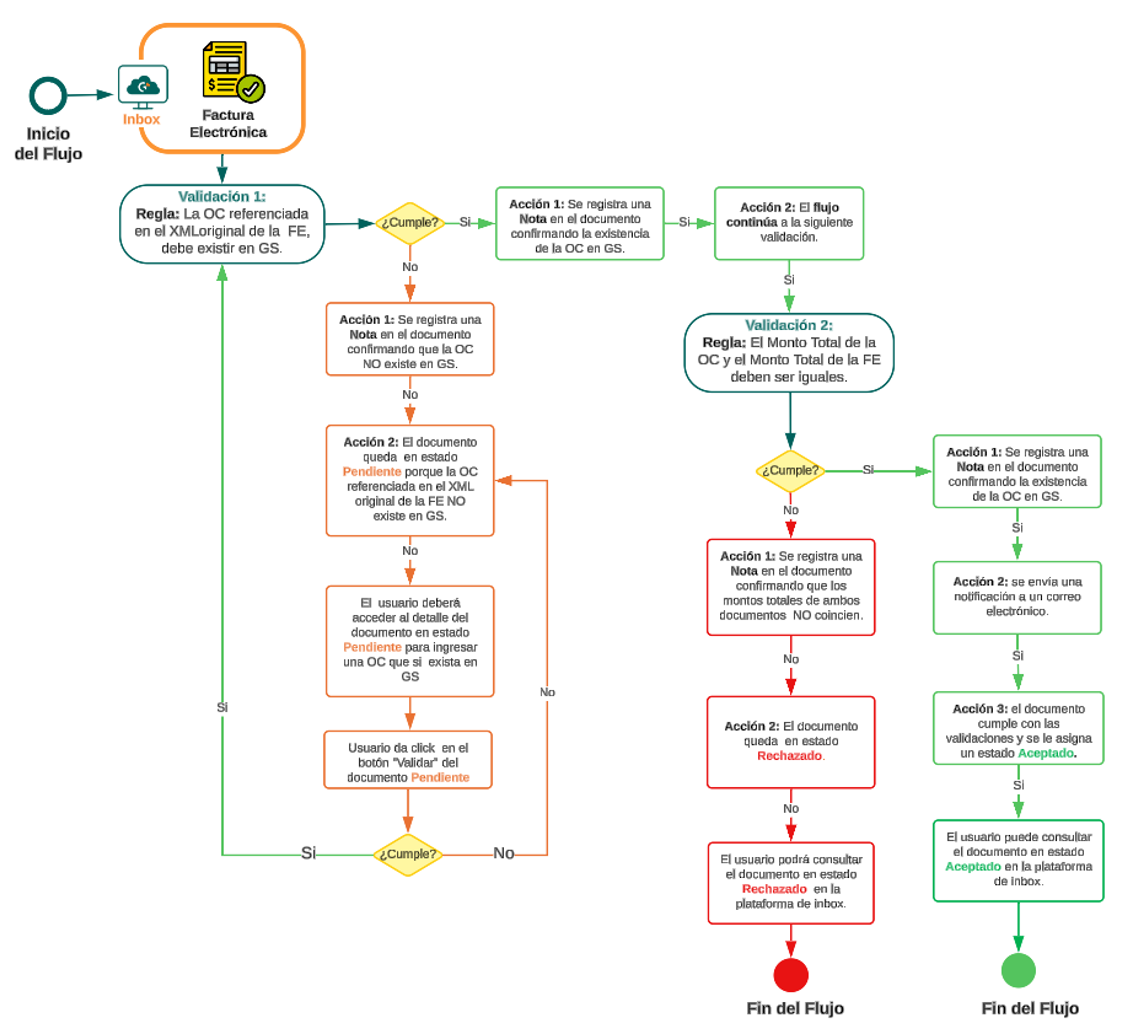
We have already identified the complete flow where the document ends up in PENDING status.
For more details on the flow of a document that ends up in PENDING Smart Supply status, see Use case: Document with Pending Smart Supply status.
We have also identified the complete success flow where the document ends up in ACCEPTED status.
For more details on the flow of a document that ends up in ACCEPTED Smart Supply status, see Use case: Document with Accepted Smart Supply status.
Now, we will focus on the last one, where the document does not meet the configured requirements and ends in the terminal status REJECTED. Next, we will review the flow step by step when the invoice fails specifically at the second validation, the amount validation.
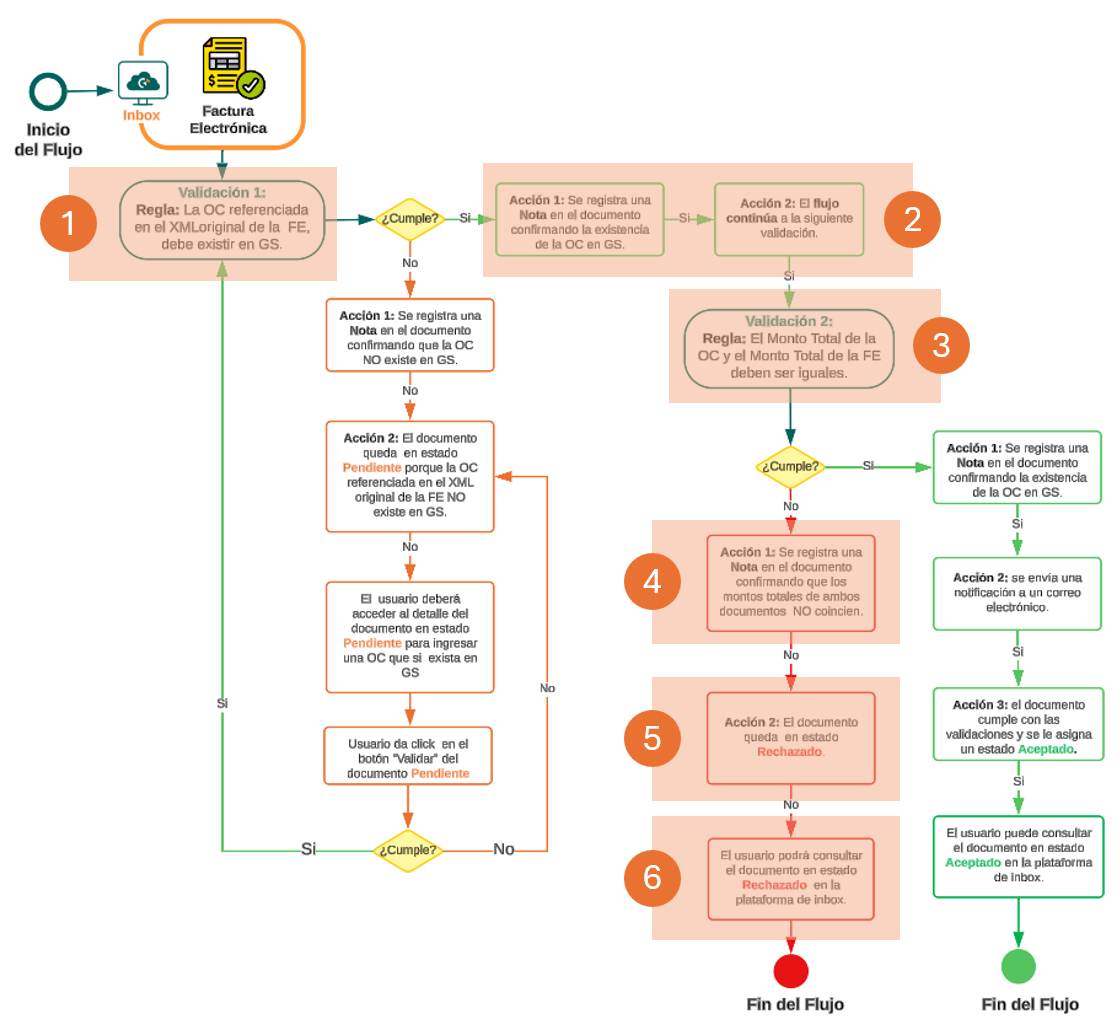
The first validation checks that the purchase order exists, and the rule is: the PO referenced in the original XML of the invoice must exist on the Gosocket platform.
If the rule is met, Smart Supply executes the action of recording a note on the document confirming that the PO exists in Inbox. Immediately afterwards, the second action is executed, in which the document moves on to the second validation.
Now, the second validation compares the total amounts of both documents. The rule to execute is: the Total Amount of the PO and the Total Amount of the EI must be equal.
At this point in the flow, if the second validation is NOT met (the system compares the total amounts of both documents and they do NOT match), Smart Supply executes the first action: recording a note on the document confirming that the total amounts of the PO and the EI do NOT match.
Immediately afterwards, the second action is executed, in which Smart Supply assigns the document the REJECTED status.
Finally, the user will be able to view the document in REJECTED status on the Inbox platform.
Based on the flow we have just described, we will now explore the different tools and features we can interact with in Inbox when a document is in REJECTED status:
- View a document in REJECTED status.
- Change status button: status change action on a REJECTED document.
We describe each of them below.
3. View a document in REJECTED status
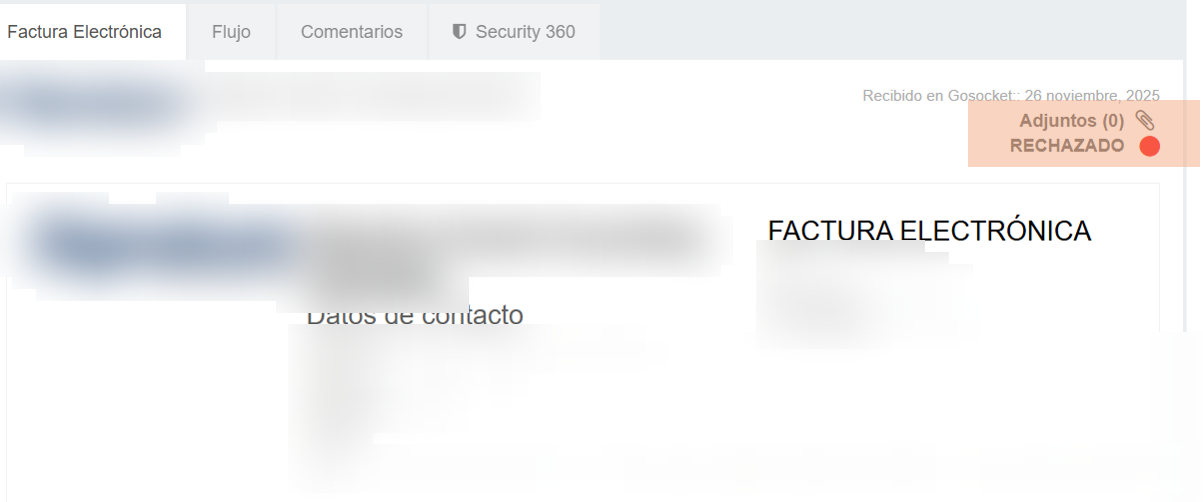
To view a document in REJECTED status, look it up in the Received tray. In the Inbox grid, the third icon (the Smart Supply traffic light) will be displayed in Red, as shown in the image:

When opening a document in REJECTED status from the Inbox grid, the Smart Supply - Status change actions section is automatically enabled in the preview. This section, which includes the Change status button, is available and visible only when the document is in REJECTED status.
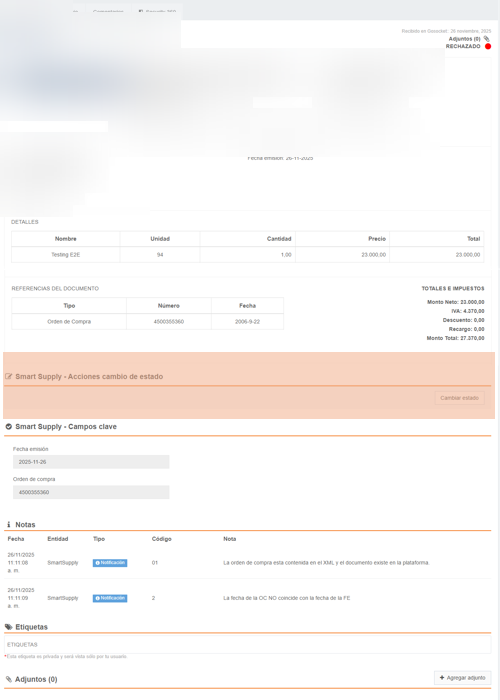
For our example, the user must log in to the Gosocket platform. Within the document details, the Smart Supply - Status change actions section will be enabled.

4. Change status button: status change action on a REJECTED document
By clicking the Change status button in this section, the following actions can be performed on the document:
- The Change status button allows you to update the document to a positive final Smart Supply status (ACCEPTED or SENT).
- When making the change, the user can record a code and a descriptive note about the action performed.
- The code and note will be displayed in the Notes section of the document preview.
Let's look at that status change in an example. We have a document in a final REJECTED status; click the Change status button in the "Smart Supply - Status change actions" section:

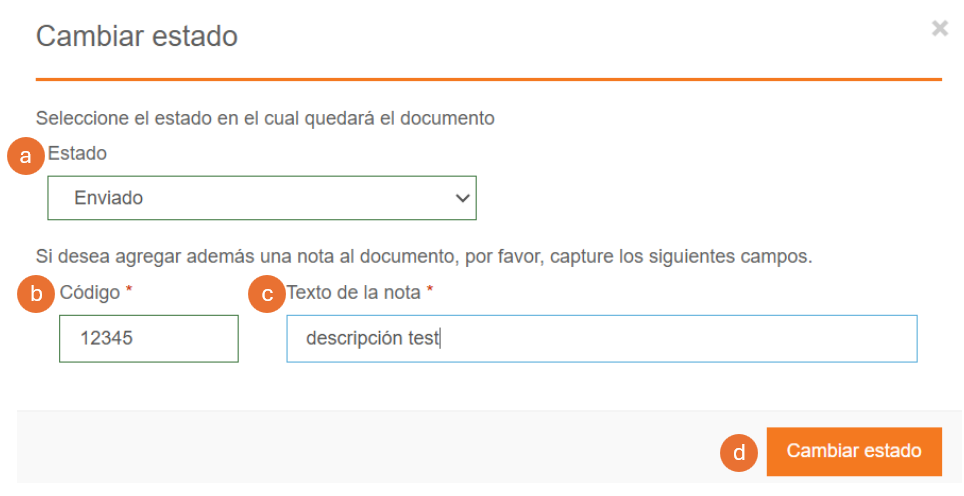
A popup like this is generated:
- In the drop-down list, the user selects the "Sent" status.
- The user enters a code.
- Then writes the "Note text".
- Finally, clicks the Change status button.
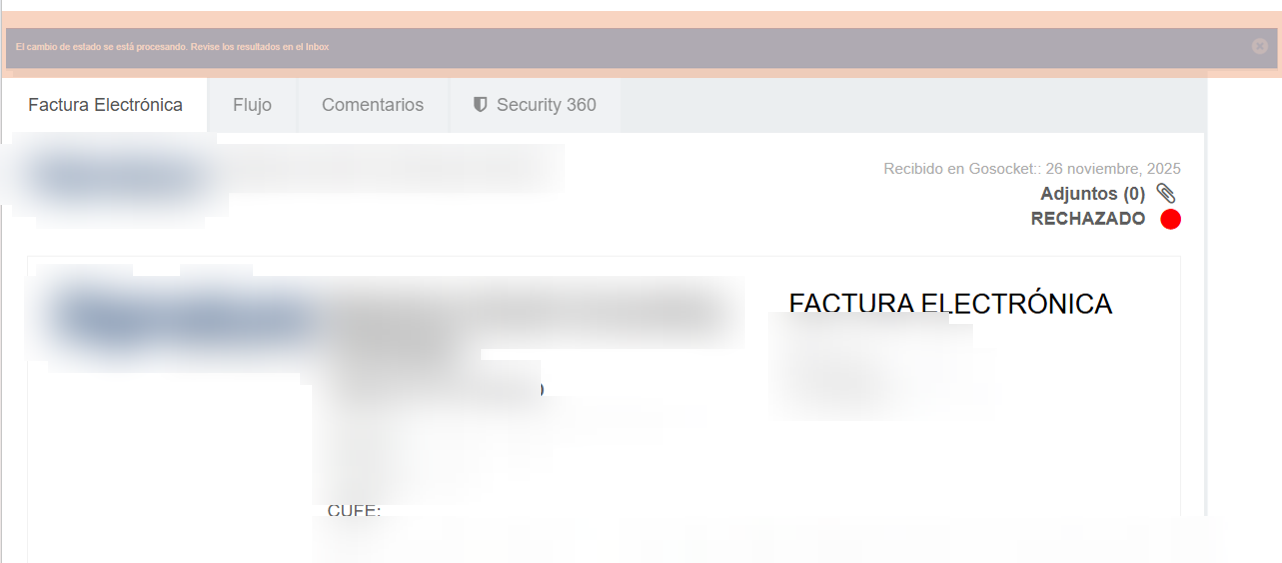
After clicking the Change status button, a confirmation message is displayed: "The status change is being processed. Check the results in Inbox".
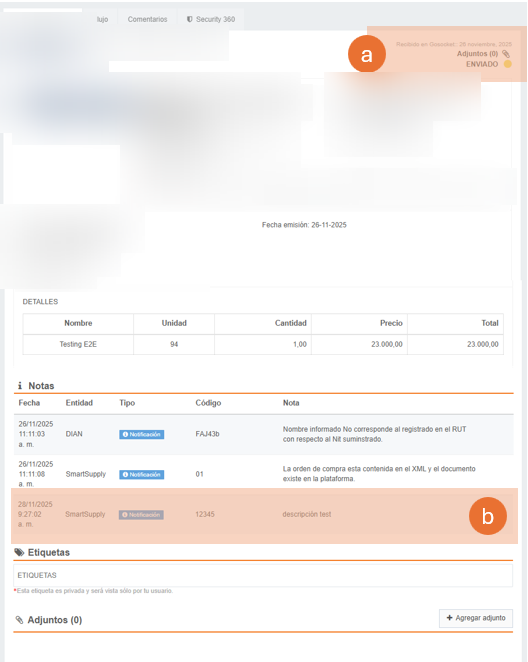
When viewing the document again in Inbox, the following will be shown:
- The status change from REJECTED to SENT (Yellow traffic light).
- The code and description recorded in the Notes section.
Other use cases: Accepted · Pending. To go back to the overview, see Inbox and Smart Supply.