The Spanish version is the authoritative reference. View in Spanish
Onboarding
🚀 xPOS-Core Manual - Onboarding
🧭 Onboarding
The Onboarding process is key to the correct configuration and operation of the xPOS. During this process, the xPOS will be asked to identify itself and will obtain its configuration to operate according to how it was identified.
xPOS will operate in only 1 environment at a time, that is, if Onboarding is carried out in the Sandbox environment it will operate in that environment; if Onboarding is carried out in the Production environment, xPOS will communicate in that environment with the Tax Authority.
Keep in mind that the onboarding process is carried out only per xPOS device.
From xPOS-Core 2.7.0 onwards, a single device can have several onboardings: several companies (tax-ids) invoicing from the same machine, each with its own digital certificate, its credentials against the tax authority and its folio ranges, fully separated.
The process described on this page is the same for the first issuer and for the following ones. To add an extra issuer to an already installed device, use New onboarding (+ TaxID) in the Dashboard.
This has one consequence for the integrator: with two or more issuers installed, the POS must send the origin parameter on every issuance. See Multiroot.
🧭 Onboarding via graphical interface
Open the browser on the local machine and go to:
We can also carry out the Onboarding process remotely (see the Remote access to xPOS-Core section).
For security reasons, the xPOS has an application access screen; you will be asked to enter a username and password to access the Dashboard. For now, you can only log in with the following user:
The credentials shown are examples: the real ones for your installation are provided during onboarding with the Gosocket team.
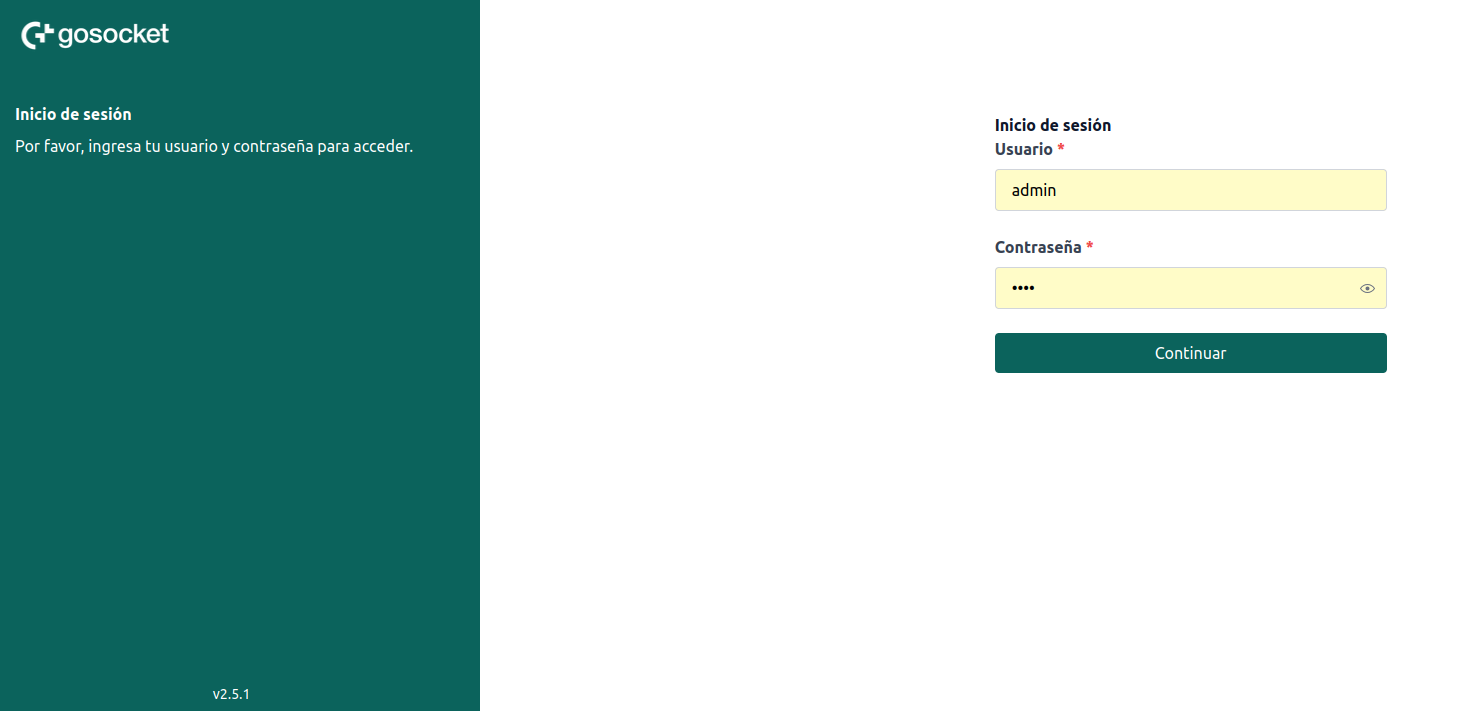
Once this action is performed, it will allow you to enter the Onboarding process or access the main xPOS-Core Dashboard.
Start
For this example, a company from Chile will be used.
On the start screen, do the following:
- Select the Sandbox / Production environment
- Enter the xPOS UUID delivered or managed from the xPOS gadget in the Inbox Gosocket portal.
- Continue the process by clicking Continue.
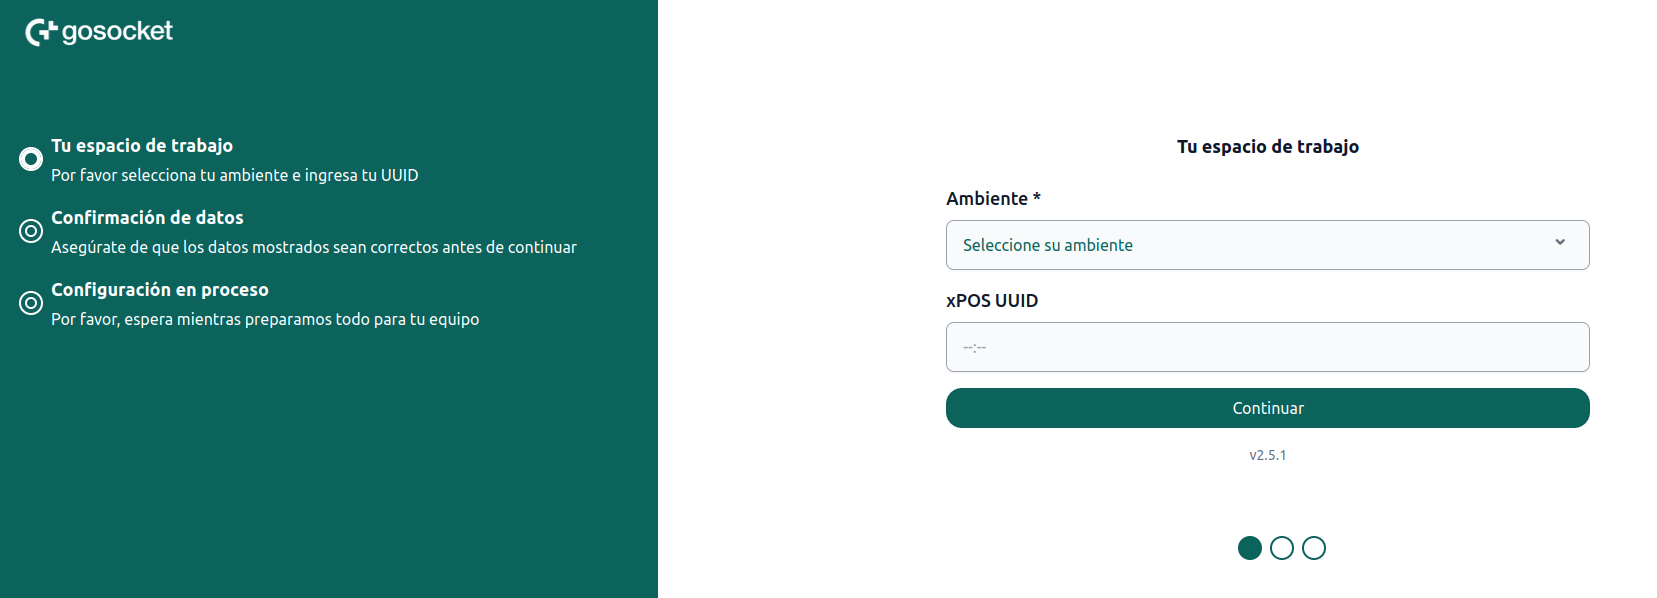
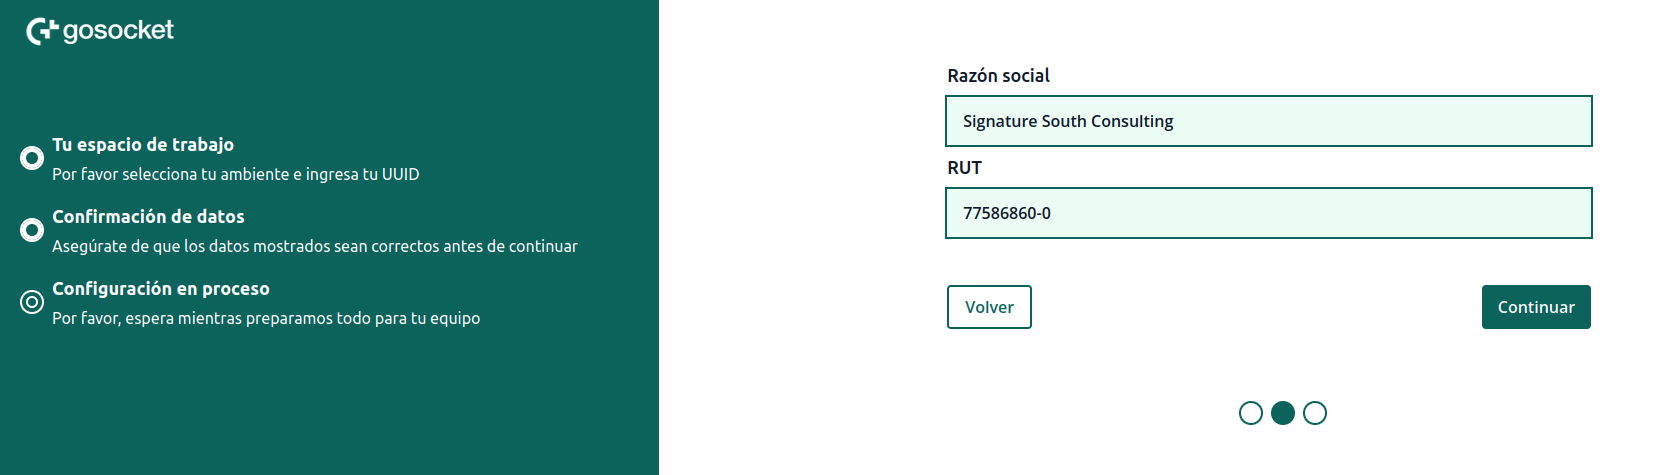
If the xPOS UUID exists in the Gosocket records, the organization's data will be displayed for review. Otherwise, the Gosocket team must be notified for review.
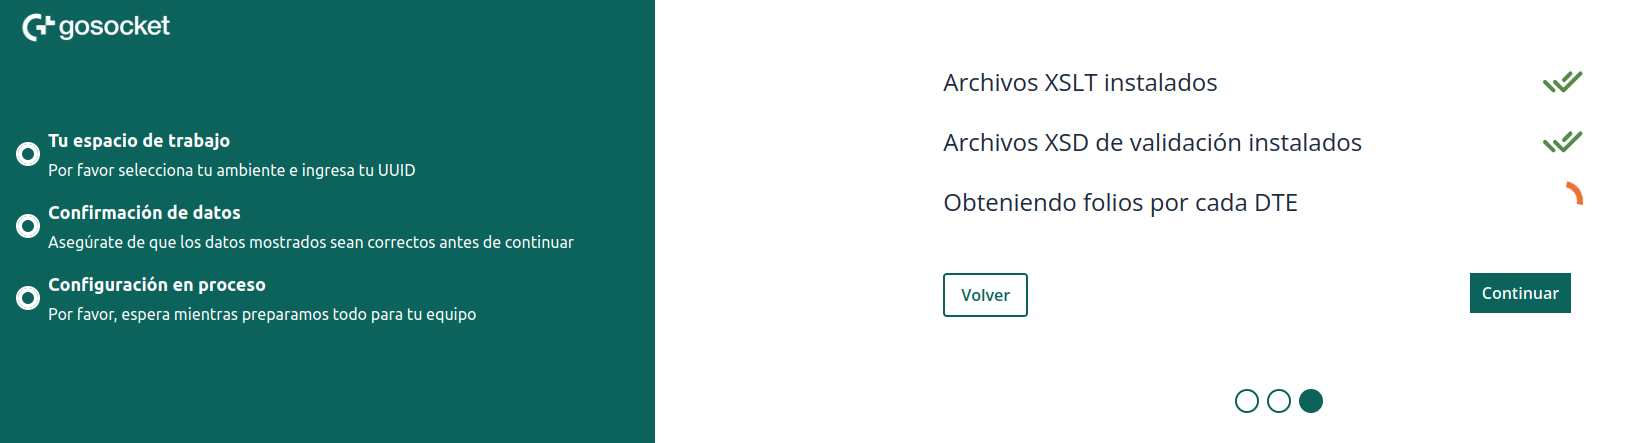
Next, xPOS-Core will mandatorily download the configuration files (transformation XSLT and validation XSD) from the Gosocket backend.
If your organization has the folio manager 3.0 enabled (document numbering), the system will automatically download the folios corresponding to the selected xPOS UUID. If this feature is disabled, this step is not required and will not be shown in the interface.
The connection to the folio manager is configured from the portal, per company, with no need to update the installation.
🩺 Installation verification
From xPOS-Core 2.7.0 onwards, onboarding includes a mandatory verification step before finishing. The device does not complete the installation until it passes.
Previously, a configuration problem — a corrupt template, messaging not connected, the device's time zone misconfigured — was discovered in production, with the store already selling. This step catches it during installation.
Six automatic checks are run:
| Check | What it verifies |
|---|---|
| XSLT | That the transformation templates are present and usable. |
| XSD | That the country's validation schemas are present. |
| Messaging connection | That the device can connect to the cloud messaging channel. |
| Messaging storage | That the device can read from and write to the associated storage. |
| Telemetry | That the device can report to the central log service. |
| Time zone | That the device clock is in a time zone compatible with the country. |
Progress is shown live on screen: whoever installs sees each check pass or fail as it happens. Each one also reports its latency, which serves as an indicator of the link quality at the store.
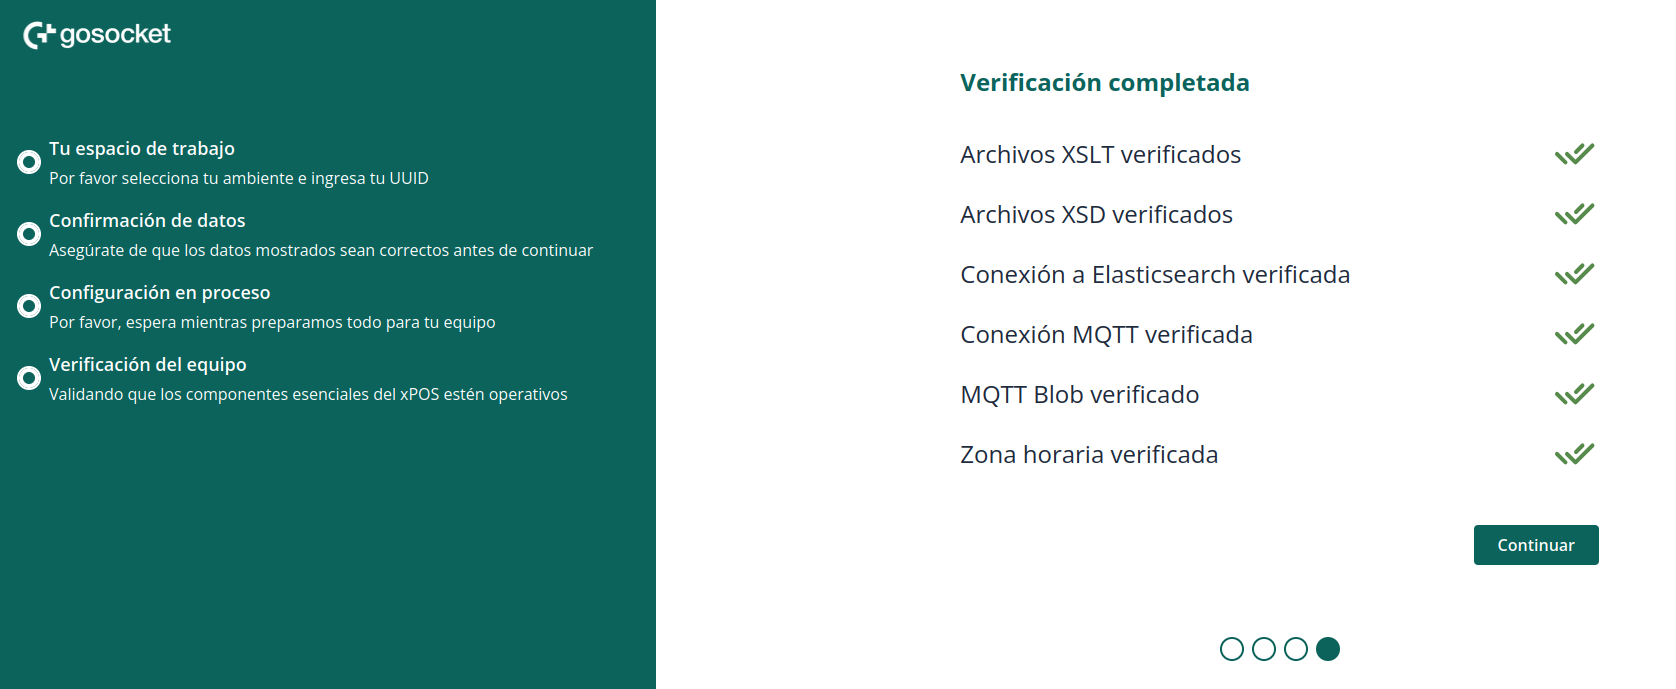
With the six checks green, the Continue button finishes the onboarding.
The time zone check
This is the one that prevents the highest-impact error: document rejection by the tax authority.
Documents are signed with the device's local time projected onto the country's time zone. If the device is configured in a zone with a UTC offset different from the country's, the signature timestamps come out shifted and the authority may reject the documents.
The comparison has three possible outcomes:
| Outcome | When it happens |
|---|---|
| ✅ Passes | The device time zone is in the country's list of valid zones. |
| ⚠️ Passes with a warning | The zone name does not match, but the current UTC offset does. Recorded in the detail. |
| ❌ Fails | The offset differs. The message states which zone was detected, which one was expected, and the offset of each. |
Two zones having the same offset today does not mean they will keep it: they can diverge when daylight saving time starts. This is especially relevant in Chile and Paraguay. On a warning, it is still advisable to correct the time zone.
This check does not validate clock accuracy: a device with the correct zone but a drifted clock still passes.
If a check fails
The failure is blocking. There are three ways out:
| Action | What it does |
|---|---|
| Retry | Runs the six checks again. |
| Re-download | Downloads the configuration files from the portal again and restores them in order. This is the way out for missing or corrupt files. |
| Roll back | Undoes the onboarding, including the associated folios. On a device with several issuers, rolling one back leaves the others operational. |
Controlled bypass of the time zone check
There is a bypass mechanism for the legitimate case in which the installation must continue with the time zone check in red. It is requested from the same screen and the data is filled in by whoever installs.
It works with four safeguards:
- It requires an identified approver: name, email address and reason. It is not a "continue anyway" button.
- It re-runs the checks on approval, so that the record reflects the actual state at that moment. If everything passes on re-run, no bypass is recorded.
- Only the time zone can be bypassed. If any other check fails, the bypass is rejected: a broken transformation template or messaging that is down leave the xPOS inoperable, and there is no reasonable risk an approver could take on.
- The specific operational risk of each failed check is recorded, together with the approver and the reason, both on the device and in the central telemetry service.
The permitted correction is to configure the country's correct time zone. Changing the device date and time while leaving the zone incorrect corrupts the UTC of the timestamps even though the local time "looks right", and the documents remain exposed to rejection.
The record makes it possible to audit afterwards why a store went live with checks in red, who authorized it and with what justification.
End of the process
Once the verification passes, the Onboarding process finishes and you must click Continue.
The final confirmation screen was removed: the Continue button on the last step finishes the onboarding and goes straight to the Dashboard.
The xPOS UUID is operational in the selected environment and ready to start processing documents.
The POS can start communication with xPOS-Core as defined in the Country - Communication with xPOS document.
🧭 Onboarding via Console
For operating systems that do not have access to a graphical interface, xPOS-Core provides a console to carry out the Onboarding process.
This console must be requested from the Gosocket team or downloaded from the xPOS gadget in the Inbox portal.
For Unix, execution permissions must be granted to the console:
chmod +x console-linux
Then, run the console:
./console-linux
./console-win
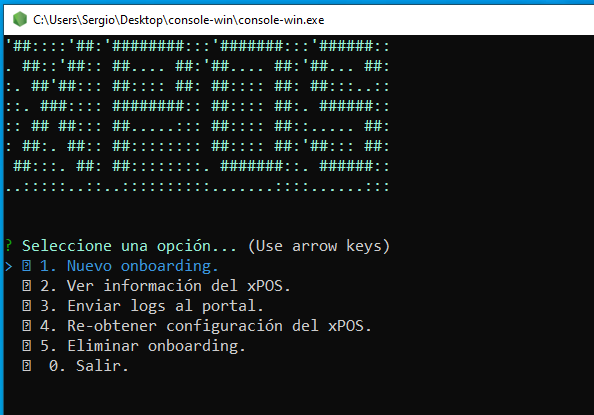
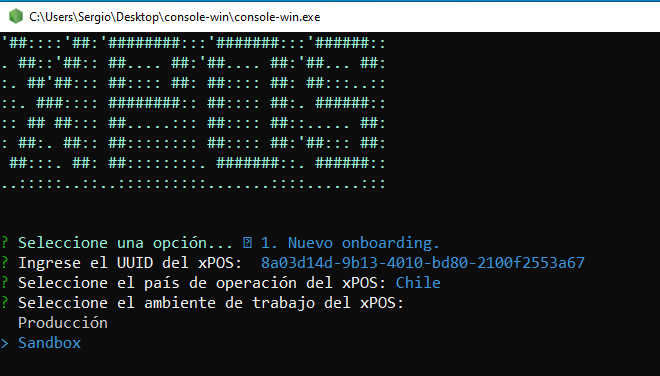
Select option 1. New onboarding.
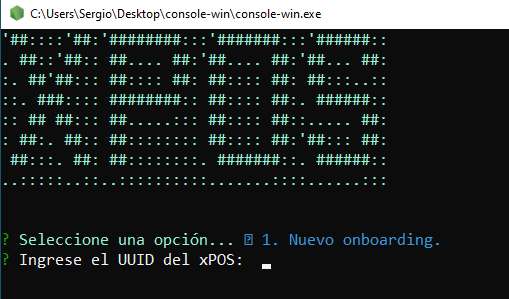
Enter the xPOS UUID and select the country to configure.
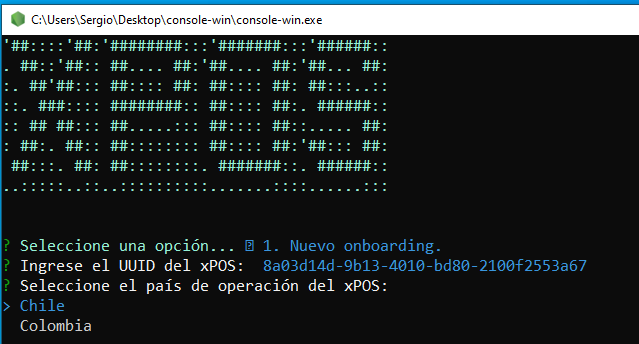
Select the environment to configure.
The organization's data will be displayed.
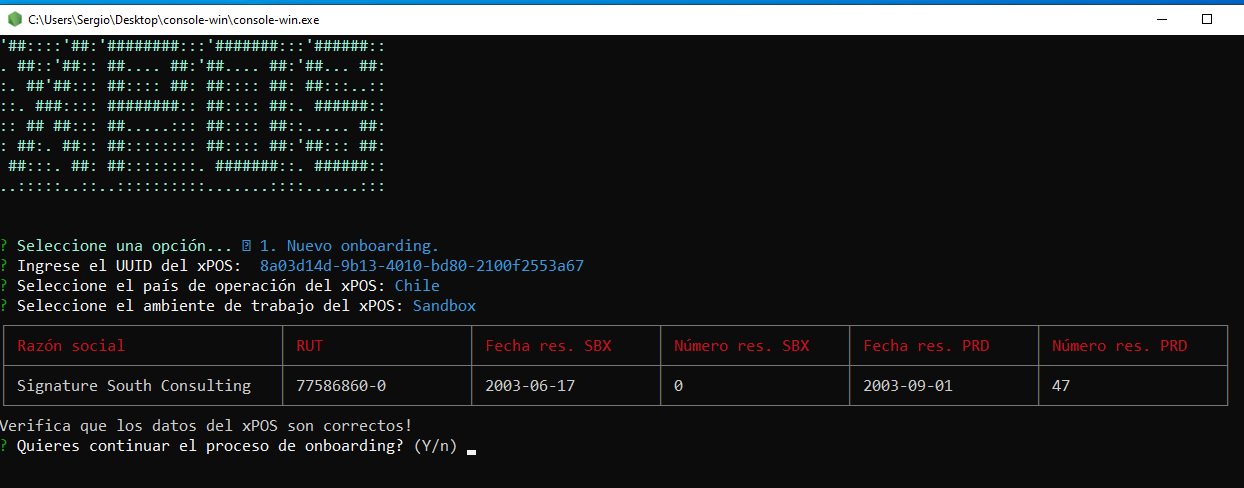
If we cancel, Onboarding will not be carried out.
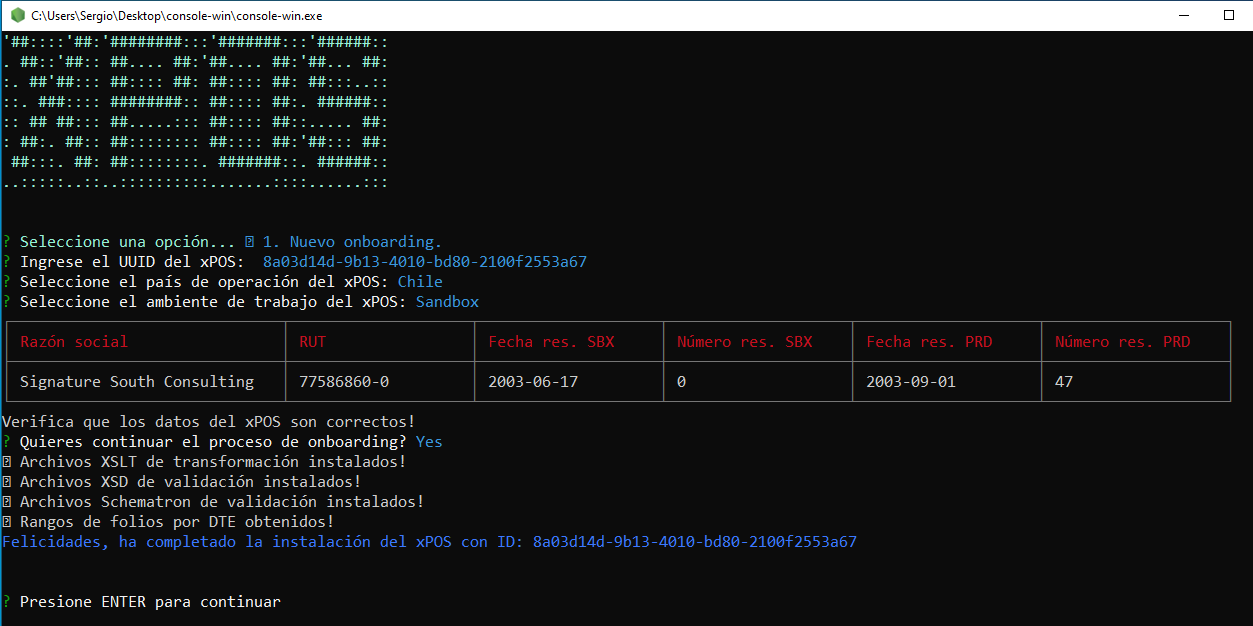
If we confirm, it will run the Onboarding process.
🌐 Remote access to xPOS-Core
It is possible to carry out the onboarding and access the dashboard remotely, connecting directly to the device where xPOS-Core is installed, provided the following requirements are met:
- The devices must be connected through the internal network (e.g., VPN).
- xPOS-Core must be installed on the host device.
- Port
3200must be enabled for communication between both machines.
From the remote machine, open the browser and replace localhost with the IP of the device running xPOS-Core: